1 Overview
The Payroll Management module handles everything related to employee compensation - from defining salary components to processing monthly payroll and managing loans.
Salary Components
Define earnings (Basic, HRA, Allowances) and deductions (PF, Tax, ESI) that make up employee salaries.
Salary Structures
Create salary structures by combining components. Assign structures to employees with CTC-based calculation.
Location Taxes
Configure office-specific taxes like Professional Tax with fixed, percentage, or slab-based rules.
Payroll Drafts
Create monthly payroll drafts, process payslips, review, and finalize before payment.
Finalized Runs
Approve finalized payroll runs, mark as paid, and export bank files for salary disbursement.
Loans & Advances
Manage employee loans with EMI deductions, interest calculations, and repayment tracking.
Arrears Management
Handle salary arrears from backdated structure changes with automatic calculation.
Payroll Adjustments
Create and manage one-time or recurring adjustments like reimbursements, bonuses, incentives, and deductions.
If You Understand Only 3 Things About Payroll...
New to payroll? Here's the mental model that will make everything click:
1. CTC = Total Cost to Company
CTC is the total annual amount your company spends on an employee. It includes:
- Gross Salary = What employee sees (Basic + Allowances)
- Deductions = PF, Tax, etc. (taken from gross)
- Net Pay = Gross - Deductions (what's deposited)
- Employer Costs = PF contribution, Gratuity (invisible to employee)
Example: ₹12L CTC → ₹1L/month gross → ~₹85K/month net pay
2. Drafts = Safe Playground
Payroll Drafts are your "undo zone" - nothing is permanent until you finalize:
- Create Draft → Empty payroll for a month
- Process → Calculate all payslips (can redo!)
- Review → Check each payslip for errors
- Finalize → Lock it forever (no undo!)
Rule: Process as many times as needed, but finalize only once.
3. Proration = Fair Partial Pay
Proration calculates partial salary when someone doesn't work full month:
- LOP Days = Leave without pay (absent/unapproved)
- Formula = Monthly Pay × (Days Worked ÷ Working Days)
- Mid-month joining = Salary from join date only
- Transfers = Salary split by location + days
Example: 5 LOP days in 22-day month → Pay × (17÷22) = 77% salary
| Basic | Foundation salary (usually 40-50% of gross). Used to calculate HRA, PF. |
| Gross | Basic + all allowances (HRA, Special, etc.). Total before deductions. |
| Net | Gross minus deductions. The actual bank transfer amount. |
| EMI | Equated Monthly Installment. Fixed amount deducted for loan repayment. |
| YTD | Year-to-Date. Cumulative total from April (financial year start). |
| Arrears | Backdated salary difference when structure changes retroactively. |
2 Payroll Workflow
Understanding the complete payroll workflow is essential for successful monthly processing.
Monthly Payroll Process
Workflow Steps Explained
| Step | Description | Who |
|---|---|---|
| 1. Create Draft | Create a new payroll draft for a specific month/year and office | HR Admin |
| 2. Process | Calculate payslips for all employees based on attendance, leaves, and deductions | System |
| 3. Review | Review individual payslips, make adjustments if needed, verify totals | HR Admin |
| 4. Finalize | Lock the draft and create a finalized payroll run (cannot be undone) | HR Admin |
| 5. Approve | Management approval of the payroll run before payment | Manager/Admin |
| 6. Pay | Mark as paid with payment reference, generate bank files | HR Admin |
3 Salary Components
Salary components are the building blocks of employee salaries. They are divided into Earnings (money added) and Deductions (money subtracted).
Understanding Component Types
| Type | Description | Examples |
|---|---|---|
| Earning | Adds to gross salary | Basic Pay, HRA, Special Allowance, Bonus |
| Deduction | Subtracts from gross salary | PF, Professional Tax, TDS, ESI |
Calculation Types
| Calculation | Description | Example |
|---|---|---|
| Fixed | Same amount every month | Professional Tax = ₹200/month |
| Percentage of CTC | Calculated as % of annual CTC | Basic = 50% of CTC |
| Percentage of Basic | Calculated as % of Basic salary | HRA = 40% of Basic, PF = 12% of Basic |
Step-by-Step: Creating Salary Components
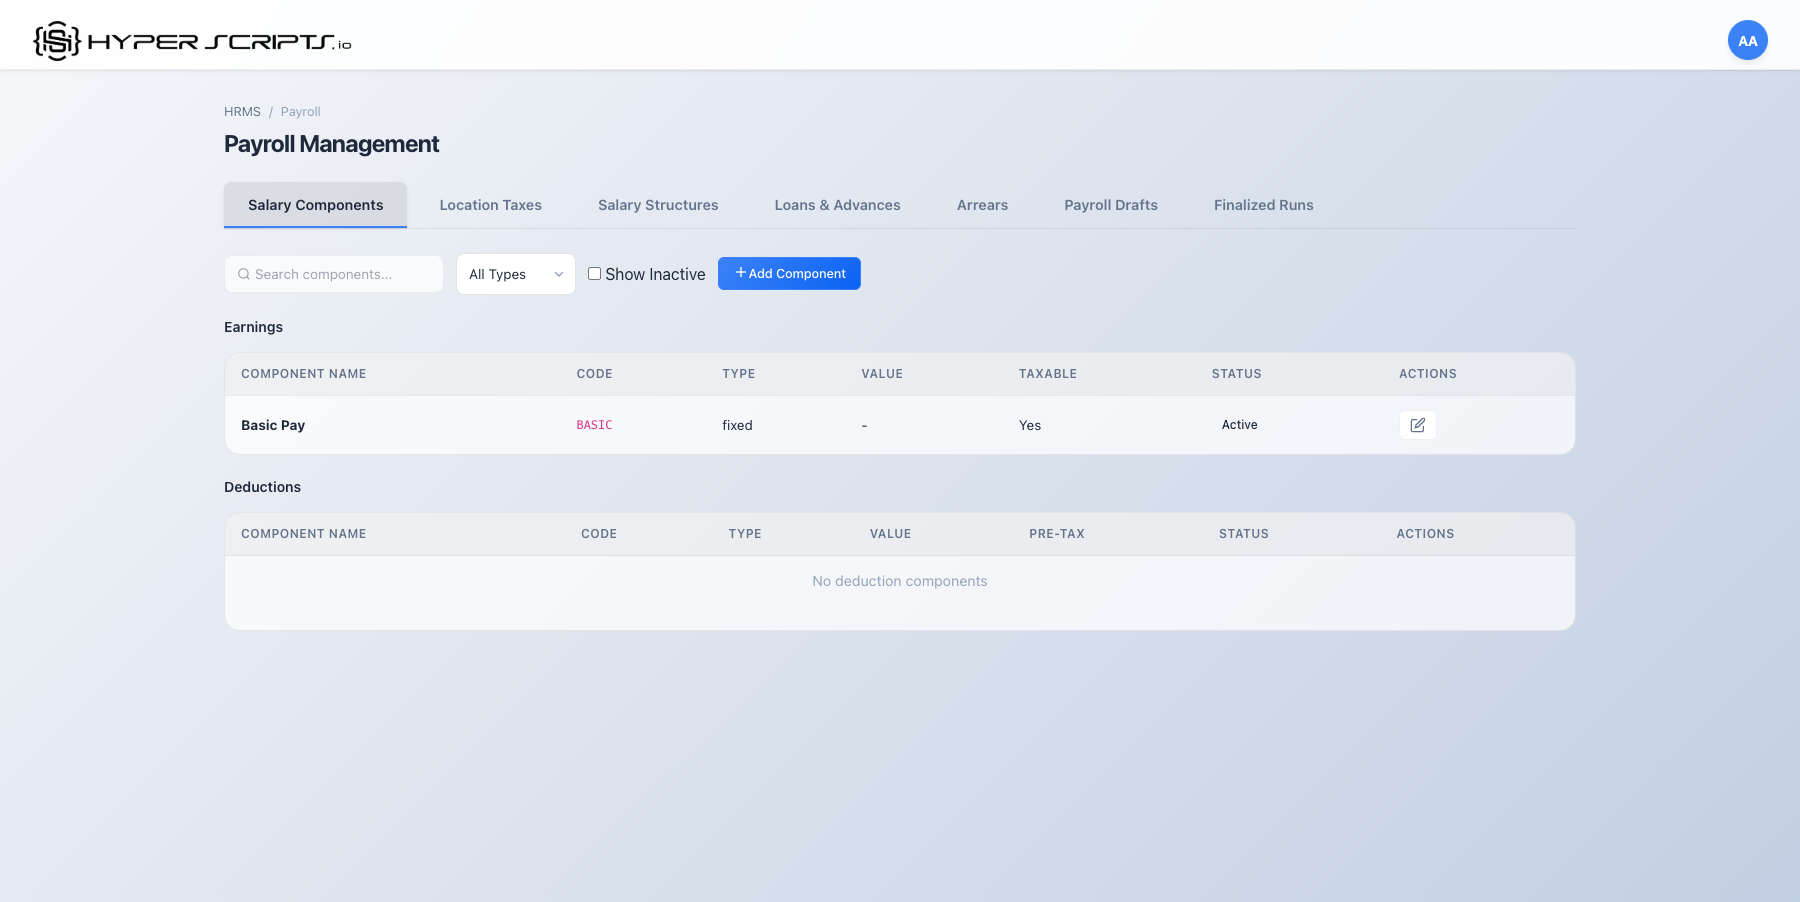
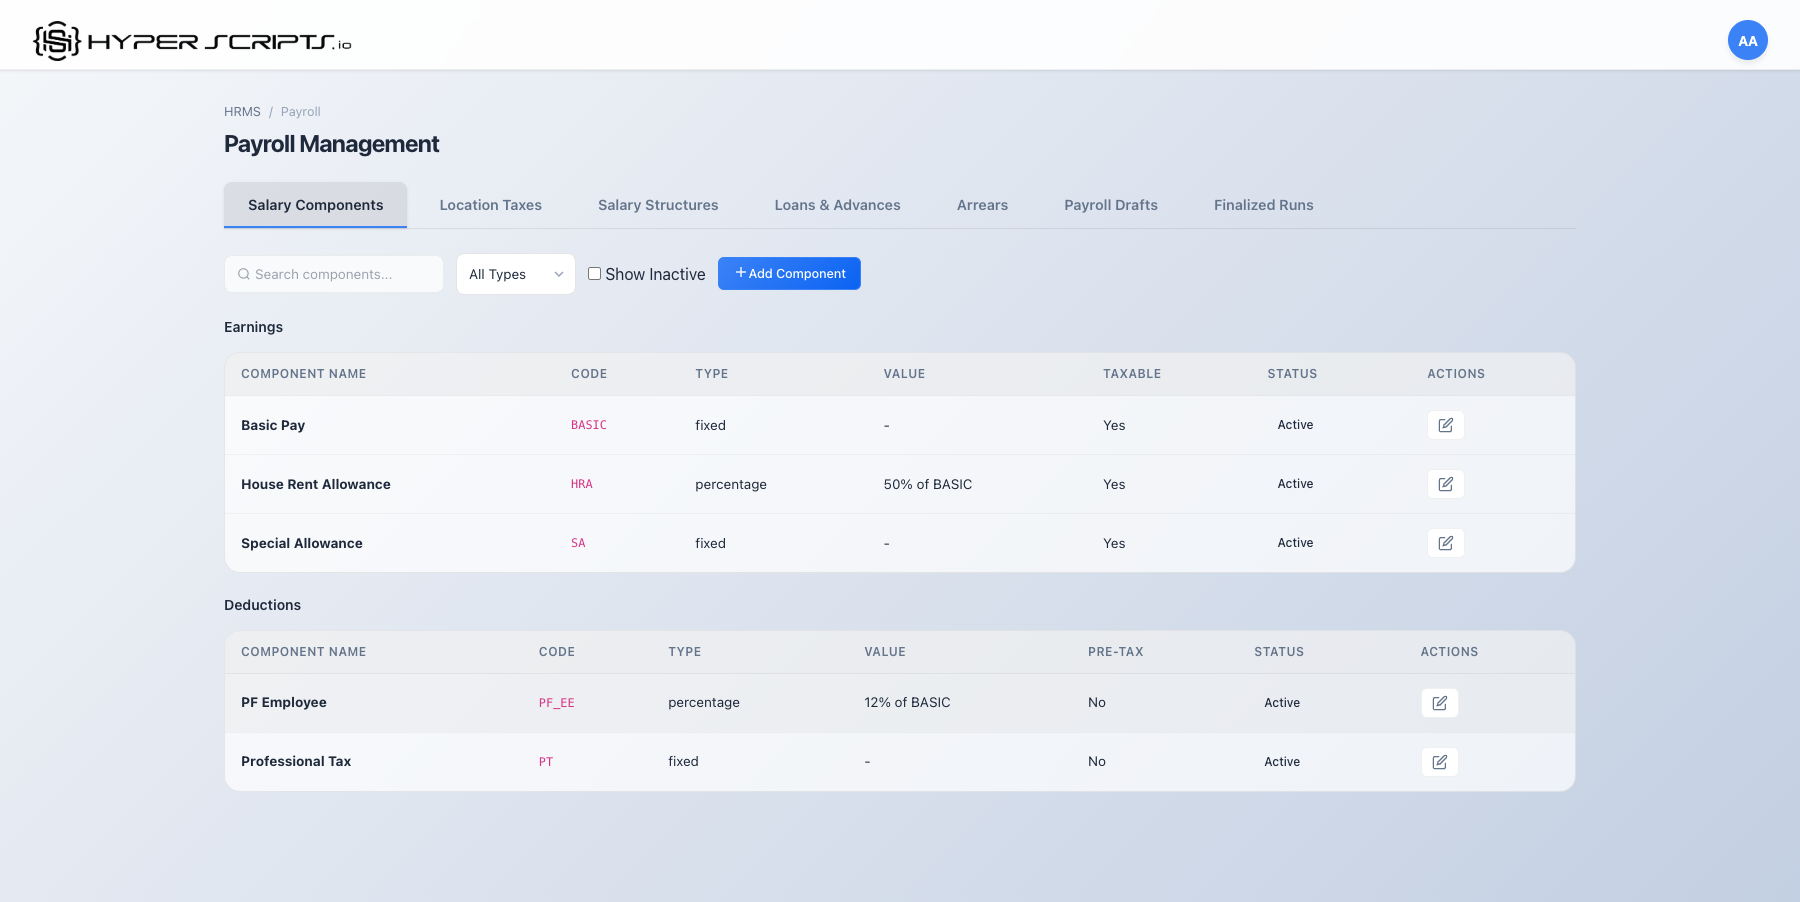
Step 1: View the Salary Components Tab
Navigate to HRMS → Payroll → Salary Components tab to see existing components:
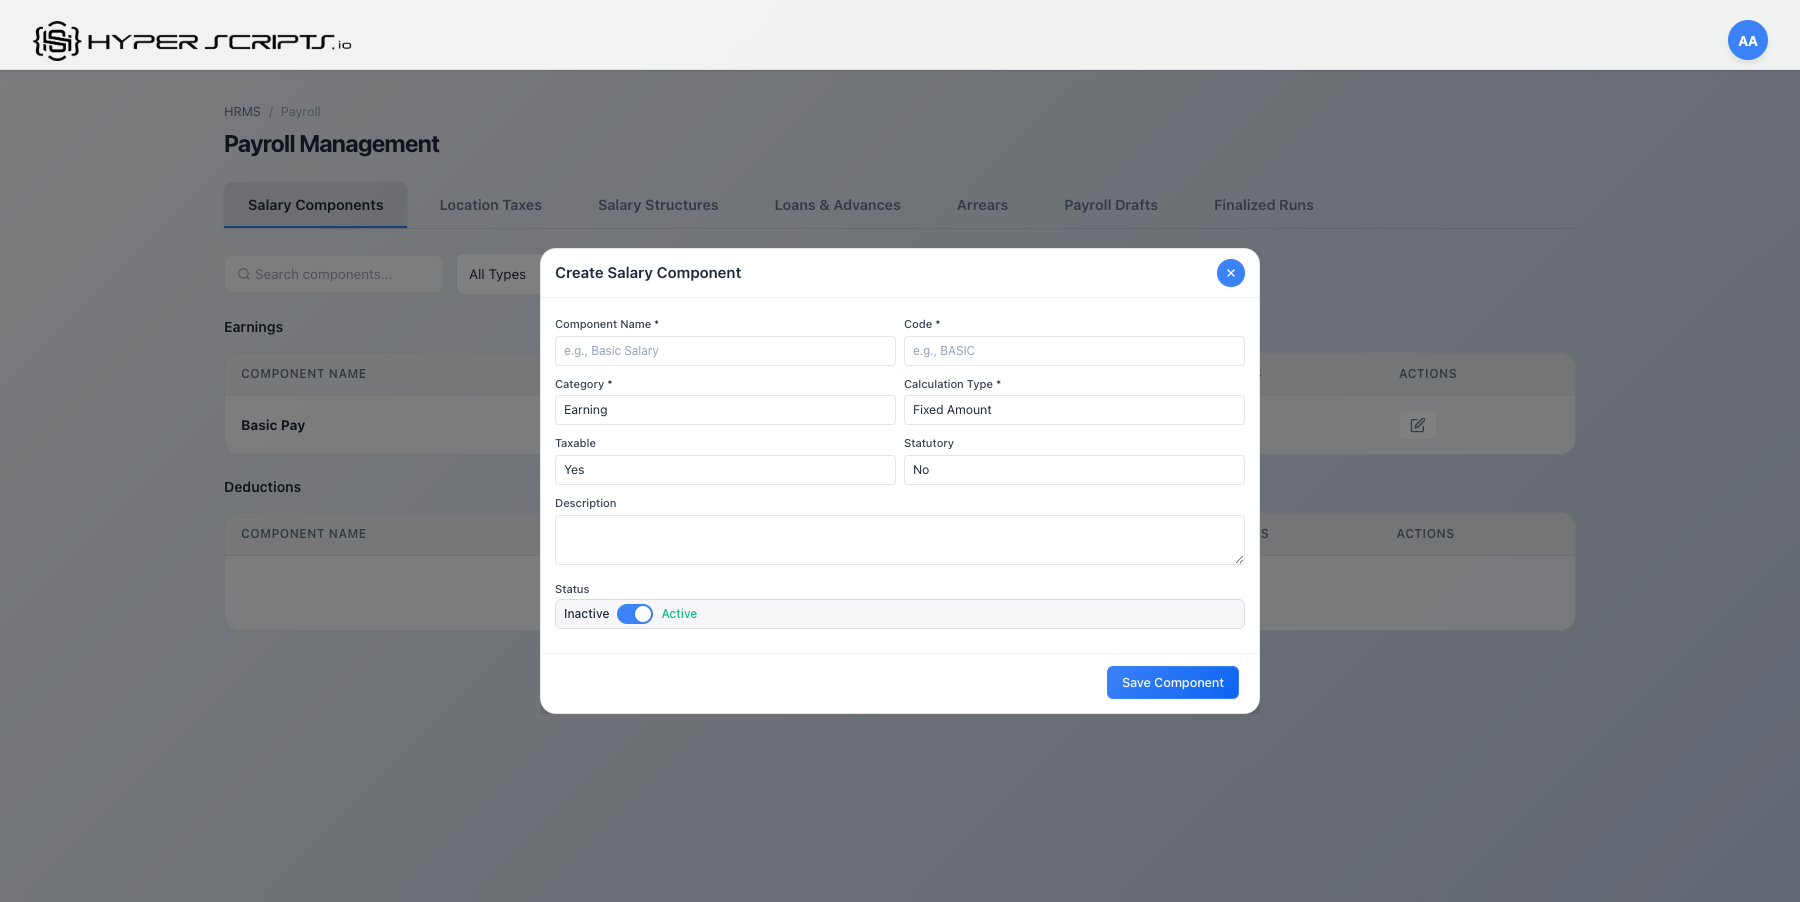
Step 2: Click Add Salary Component
Click the "Add Salary Component" button to open the creation modal:
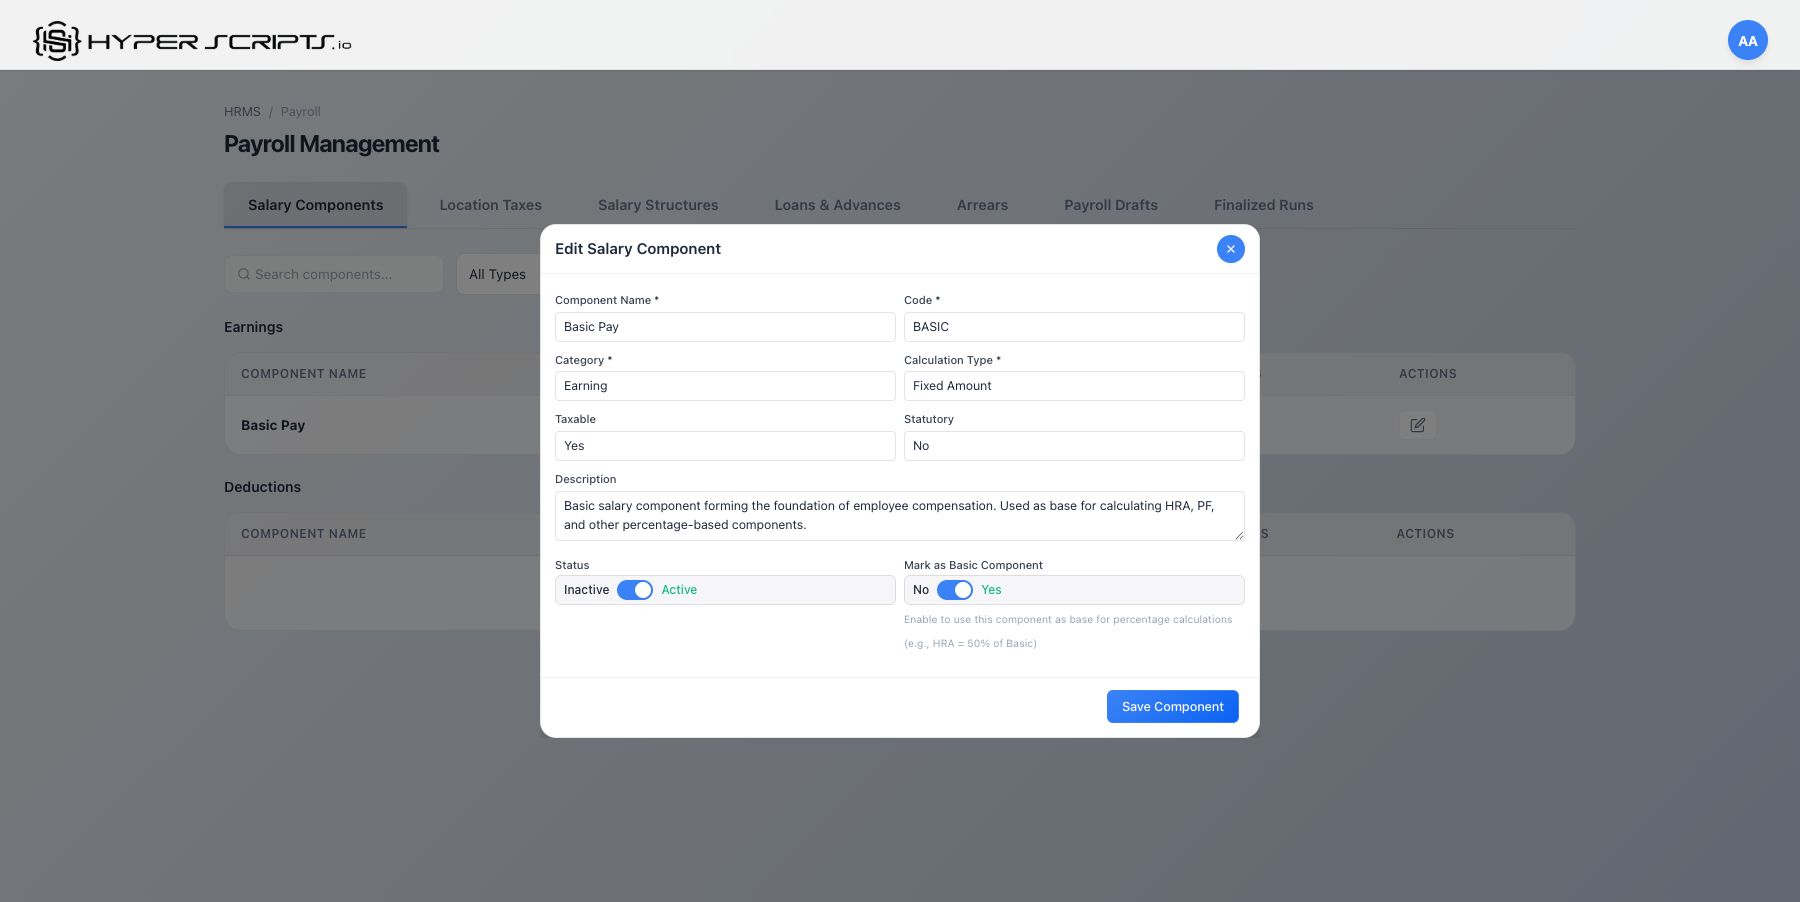
Step 3: Configure an Earning Component (Basic Pay)
For Basic Pay, use Percentage of CTC calculation:
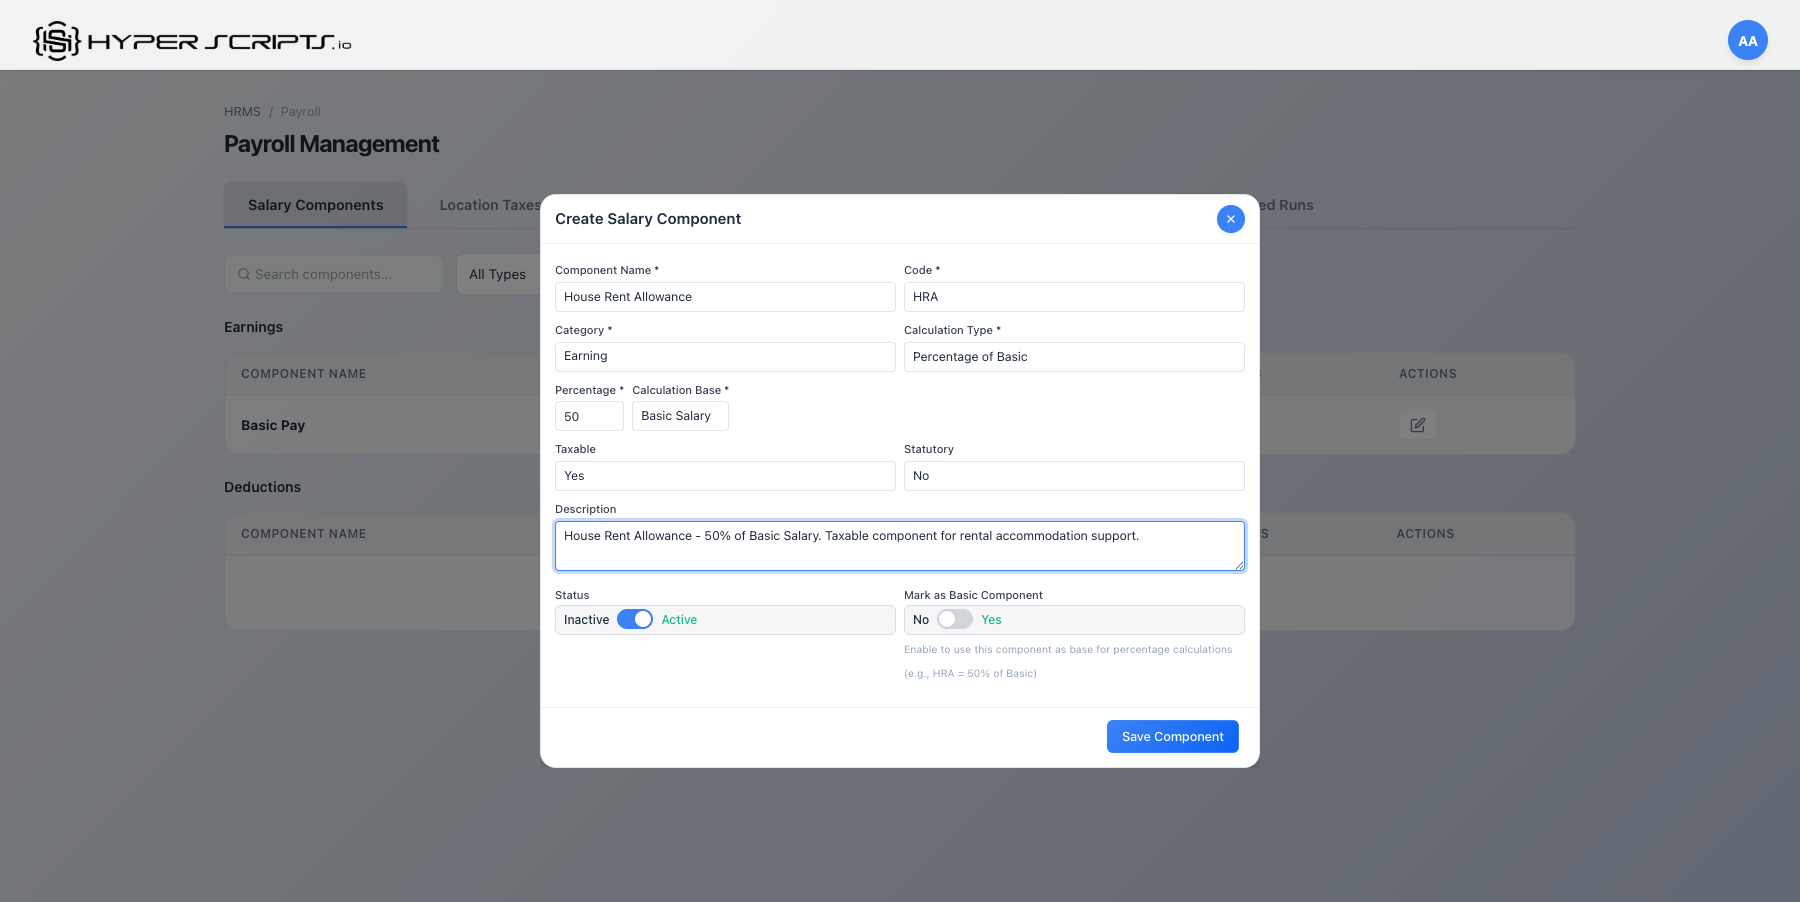
Step 4: Create HRA as Percentage of Basic
For HRA, use Percentage of Basic calculation:
Step 5: View All Components
After creating all required components, your list should look like this:
Field Descriptions
| Field | Required | Description |
|---|---|---|
| Component Name | Required | Display name (e.g., "Basic Pay", "House Rent Allowance") |
| Component Code | Required | Unique code (e.g., "BASIC", "HRA", "PF") |
| Component Type | Required | Earning or Deduction |
| Calculation Type | Required | Fixed, Percentage of CTC, or Percentage of Basic |
| Default Value/Percentage | Optional | Default fixed amount or percentage for this component |
| Is Basic Salary | Optional | Enable only for Basic Pay - marks it as base for % of basic calculations |
| Is Taxable | Optional | Whether this component is subject to income tax |
| Is Statutory | Optional | Whether this is a government-mandated component (PF, ESI) |
Earnings: Basic Pay (50% CTC), HRA (40% Basic), Special Allowance (remainder), Conveyance
Deductions: PF Employee (12% Basic), Professional Tax (Fixed), ESI (if applicable)
4 Salary Structures
Salary structures combine multiple components into a template that can be assigned to employees. Each structure calculates salaries based on the employee's CTC (Cost to Company).
This is a crucial concept for payroll configuration:
- Component Default Values: When you create a salary component (e.g., Basic Pay = 40% of CTC), the percentage/amount is a default template value. It's used to pre-fill forms when adding components to structures.
- Structure Values (Override): When you add a component to a salary structure, you can override the default. For example, a component with 40% default can be set to 65% in a specific structure.
- What Backend Uses: During payslip generation, the structure value is used, NOT the component default. The component default is just a convenience for form pre-filling.
Why This Design Pattern?
This layered approach enables powerful flexibility:
| Scenario | How It Works | Example |
|---|---|---|
| Same Component, Different Structures | One component can have different values across multiple structures | Basic Pay: 35% for Junior Structure, 50% for Senior Structure |
| Location-Based Differences | Structures for different offices may have different percentages | HRA: 50% for Mumbai, 40% for Tier-2 cities |
| Quick Setup | Component defaults auto-fill the form, saving time for common cases | Most structures use Basic at 40%, so 40% is the default |
| Consistency with Flexibility | Same component definition used everywhere, but values can vary | All use "BASIC" component, but percentages differ per structure |
Step-by-Step: Creating a Salary Structure
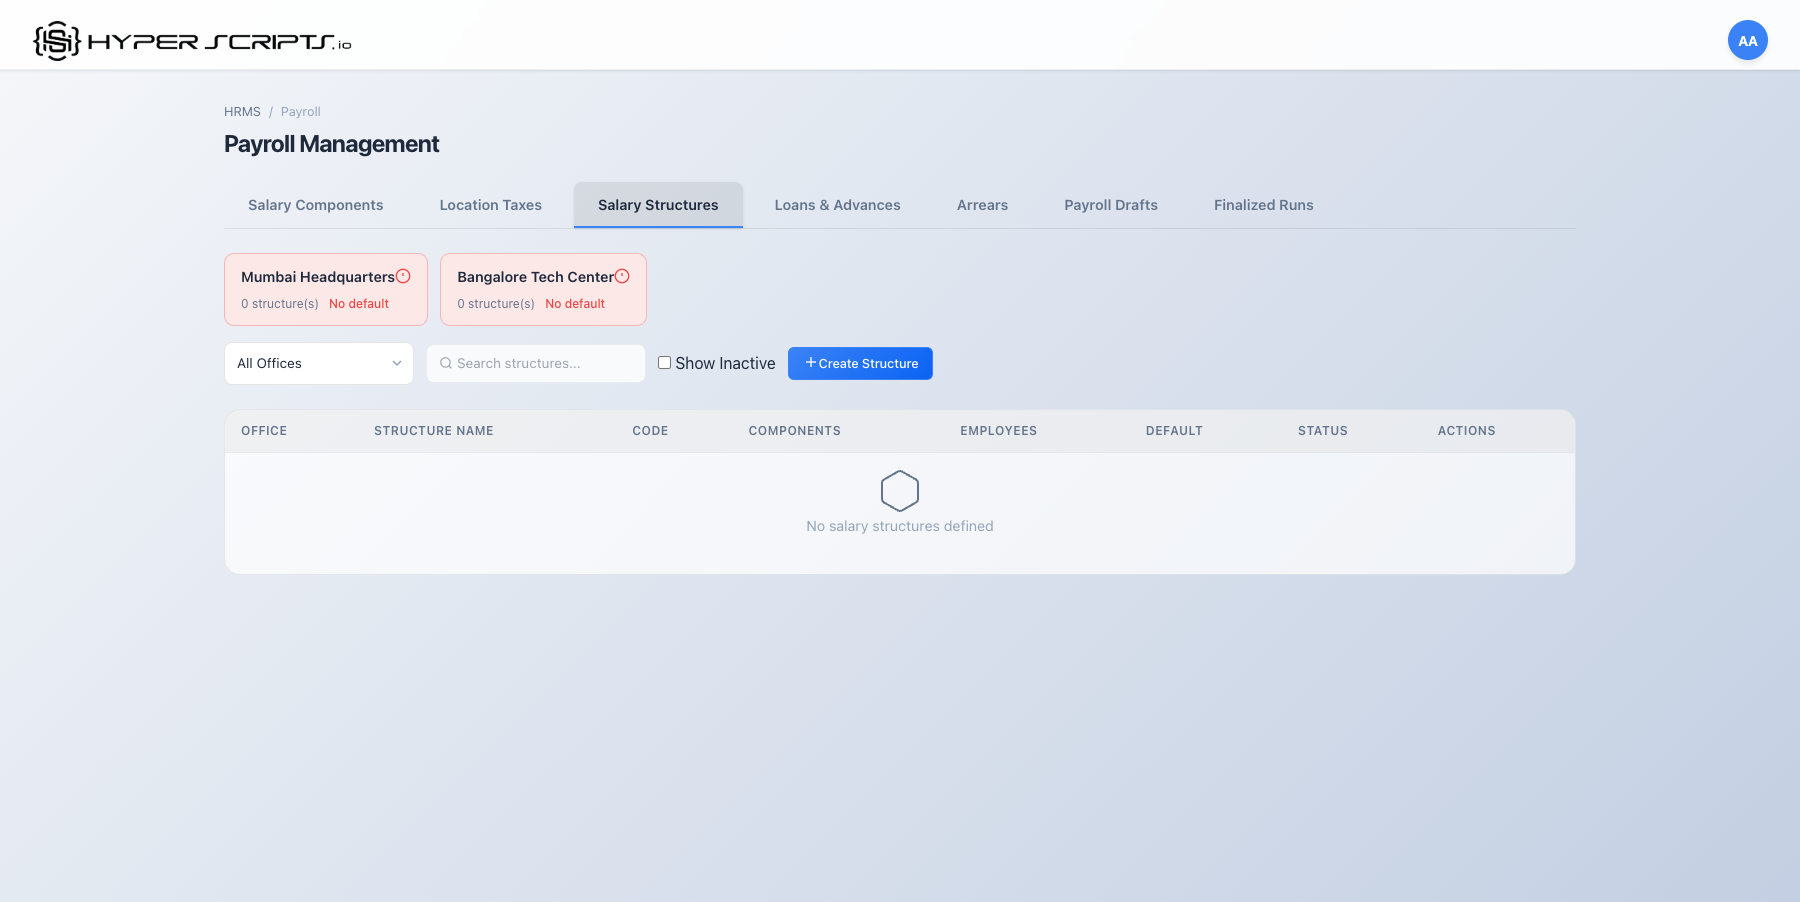
Step 1: View the Salary Structures Tab
Navigate to Salary Structures tab. Initially it will be empty:
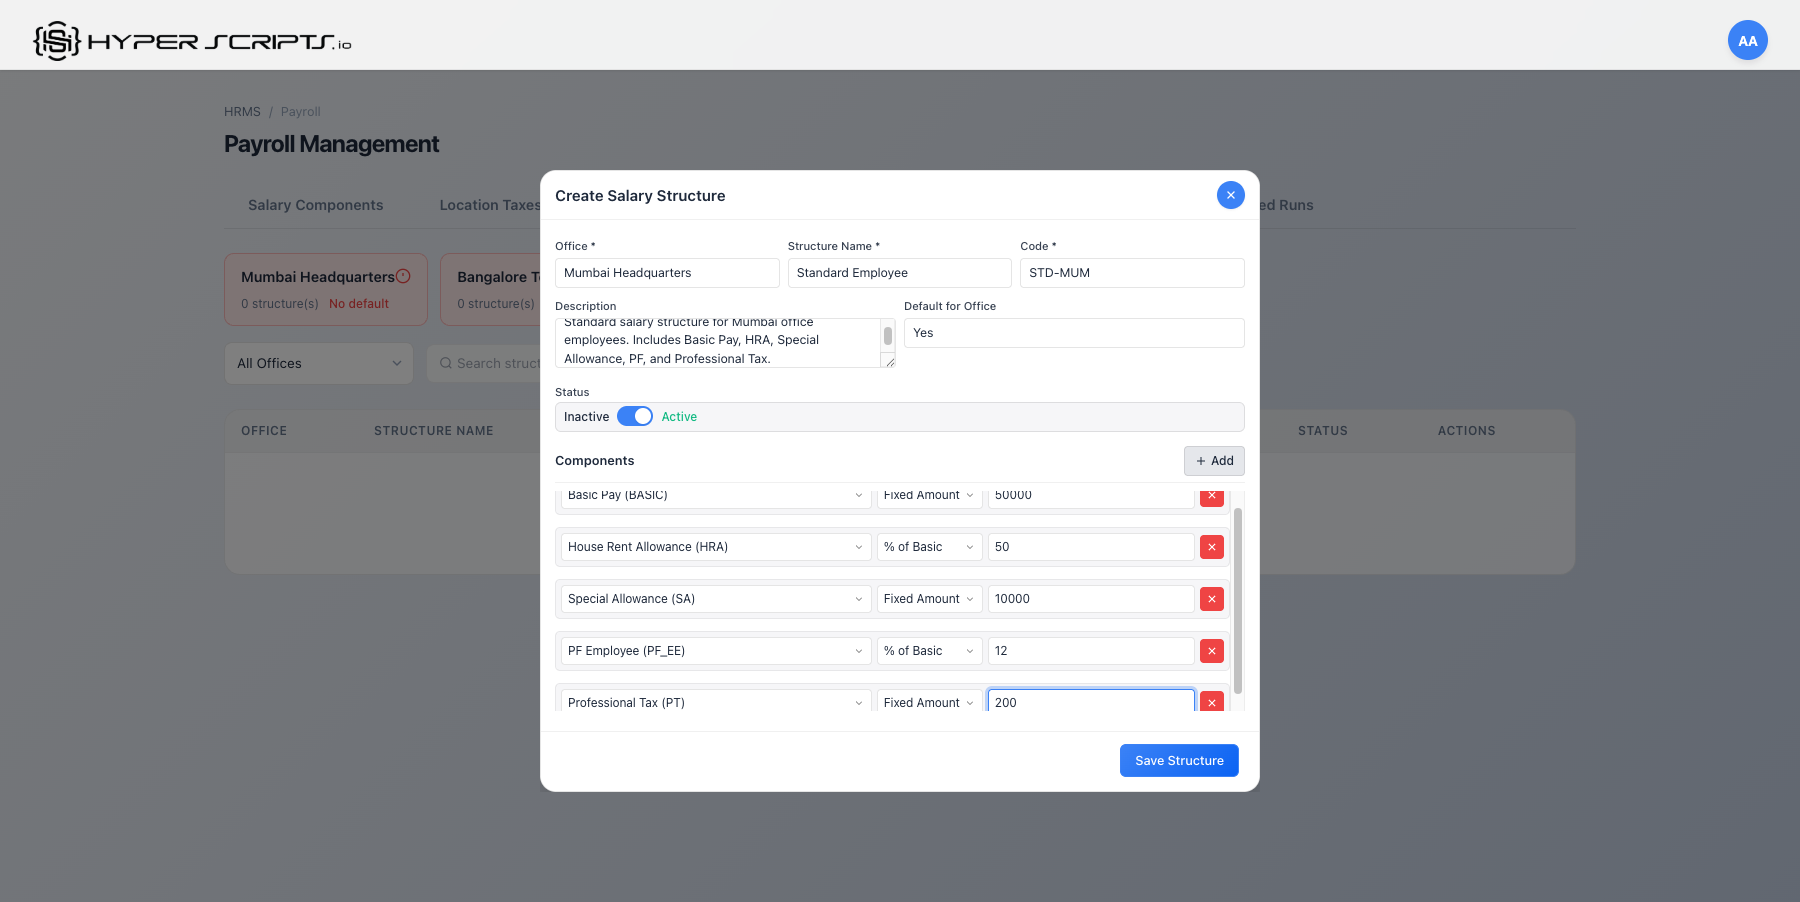
Step 2: Click Create Salary Structure
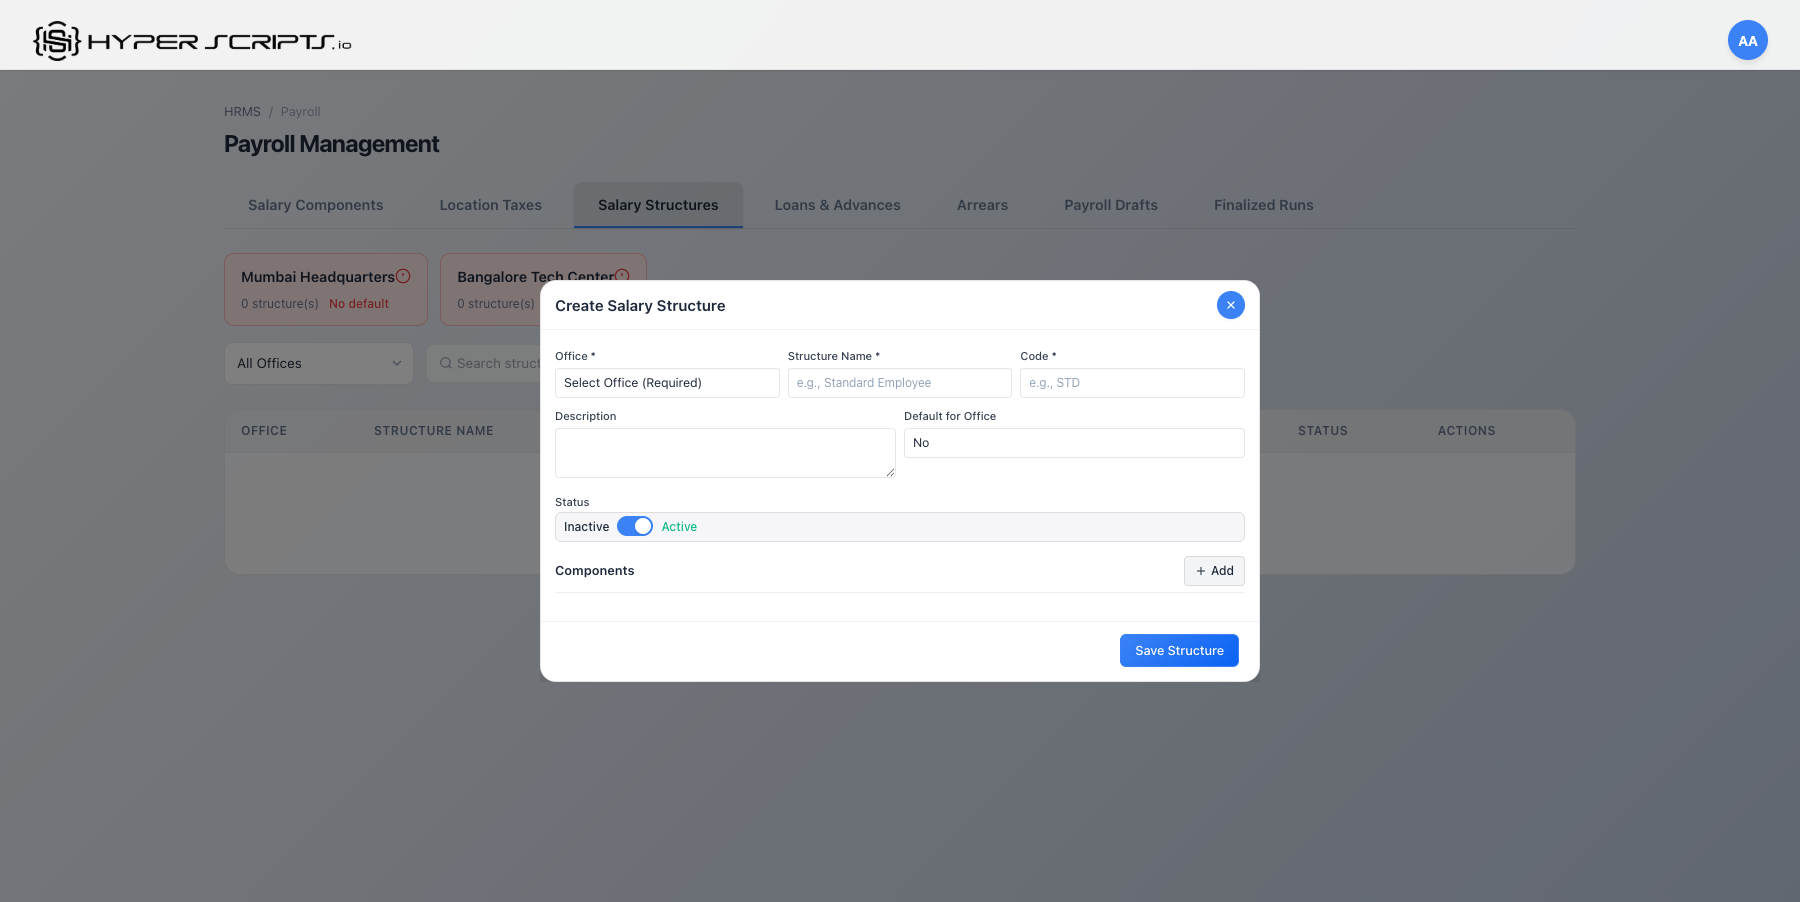
Step 3: Add Components to Structure
Click "Add Component" to add salary components:
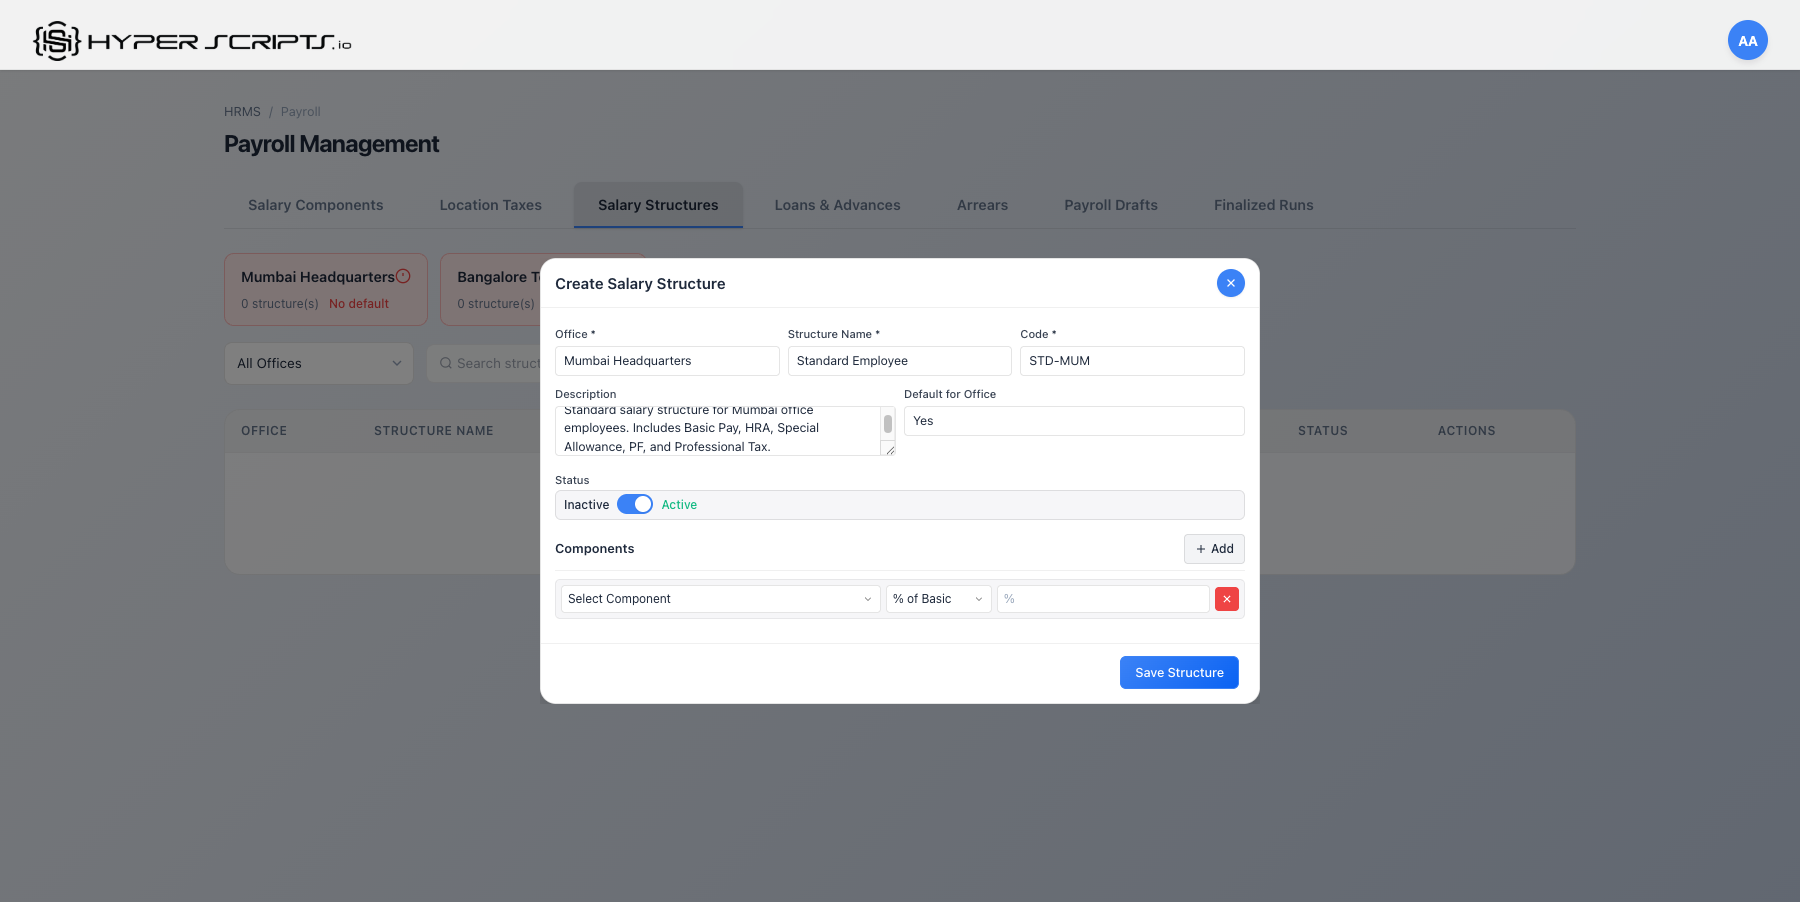
Step 4: Complete the Structure Configuration
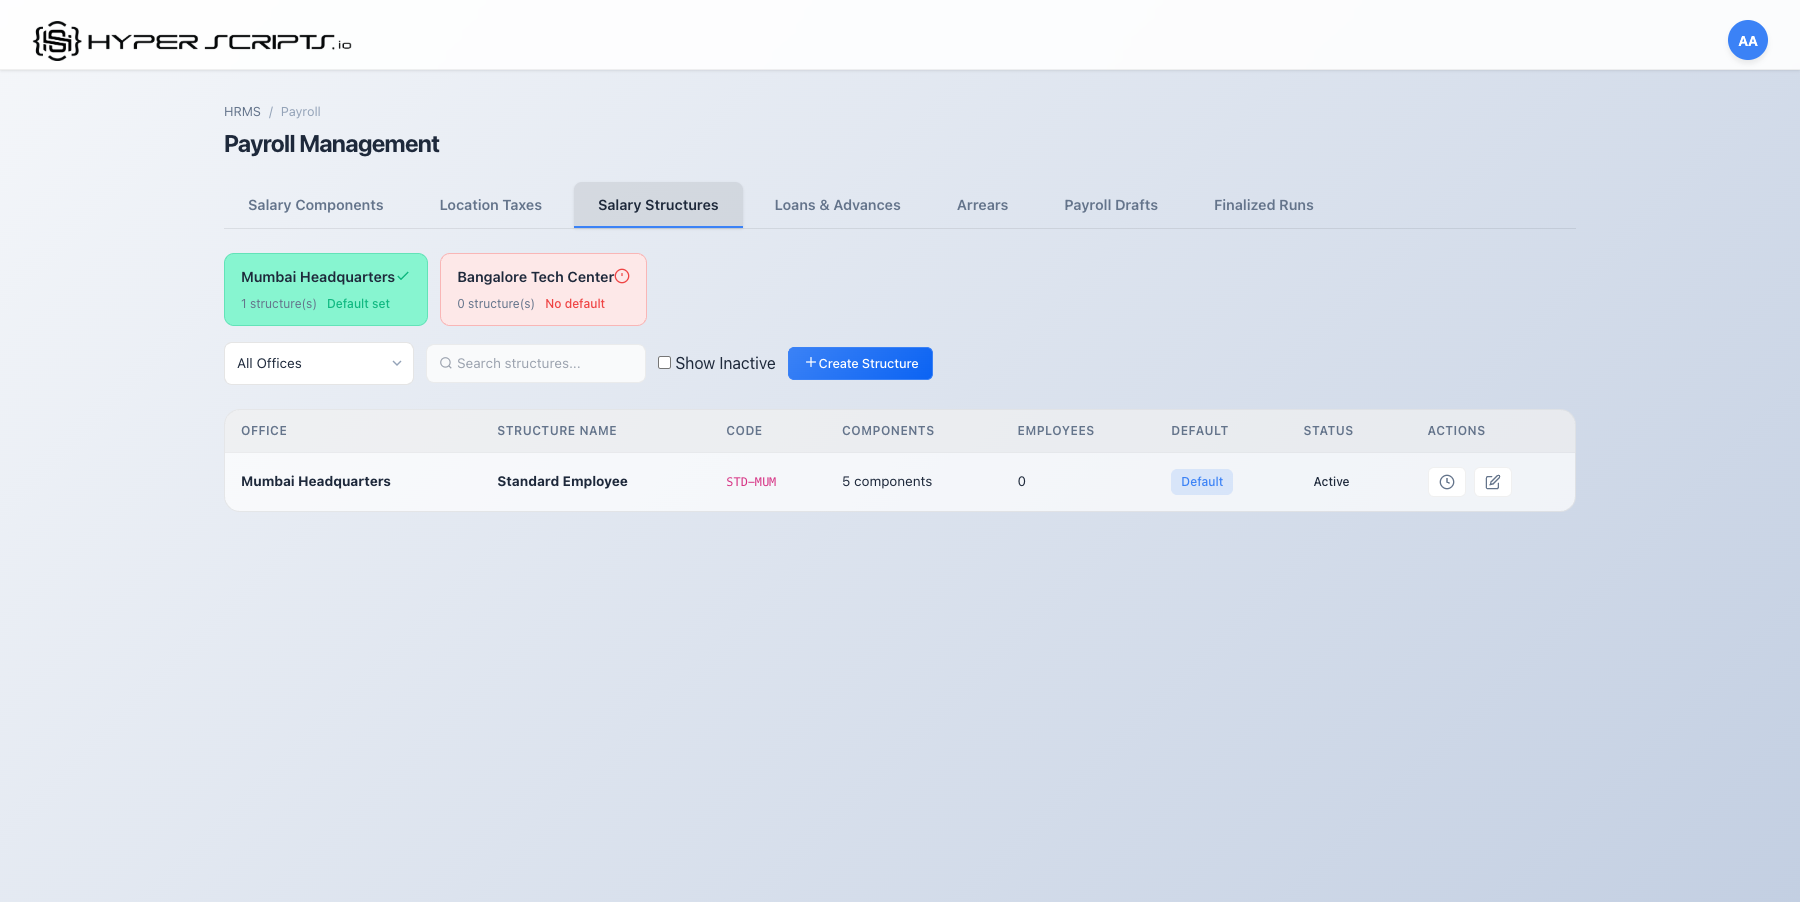
Step 5: View the Created Structure
Structure Versioning
Salary structures support versioning for handling mid-year changes. When you modify a structure, you can create a new version with an effective date.
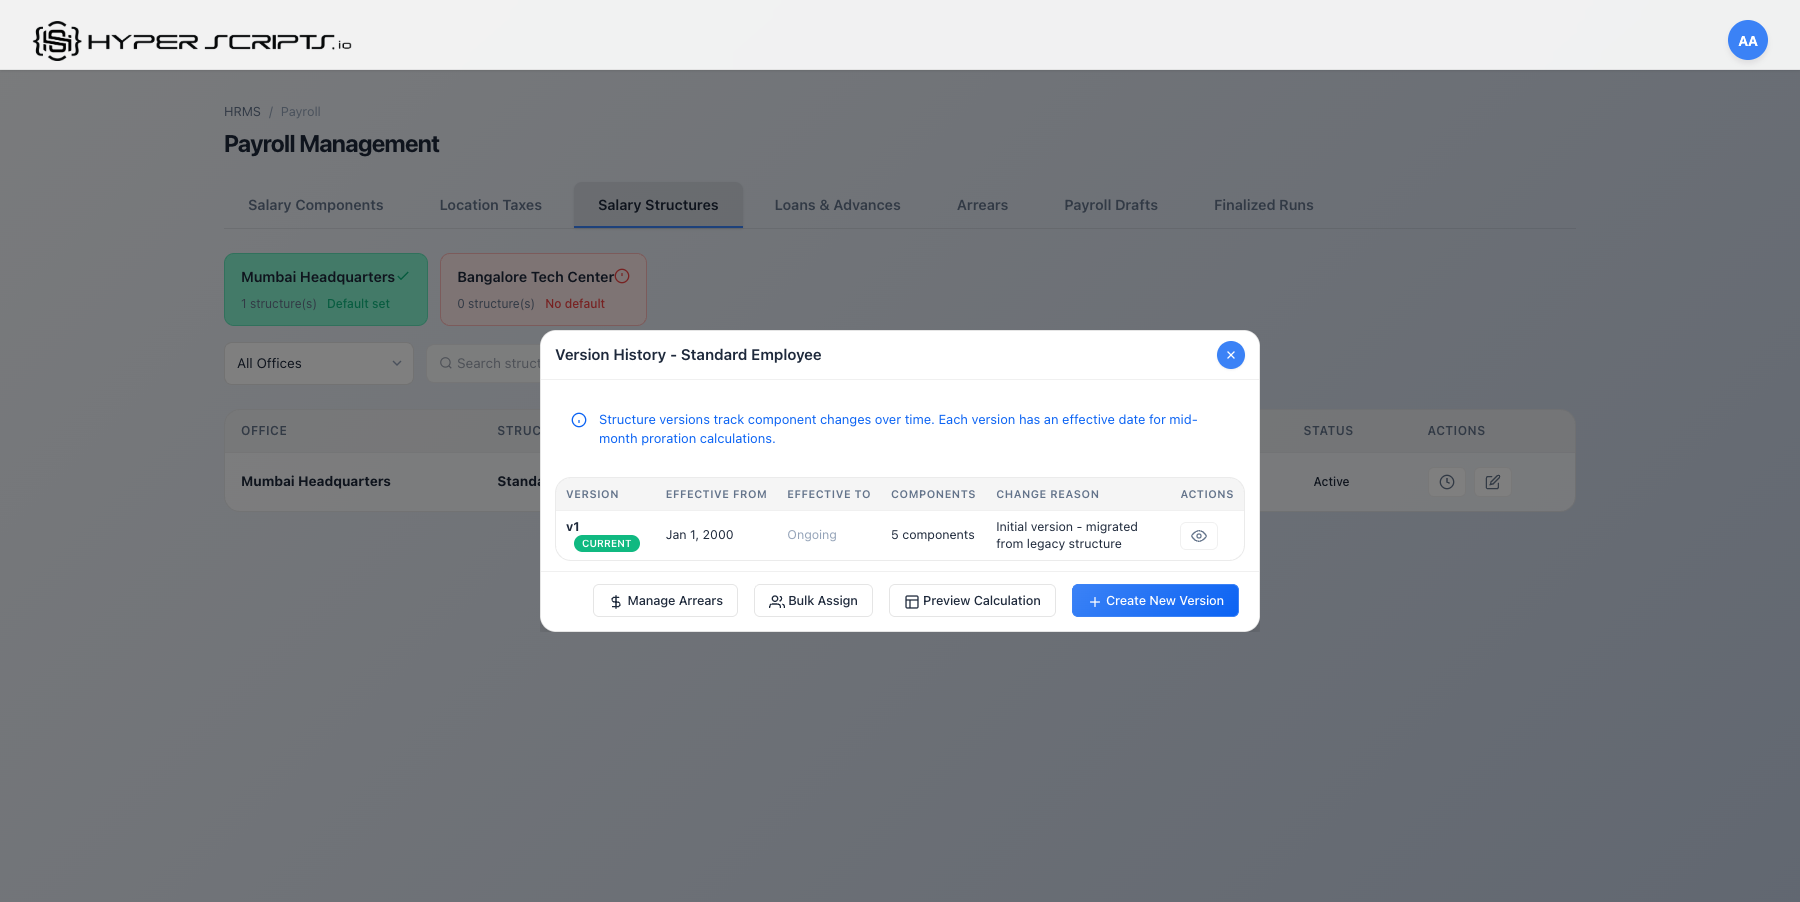
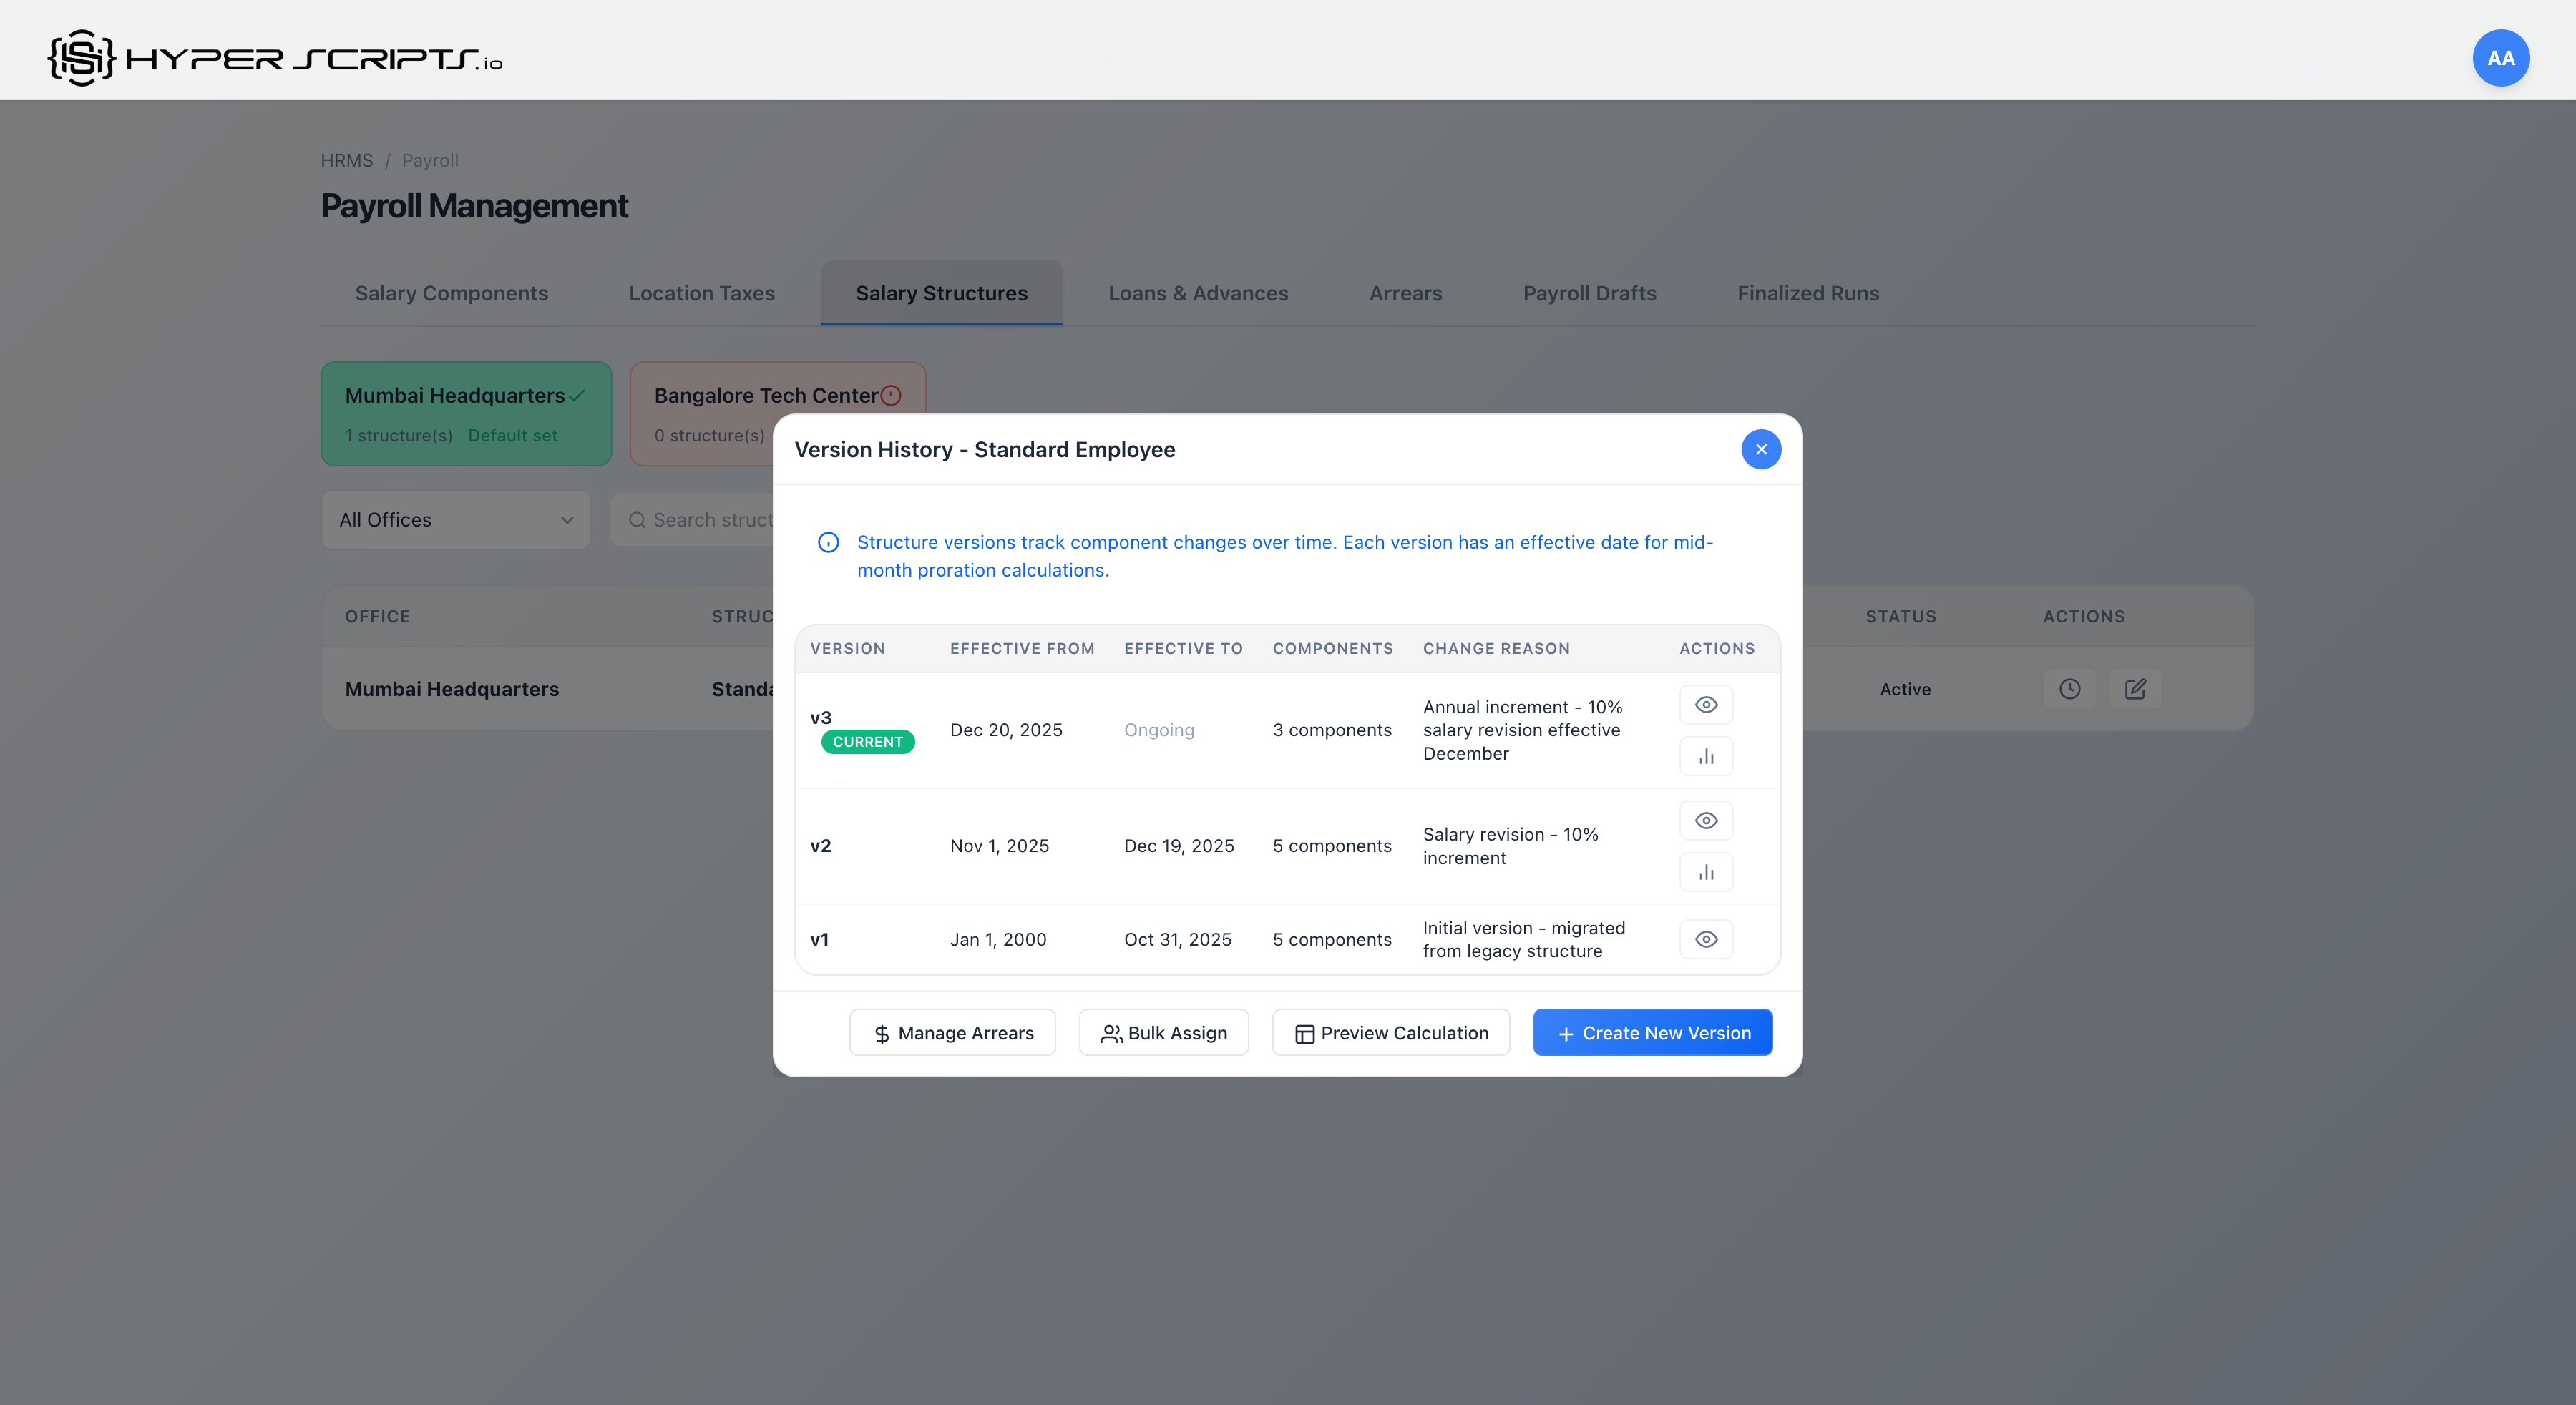
Viewing Version History
Click the "Version History" button on any salary structure to view all versions with action buttons:
Version Details (Snapshot View)
Click "View Details" on any version to see a complete snapshot of the version configuration:
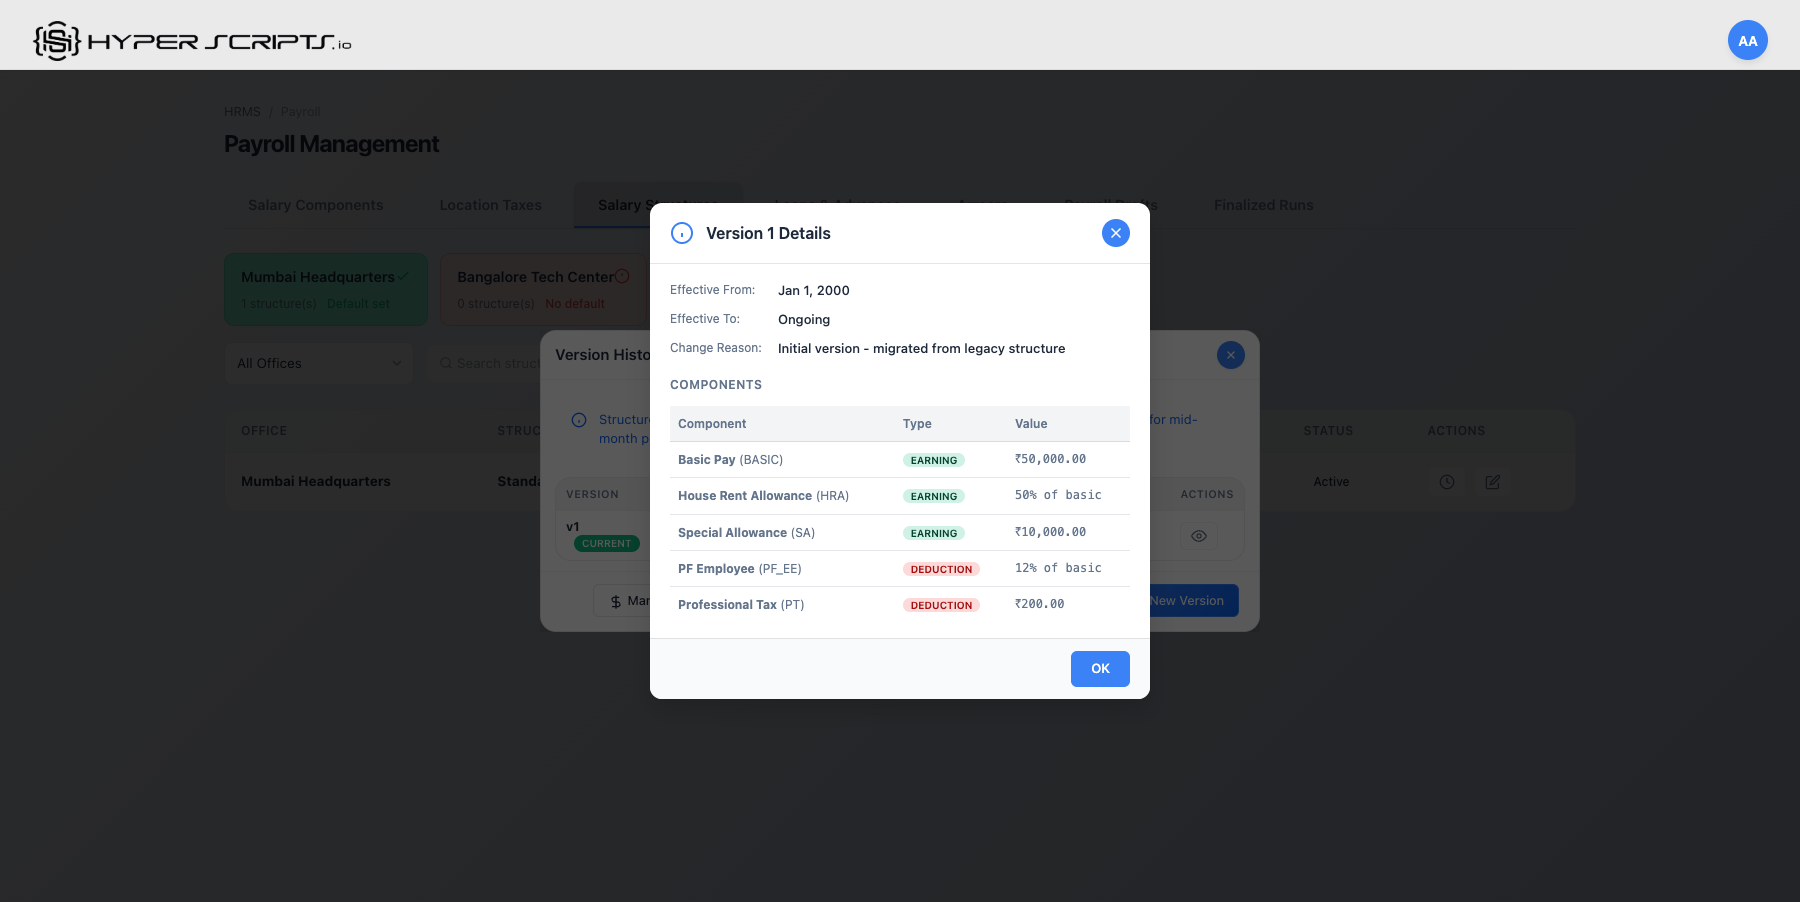
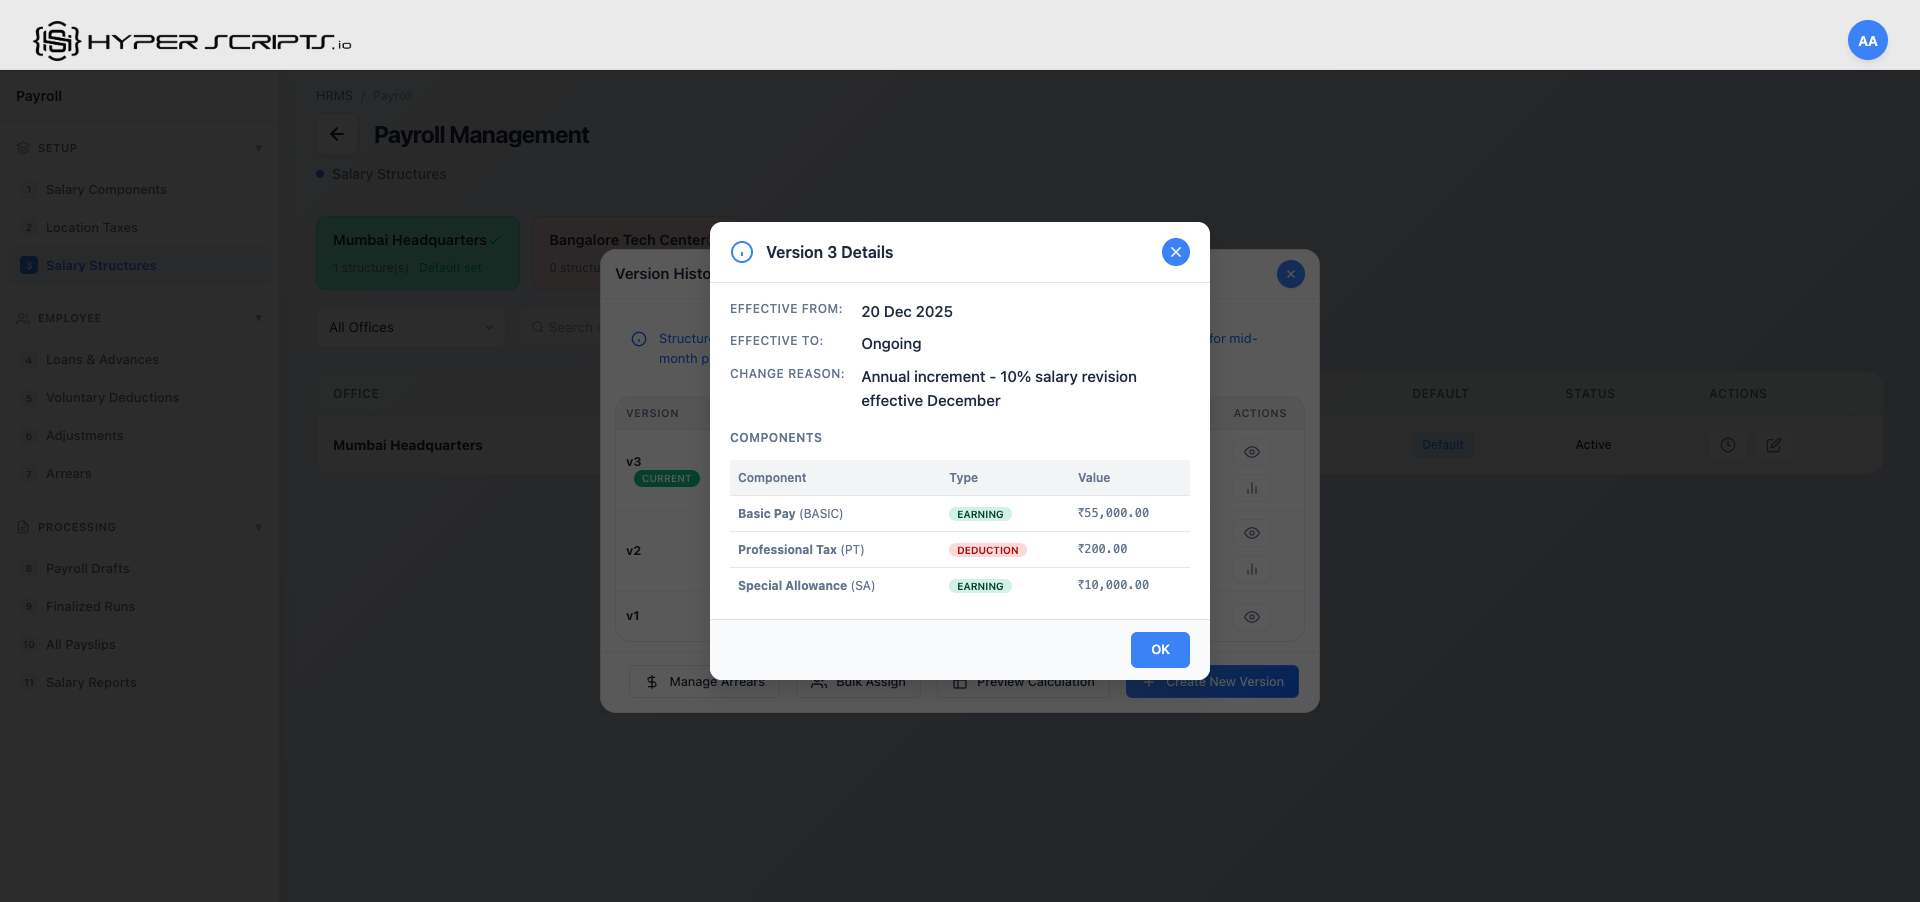
The Version Details modal displays:
- Version Number: Sequential version identifier (v1, v2, v3, etc.)
- Effective From/To: Date range when this version is/was active
- Status: Current status (Active, Superseded, or Draft)
- Change Reason: Description of why this version was created
- Components Table: All salary components with their calculation settings
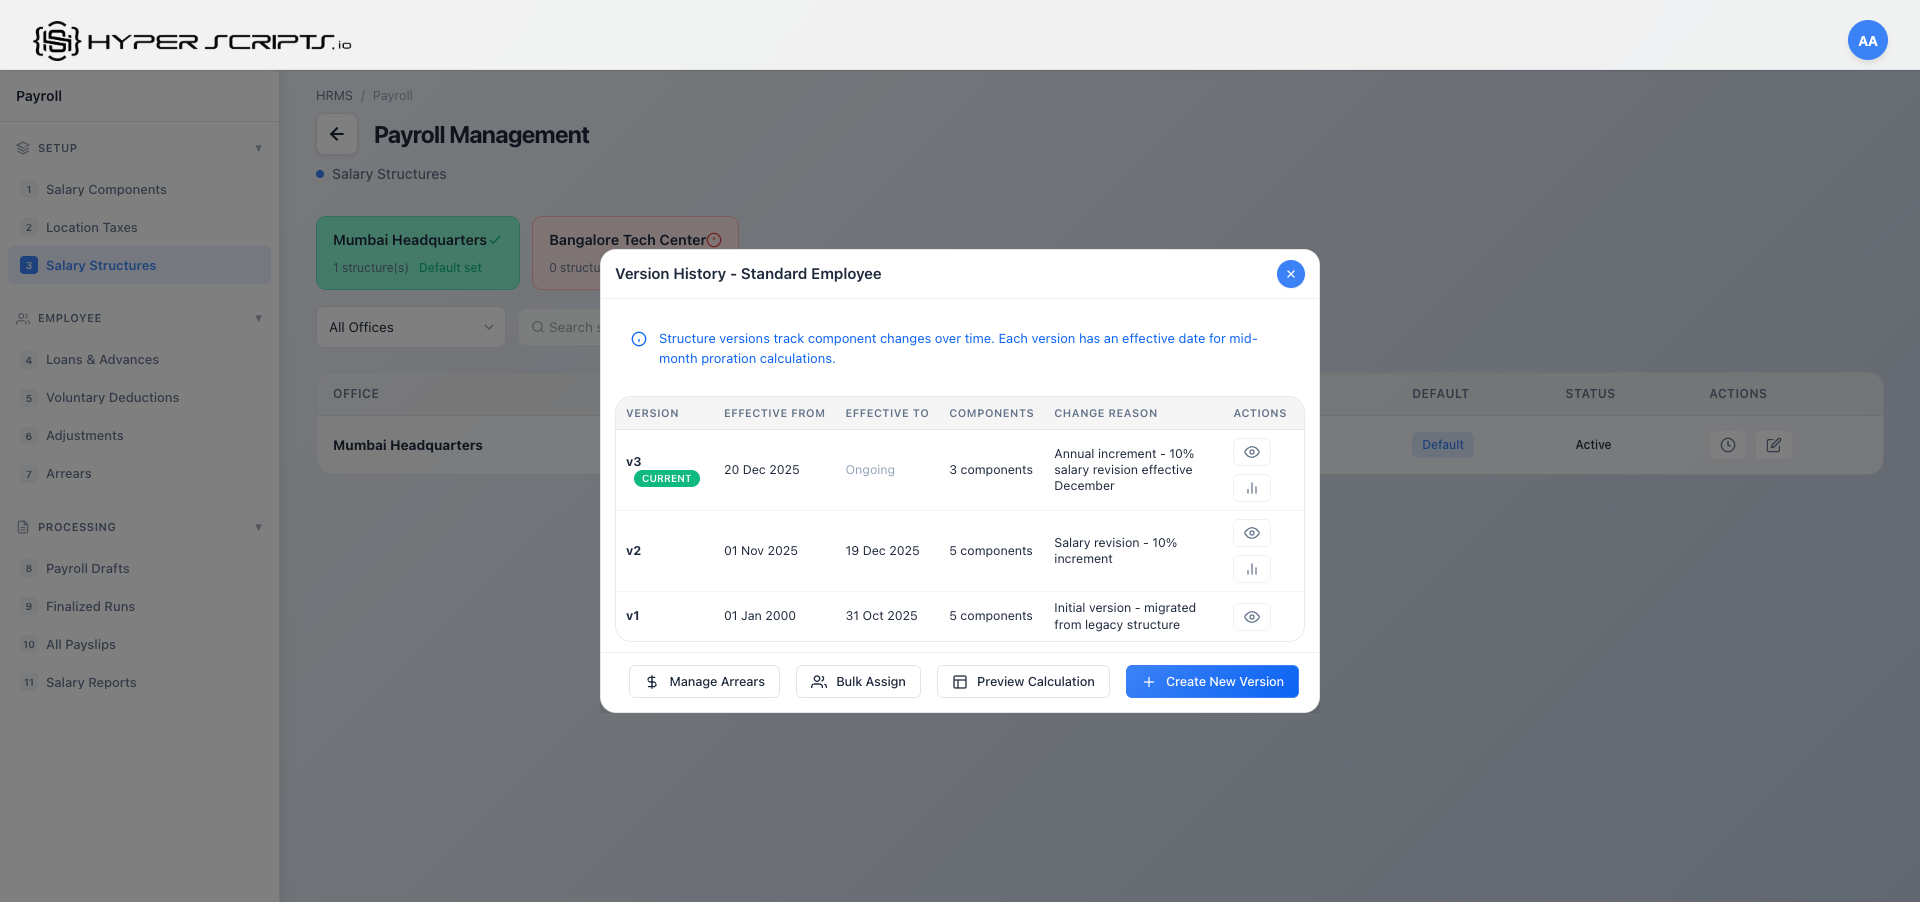
Comparing Versions
Click "Compare with Previous" to see exactly what changed between two versions:
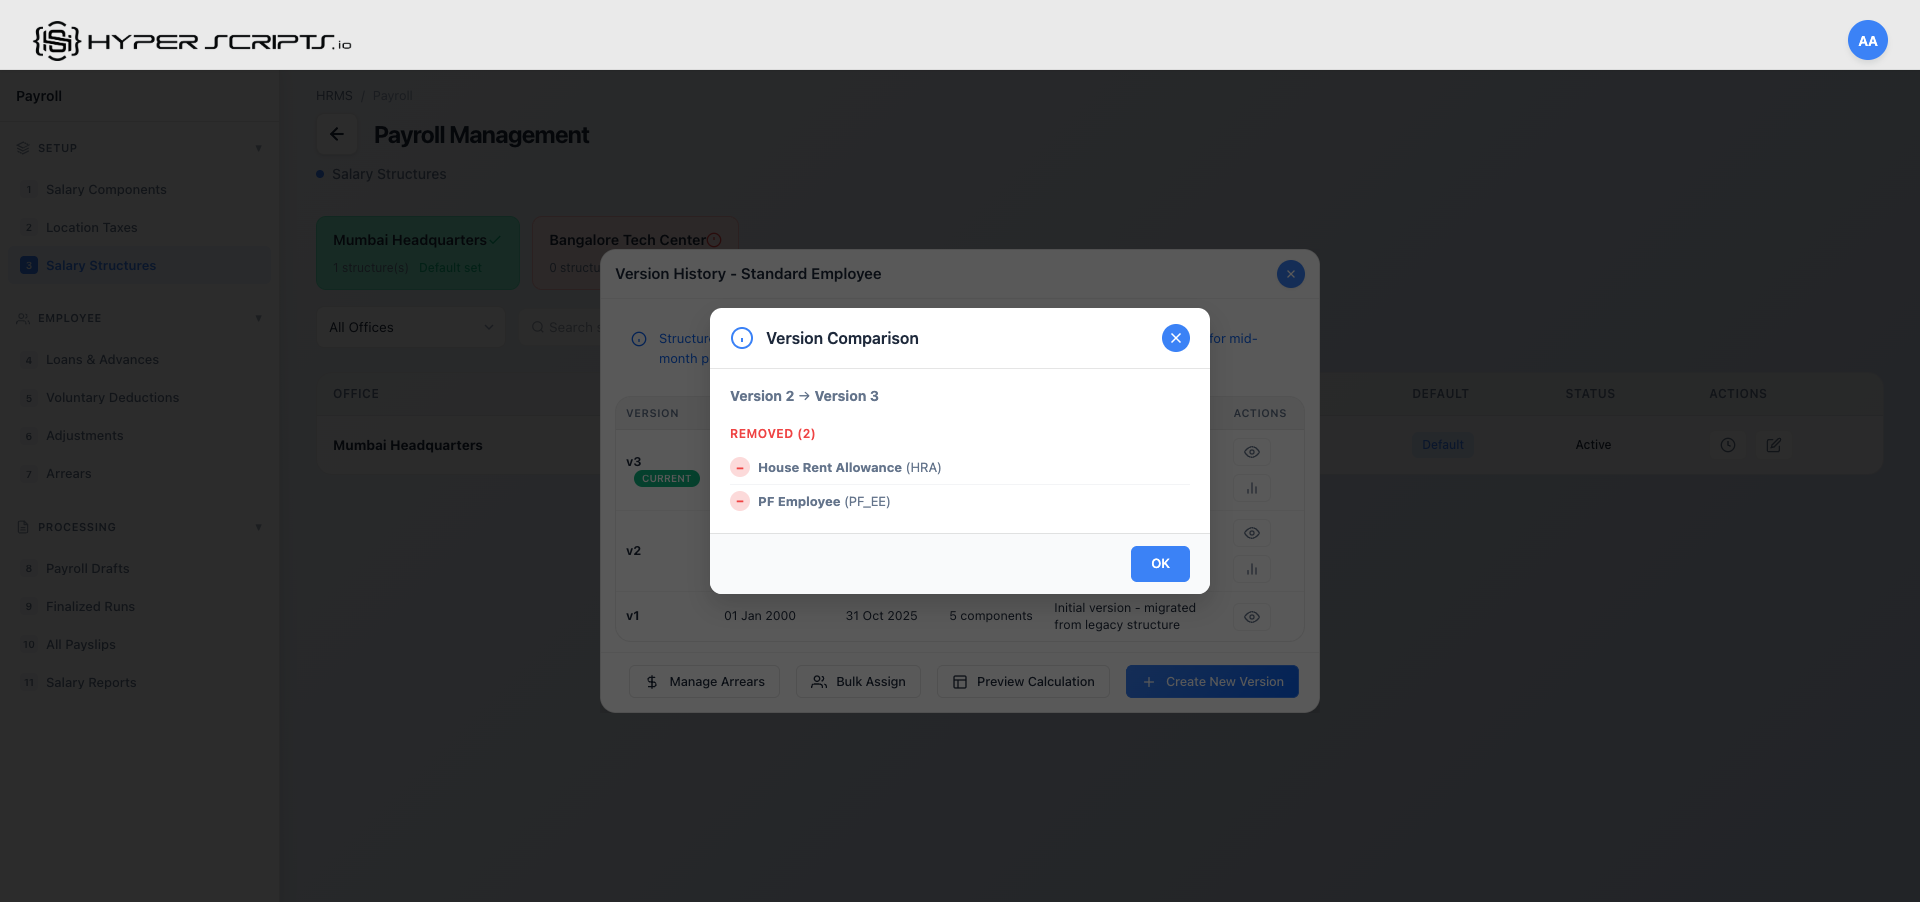
The comparison view highlights:
| Section | Description | Color |
|---|---|---|
| Added Components | New components in the newer version | Green |
| Removed Components | Components that were removed | Red |
| Modified Components | Components with changed percentages or amounts | Yellow/Orange |
| Unchanged Components | Components that remain the same | Gray |
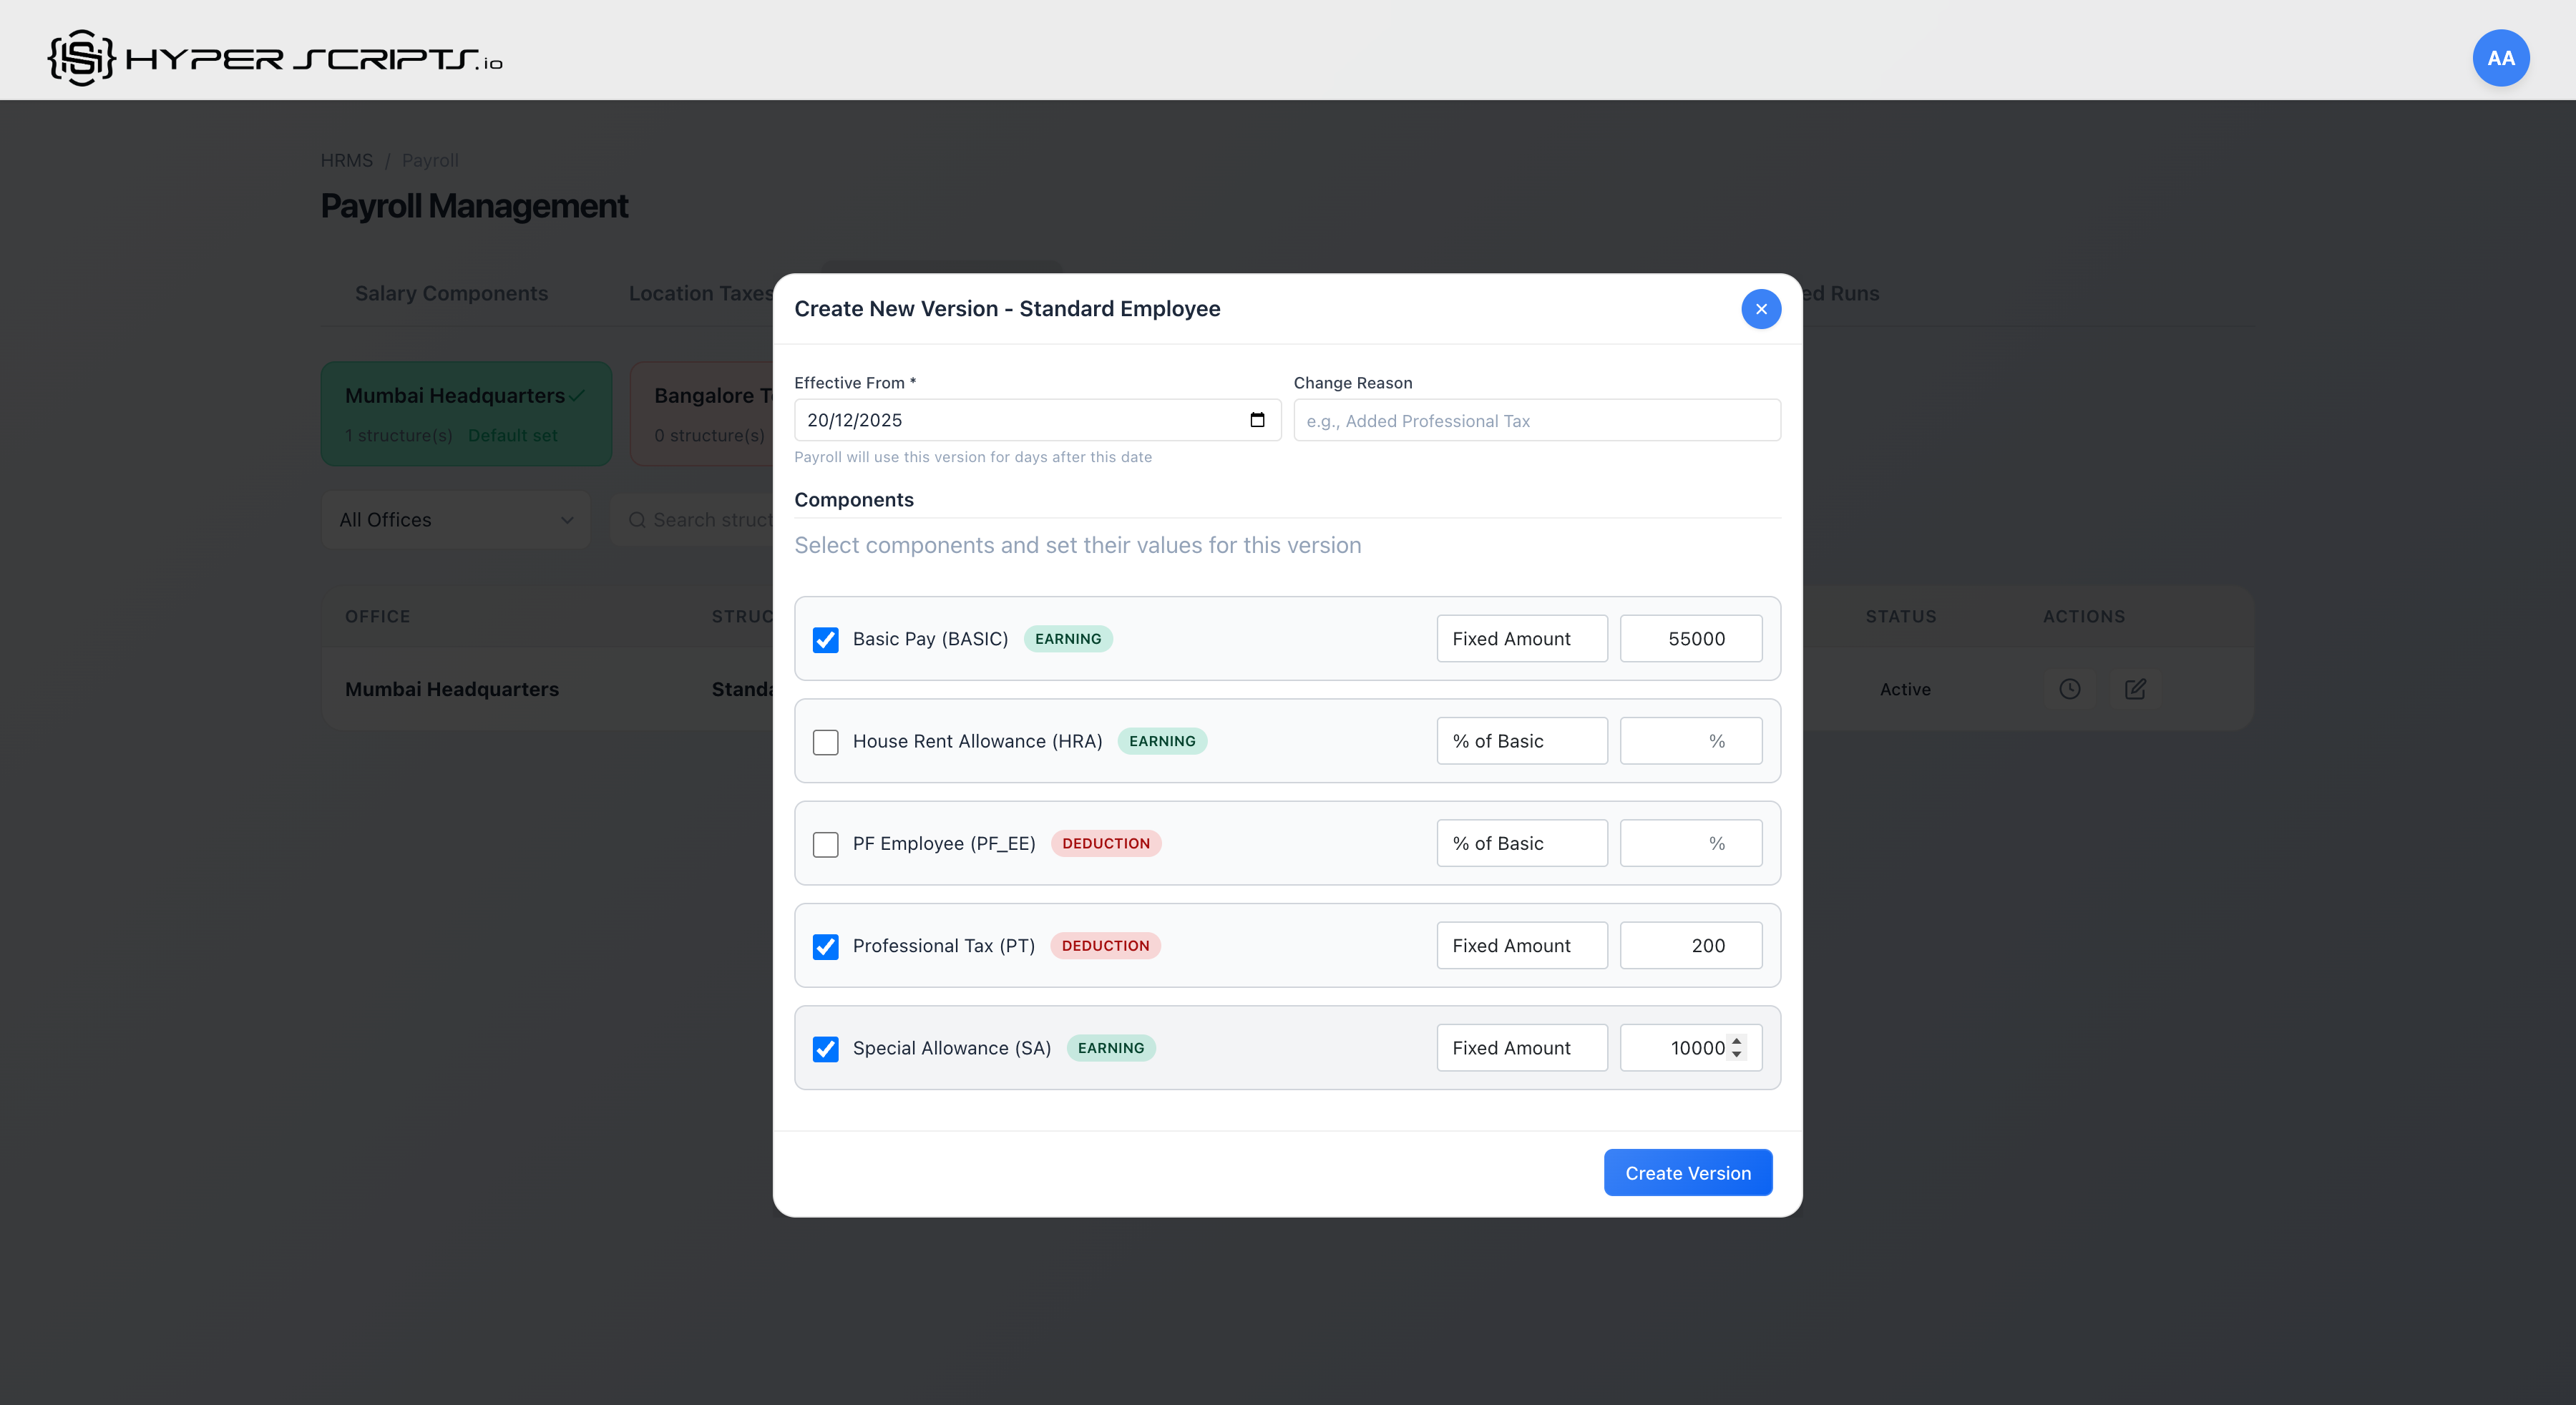
Creating a New Version
When salary components change (e.g., government revises PF percentage), create a new version:

Bulk Version Assignment
Assign a salary structure version to multiple employees at once, with powerful filtering options:
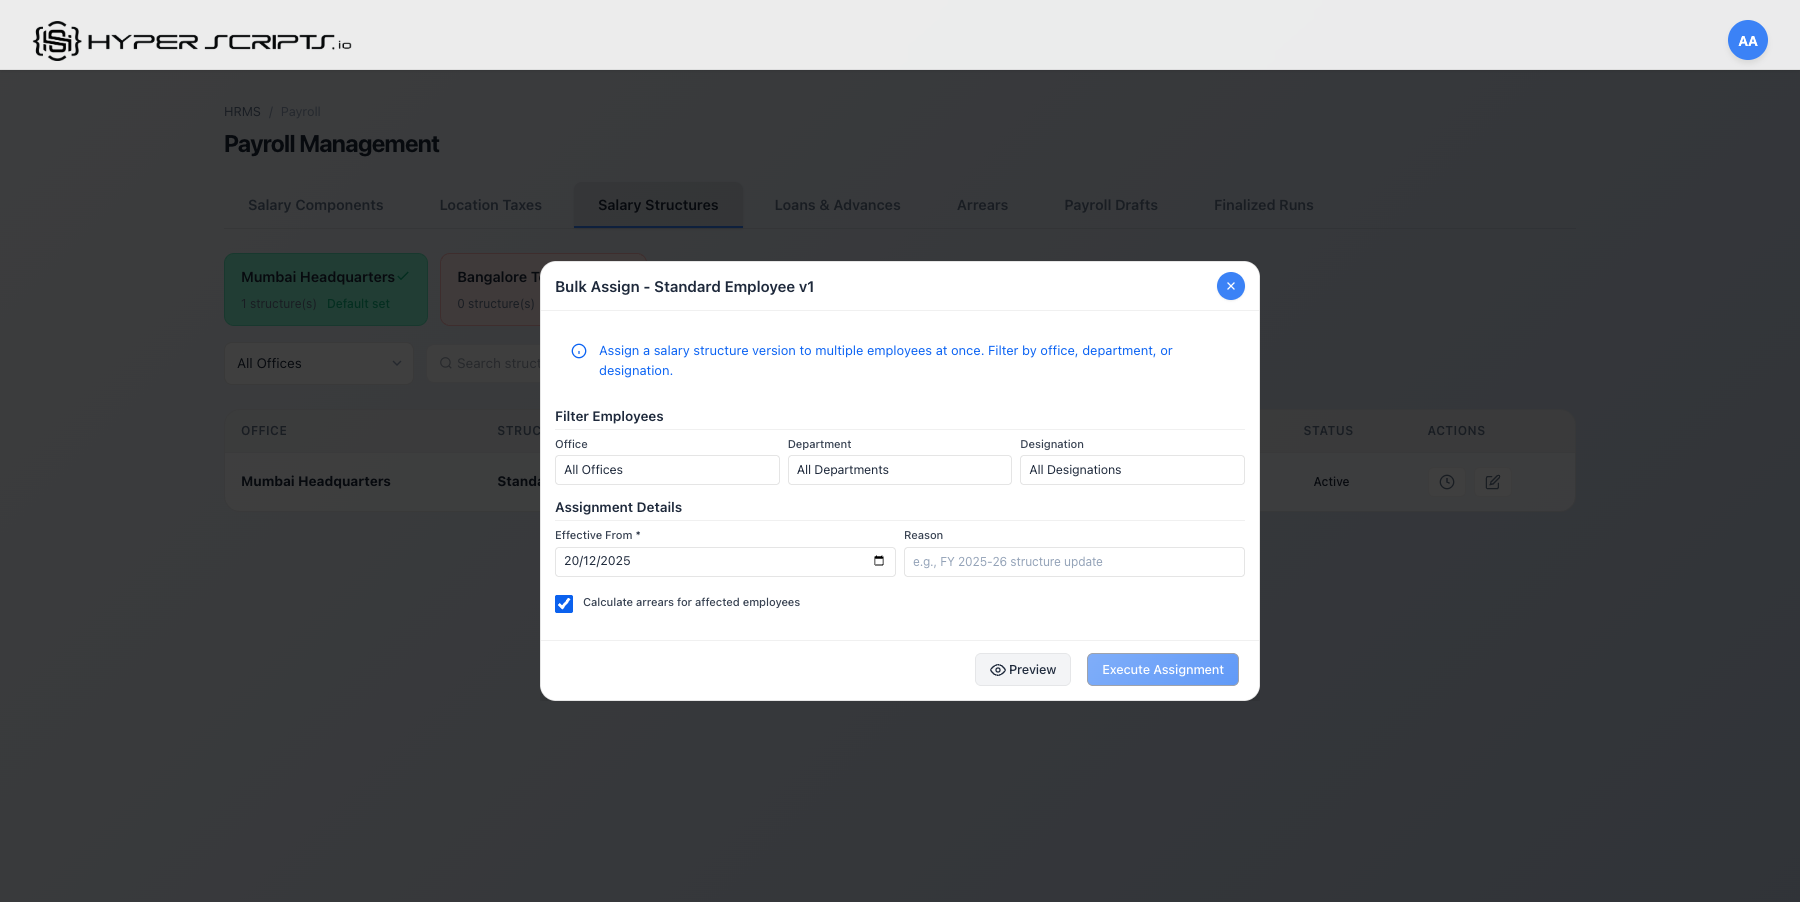
Bulk Assignment with Filters
Click "Bulk Assign" on any version in the Version History modal to open the advanced assignment interface:
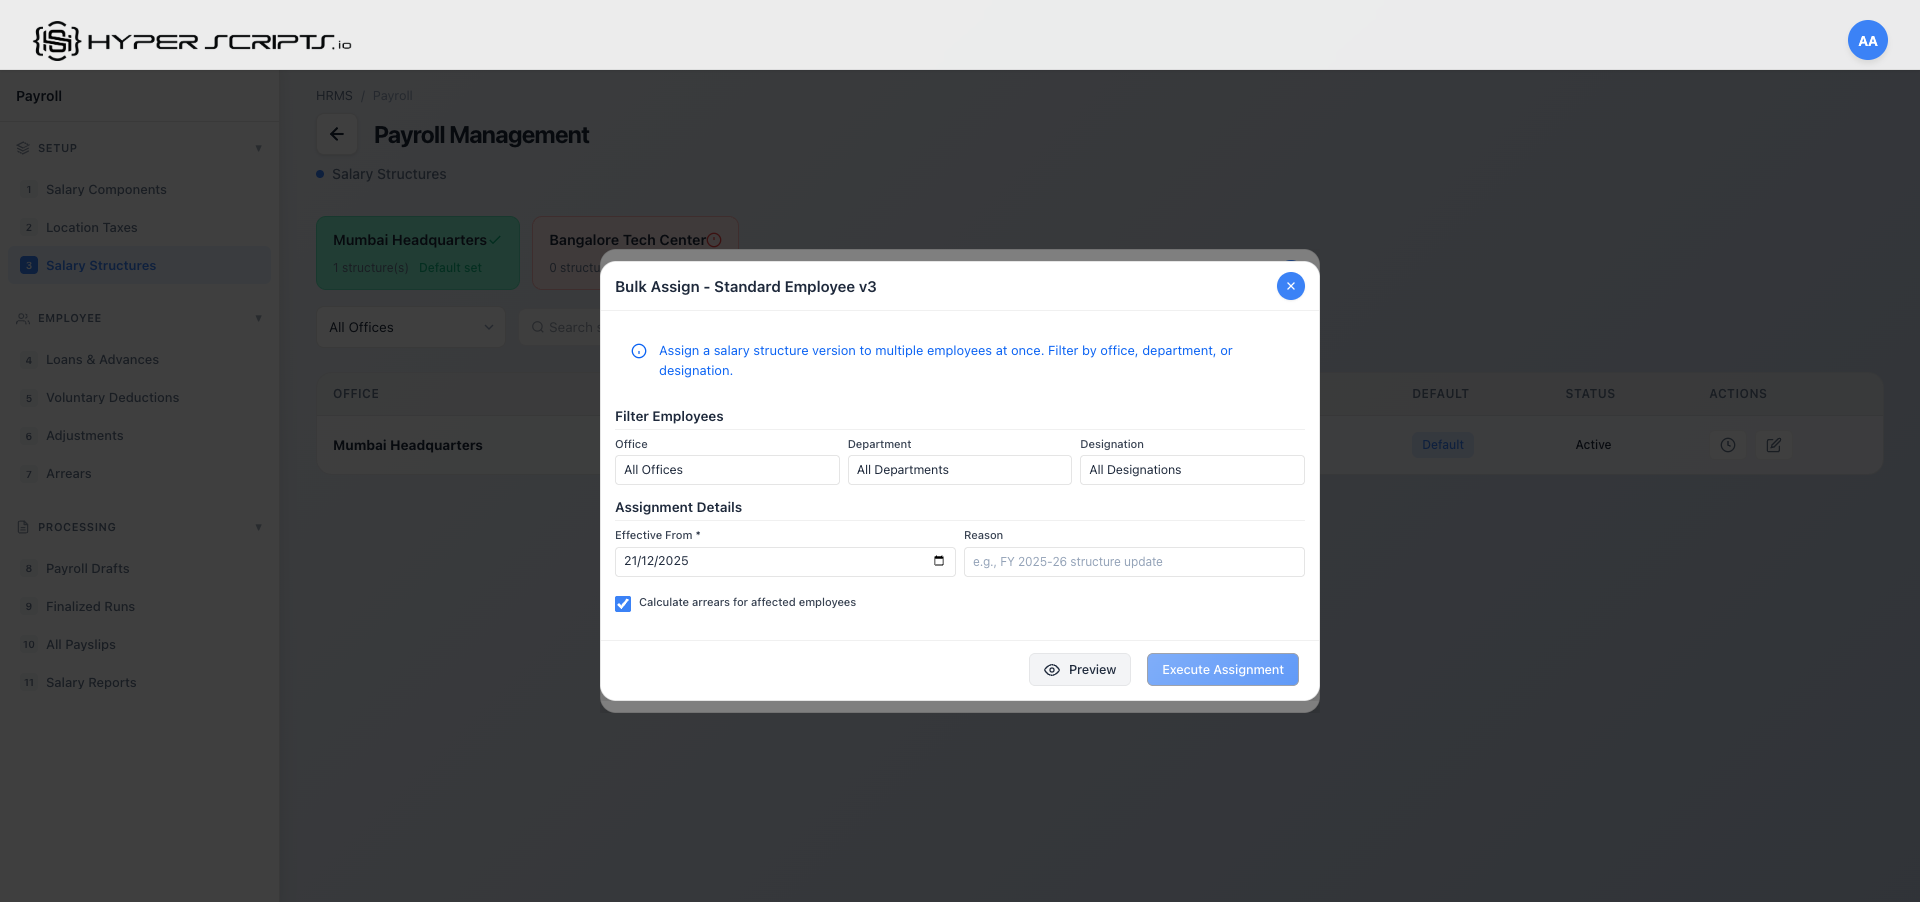
Bulk Assignment Options
| Option | Description |
|---|---|
| Office Filter | Select a specific office to assign only to employees at that location |
| Department Filter | Filter by department (e.g., Engineering, HR, Finance) |
| Designation Filter | Filter by job designation/grade |
| Effective From | Date from which the assignment takes effect |
| Calculate Arrears | When checked, automatically calculates and creates arrears for retroactive assignments |
- Apply annual salary revision to all employees in a department
- Assign location-specific structure to all employees at an office
- Update structure for specific grade/designation levels
- Handle mid-year policy changes with automatic arrears calculation
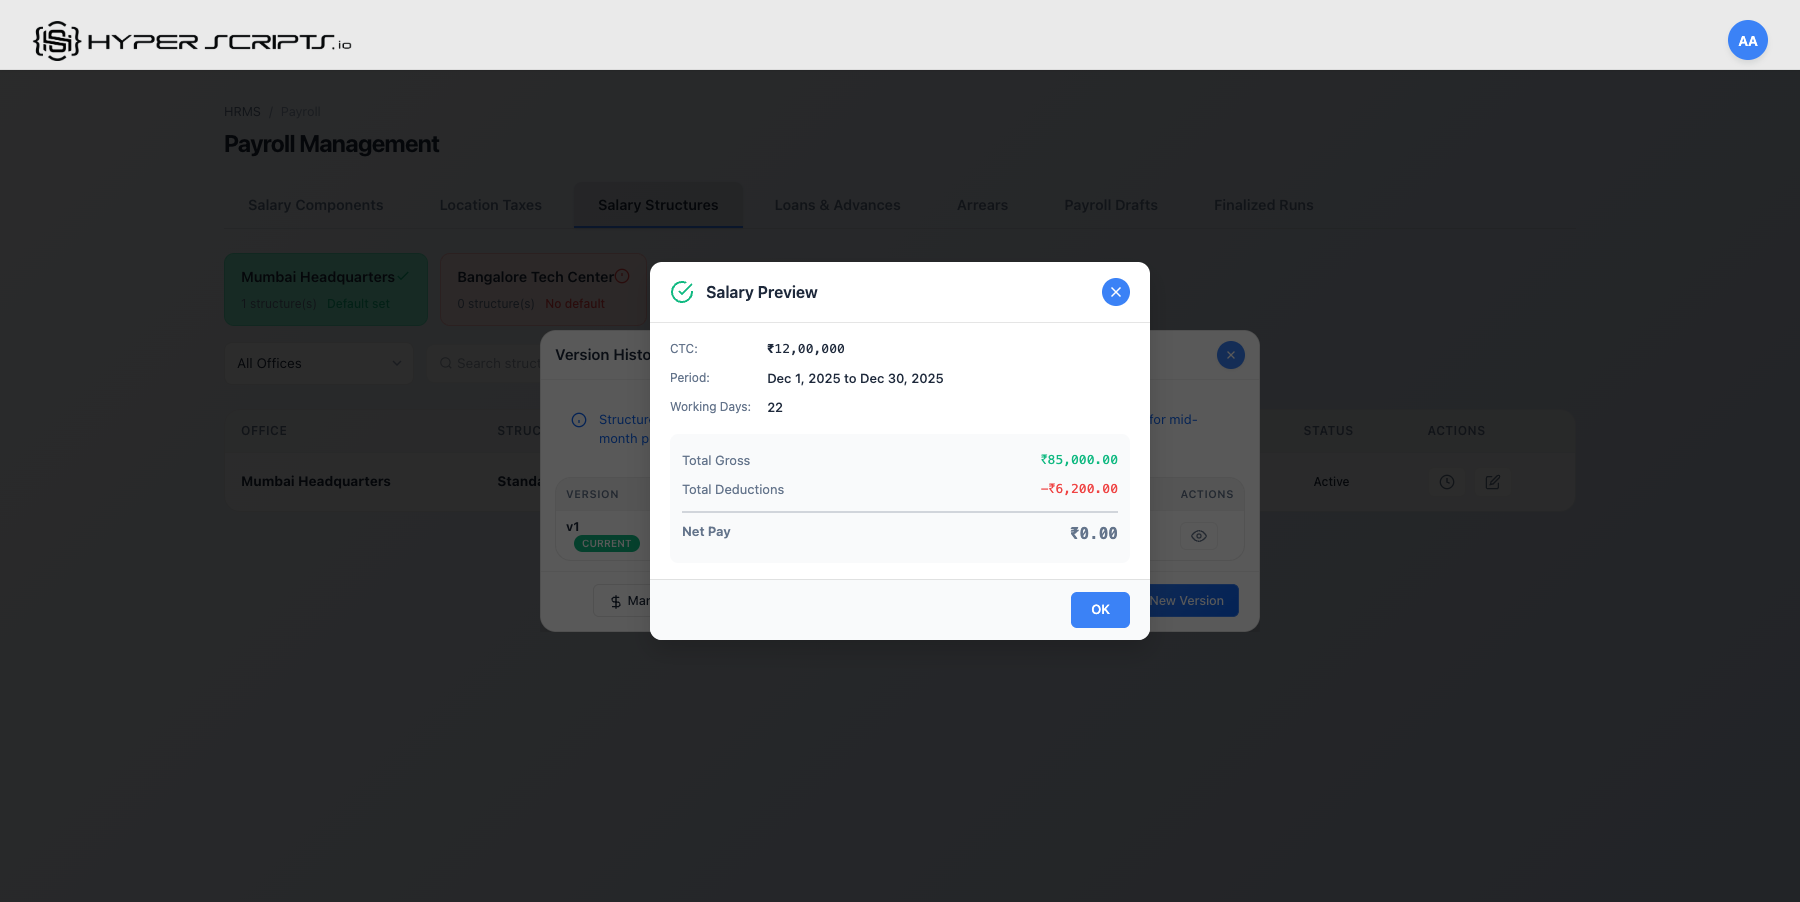
Preview Salary Calculation
Preview how salaries will be calculated before assigning to employees:

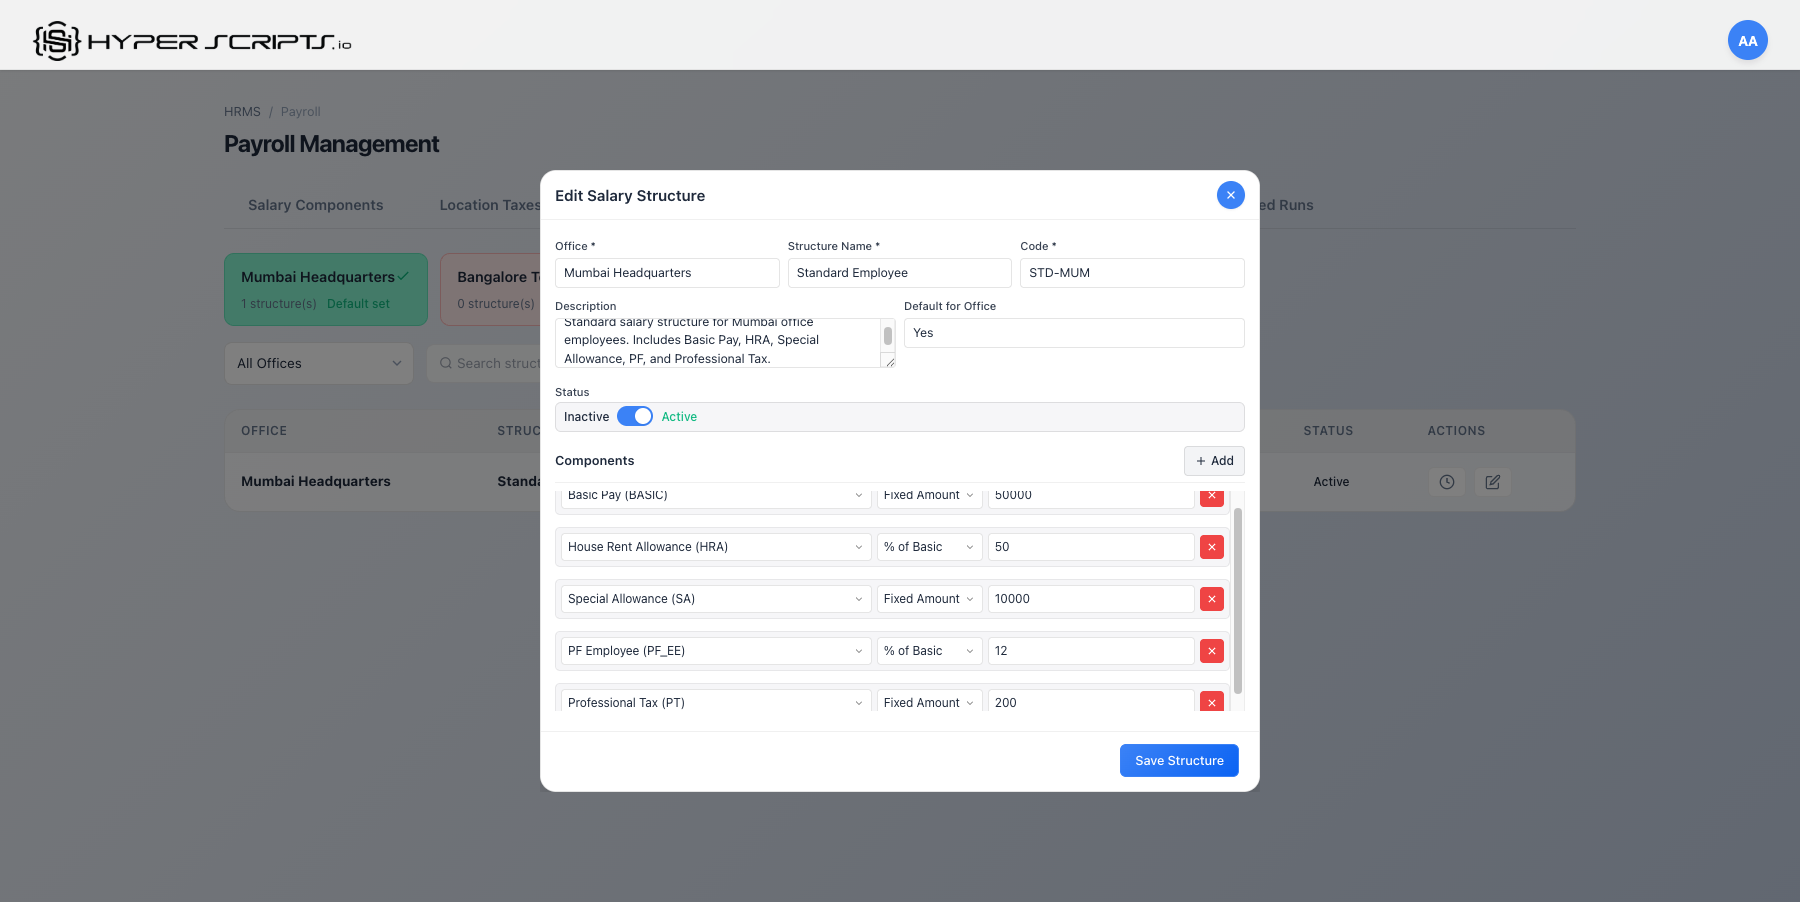
Editing a Structure
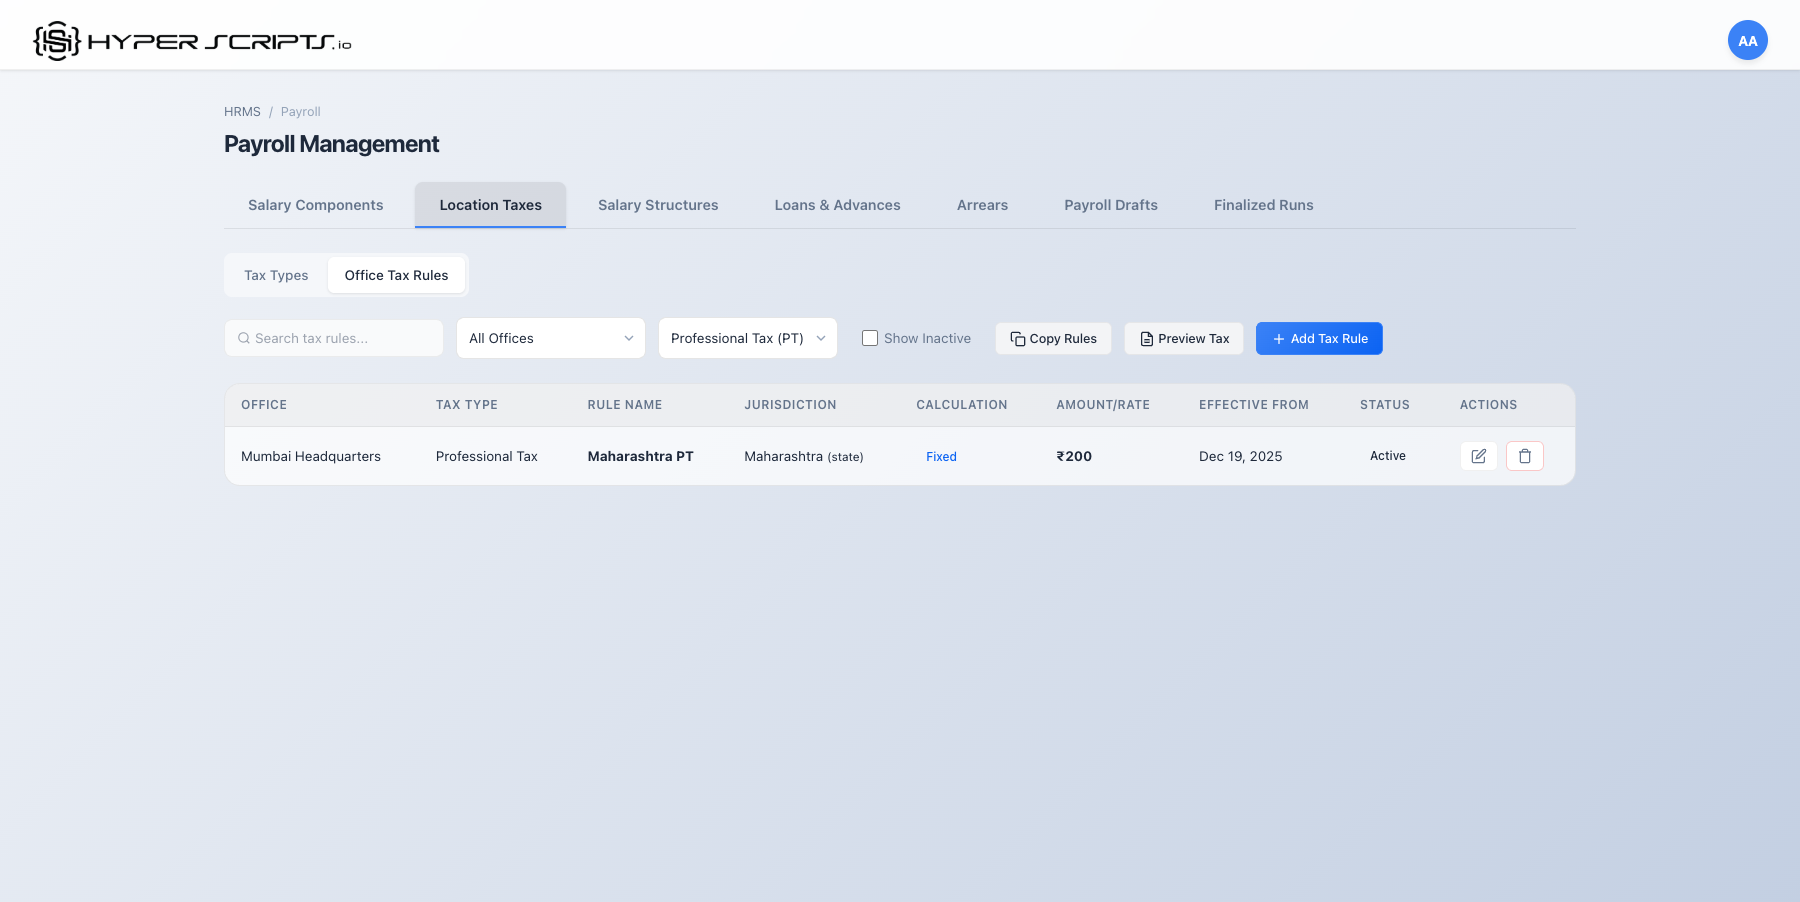
5 Location Taxes
Location Taxes allow you to configure office-specific tax rules like Professional Tax (PT) that vary by state/location.
Understanding Location Taxes
Location taxes are managed through two sub-tabs:
- Tax Types: Define the types of taxes (e.g., Professional Tax, State Tax)
- Office Tax Rules: Configure specific rules for each office
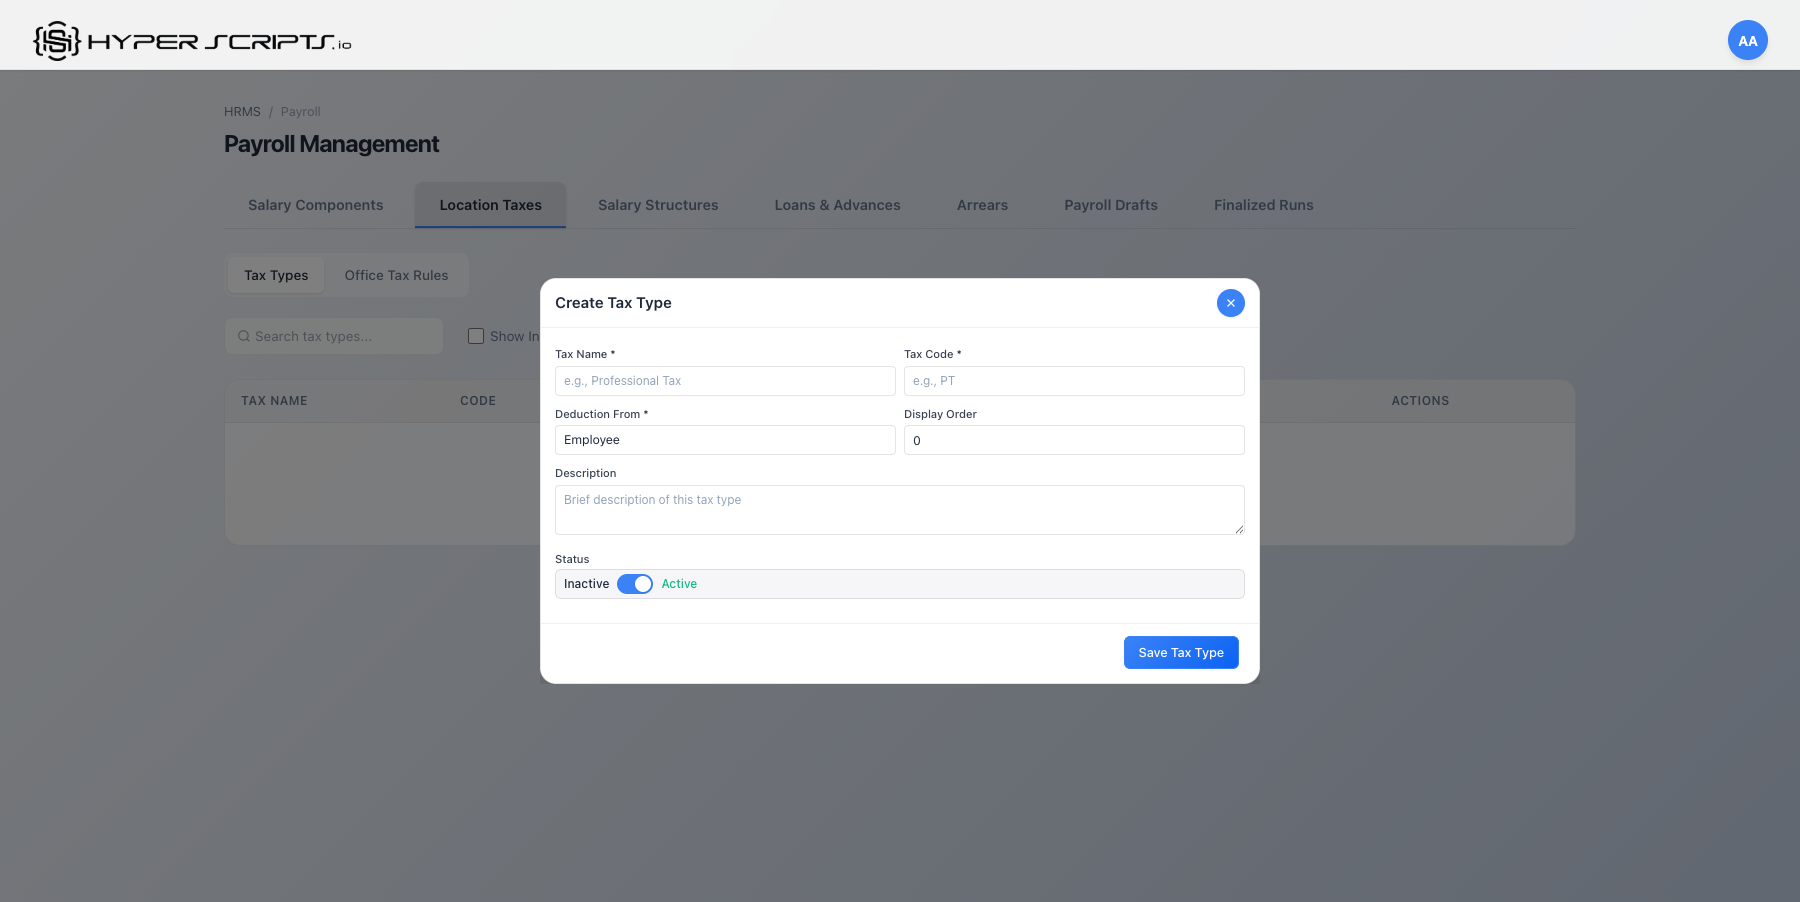
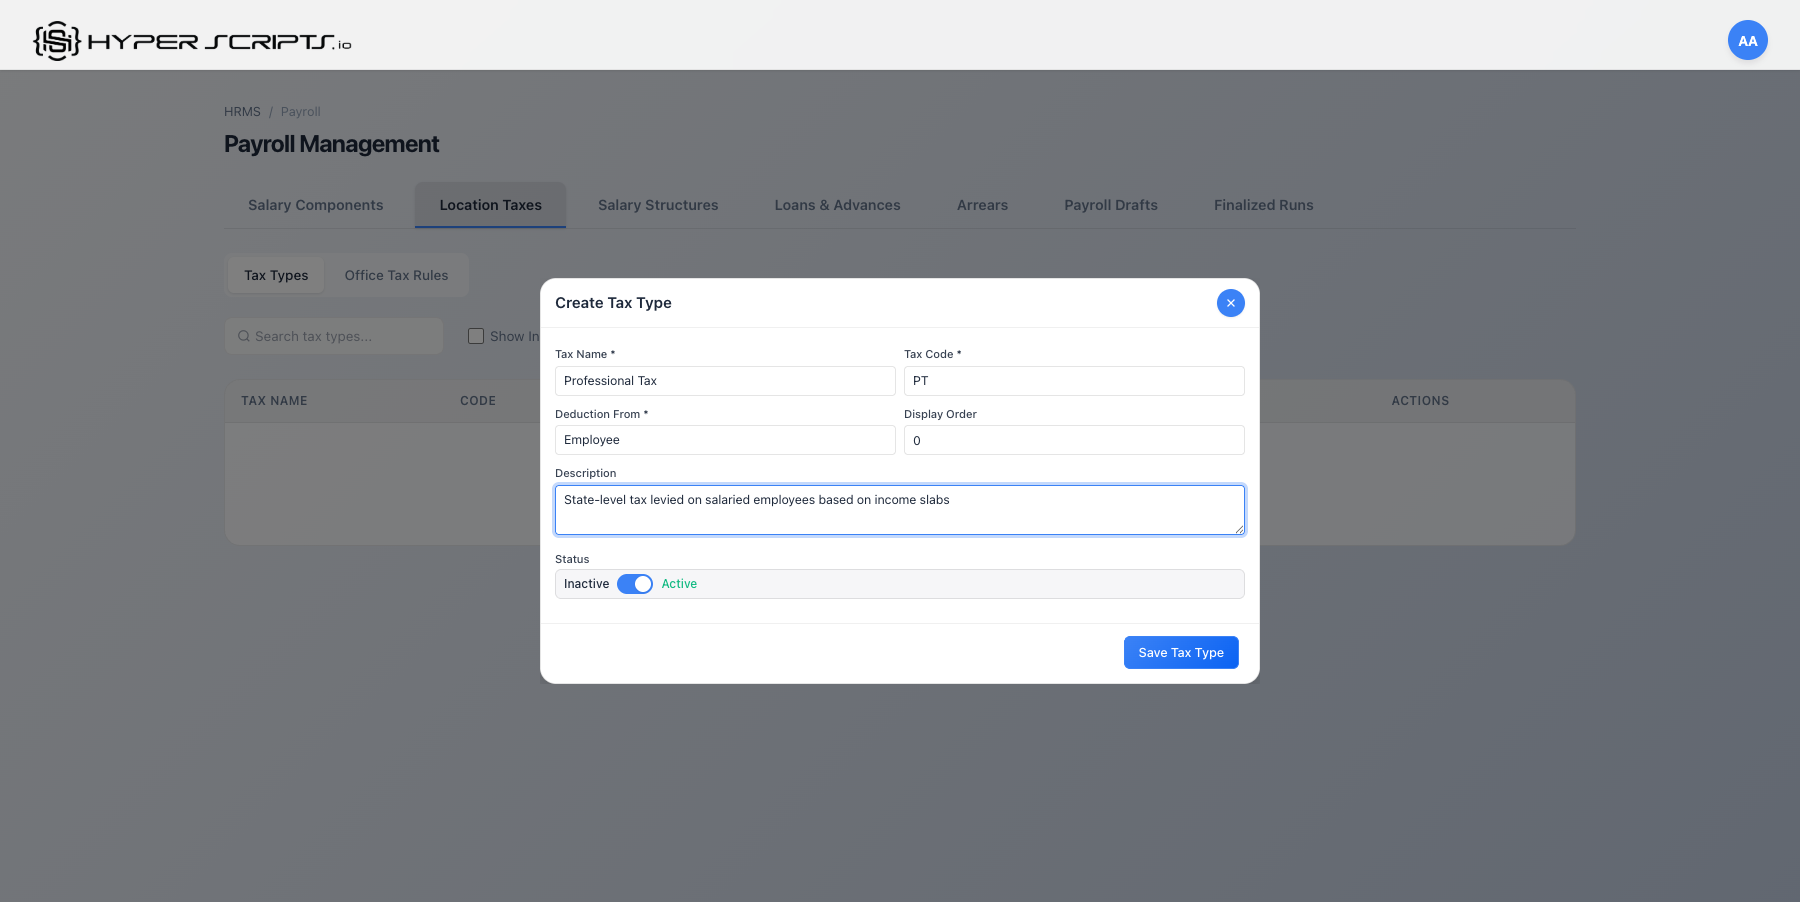
Step 1: Create Tax Types
First, create the tax types your organization needs:
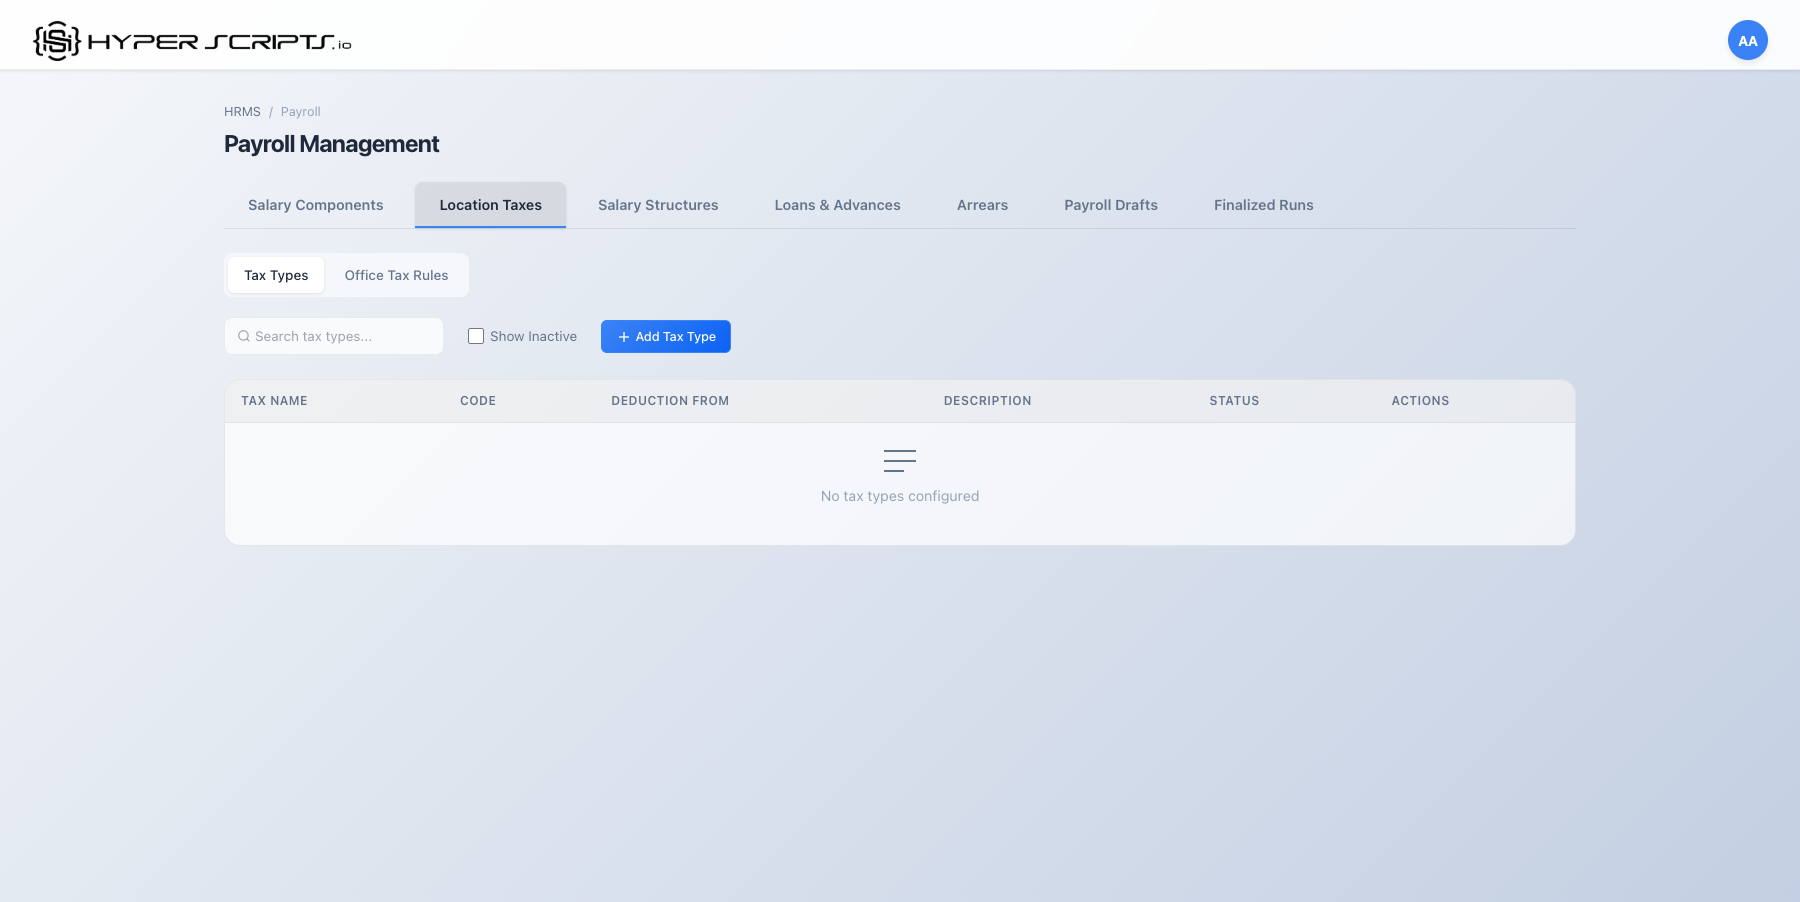

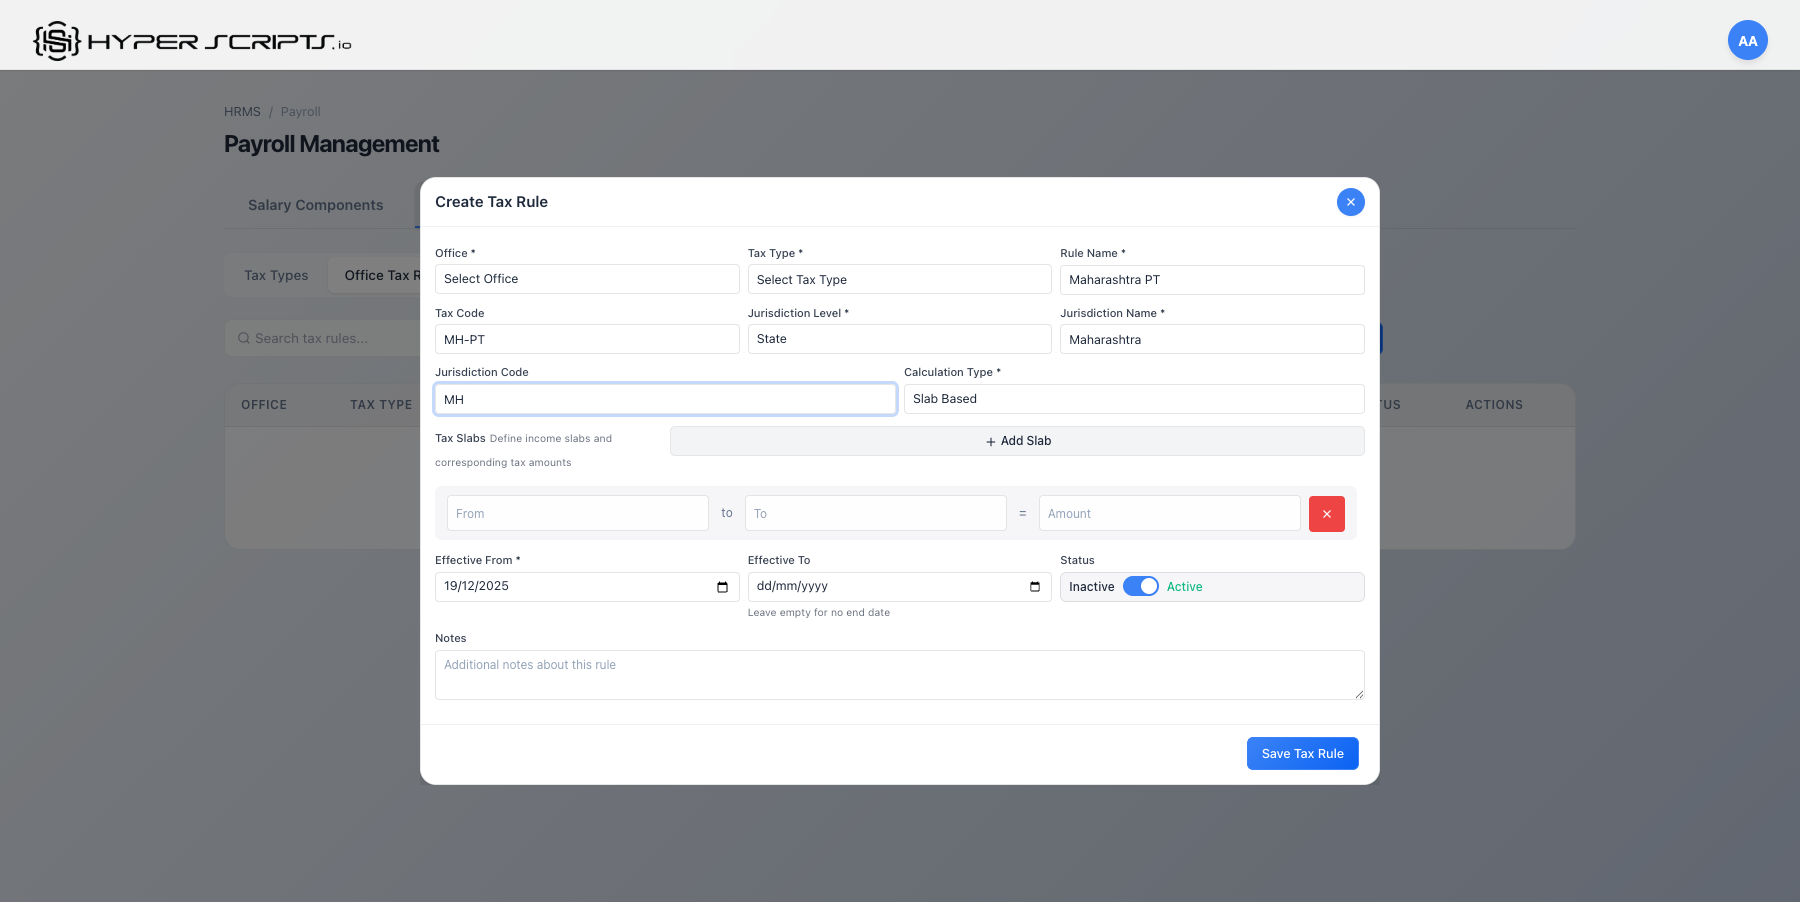
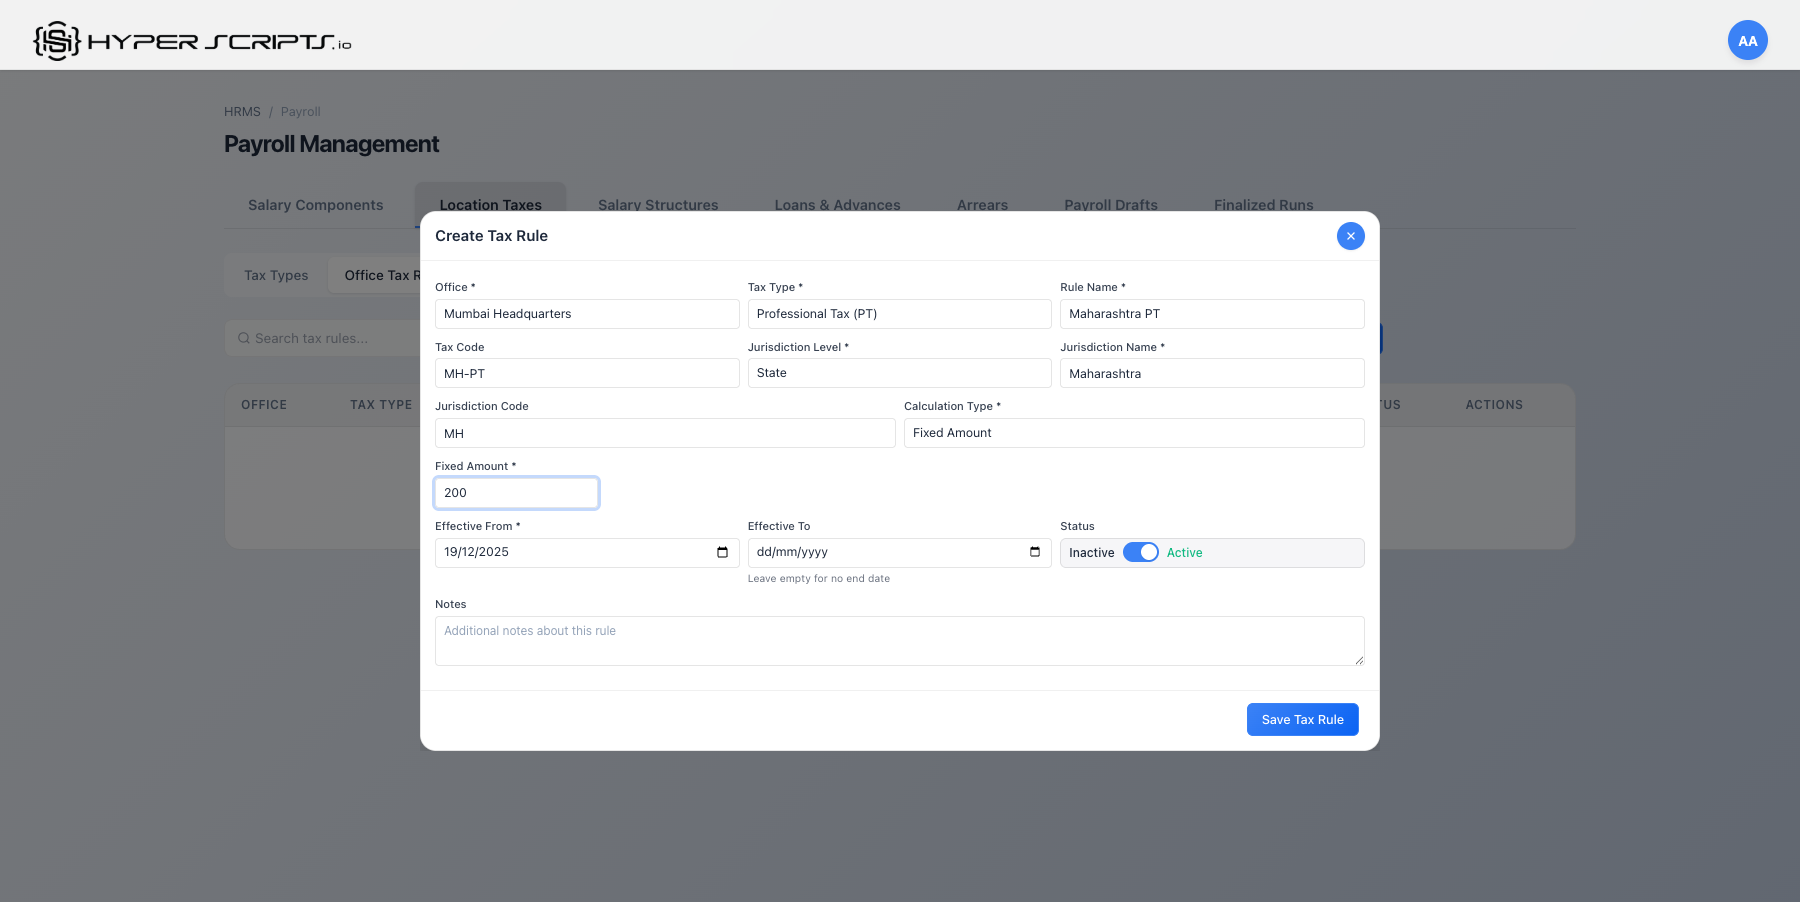
Step 2: Create Office Tax Rules
Switch to "Office Tax Rules" sub-tab and create rules for each office:

Rule Types
| Calculation Type | Description | Example |
|---|---|---|
| Fixed | Same amount for all employees | PT = ₹200/month |
| Percentage | Calculated as % of salary | State Tax = 2% of Gross |
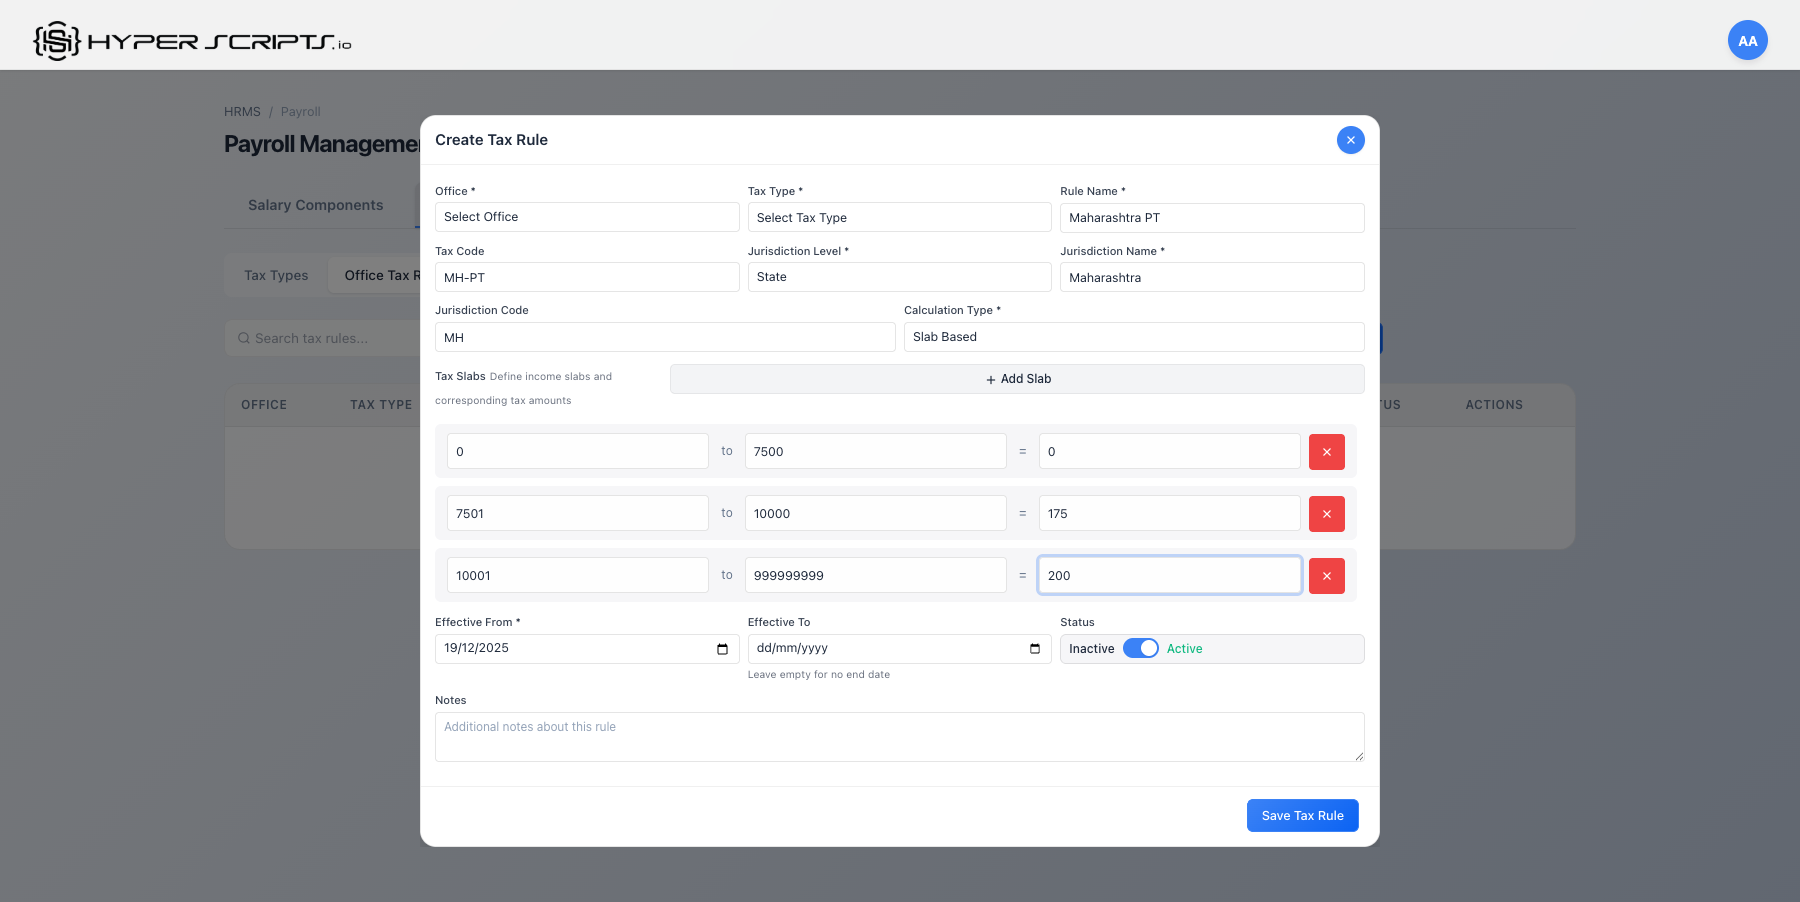
| Slab-Based | Different rates for different salary ranges | PT varies by income slab |
Creating a Slab-Based Rule
Creating a Fixed Rule
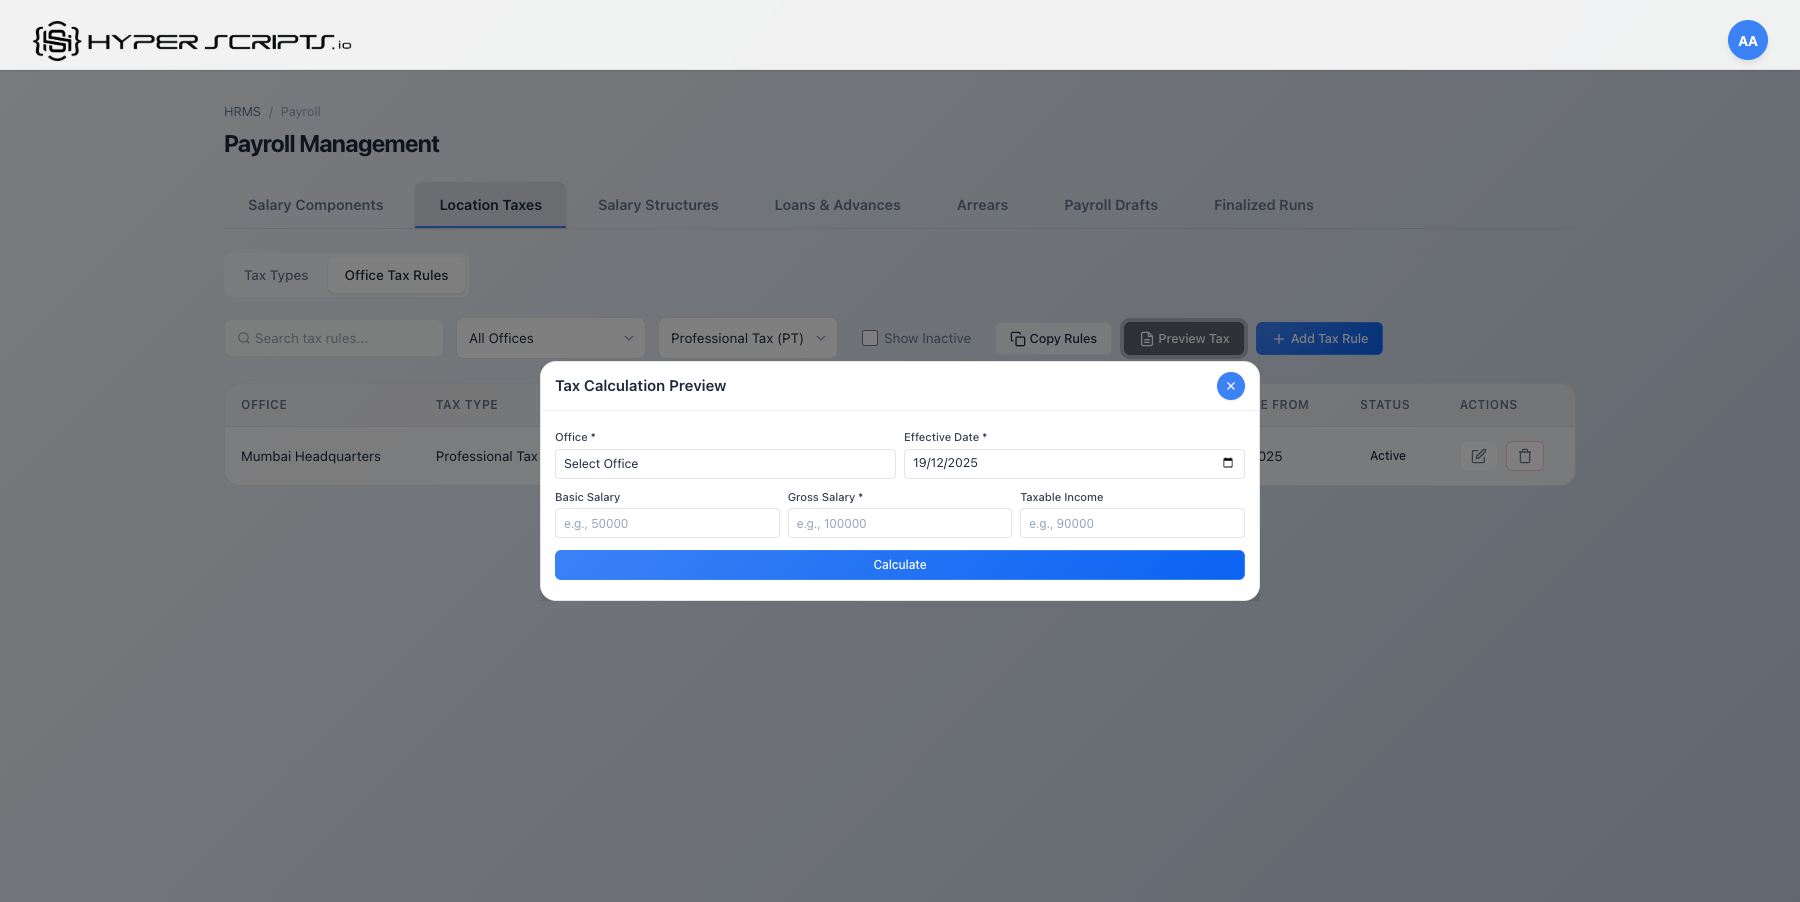
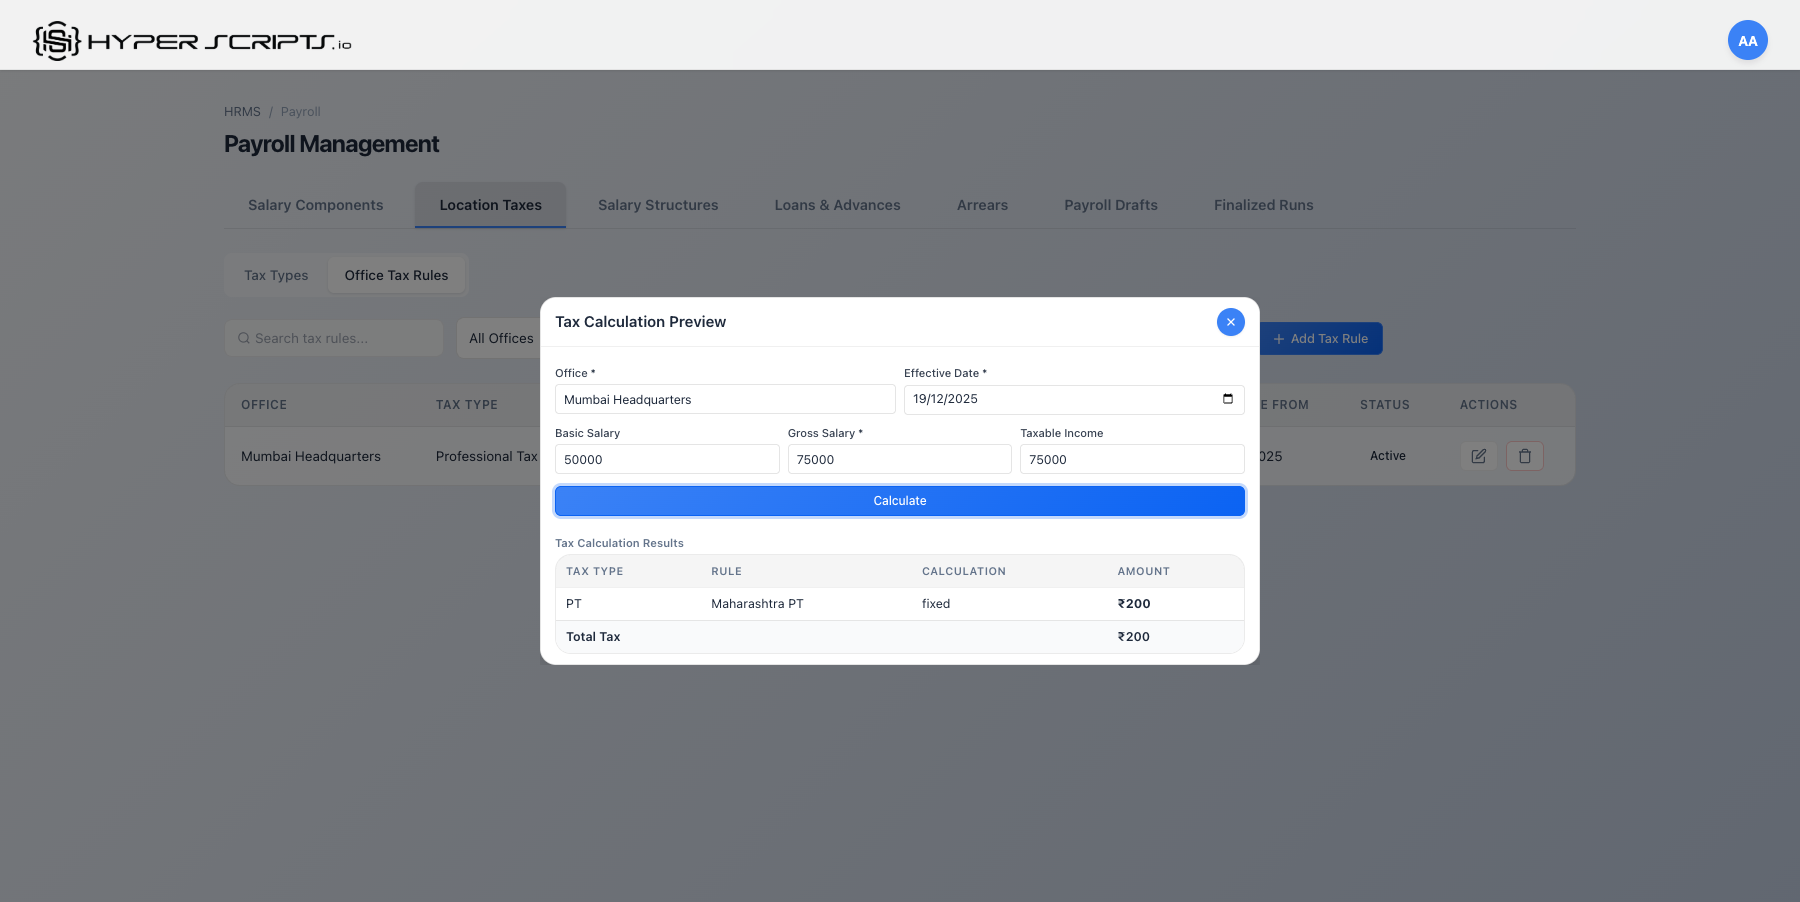
Tax Preview
Preview how taxes will be calculated for a specific salary:
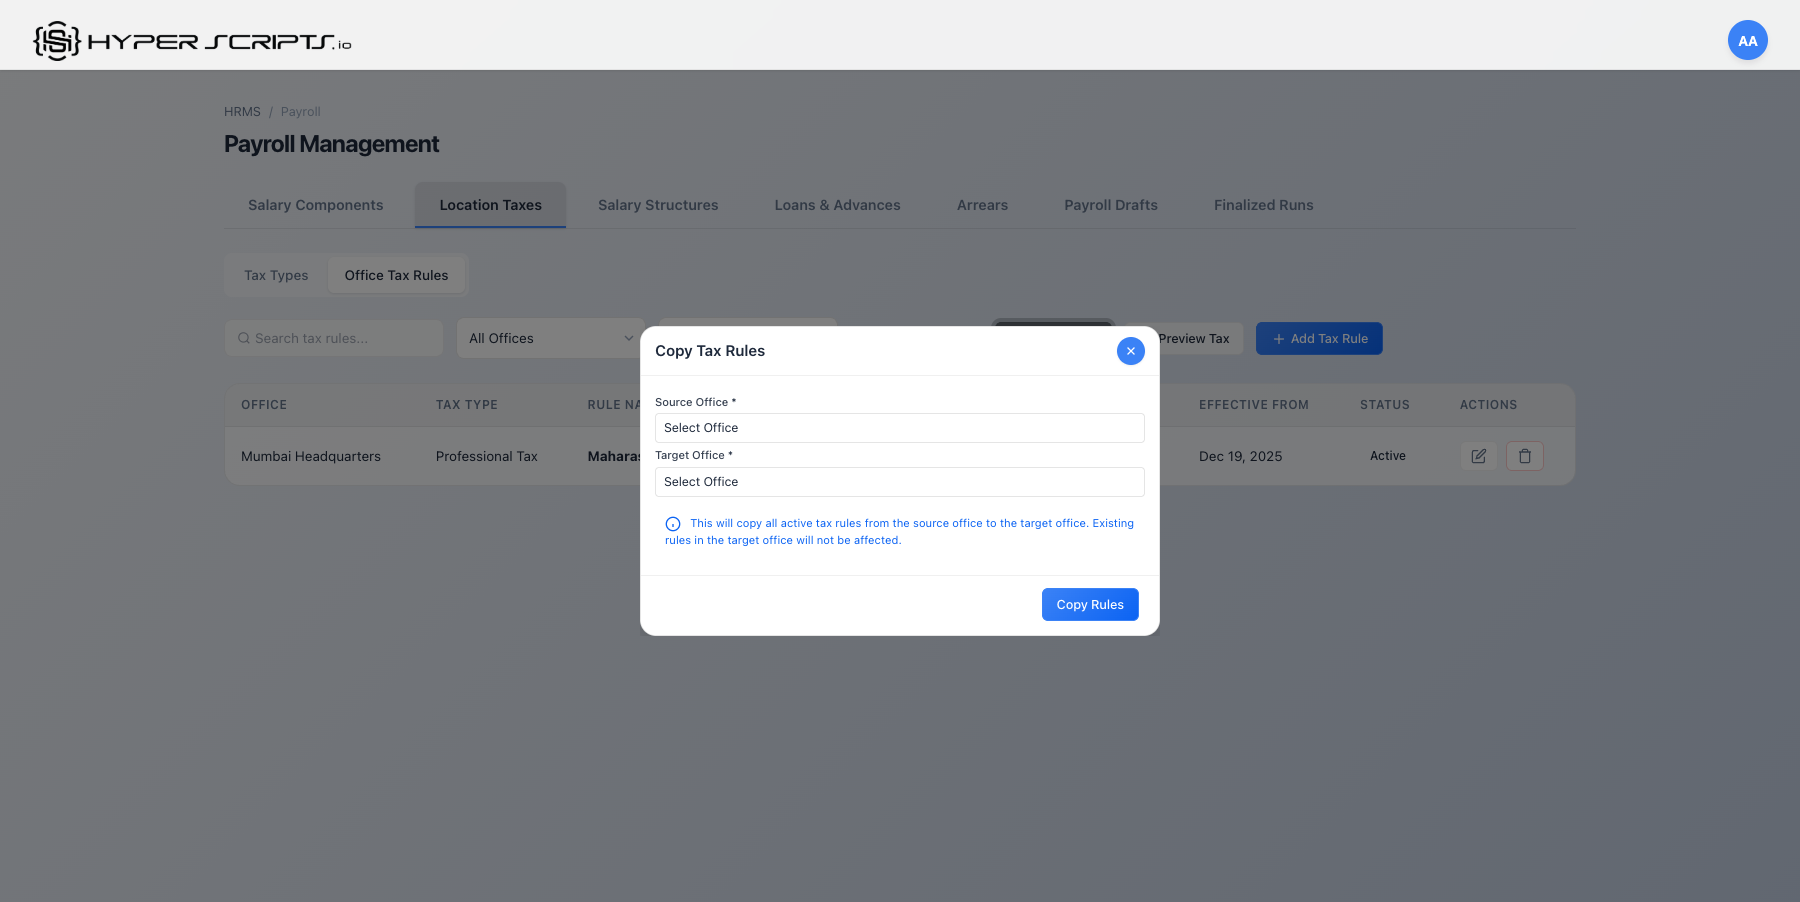
Copy Rules Between Offices
Copy tax rules from one office to another:
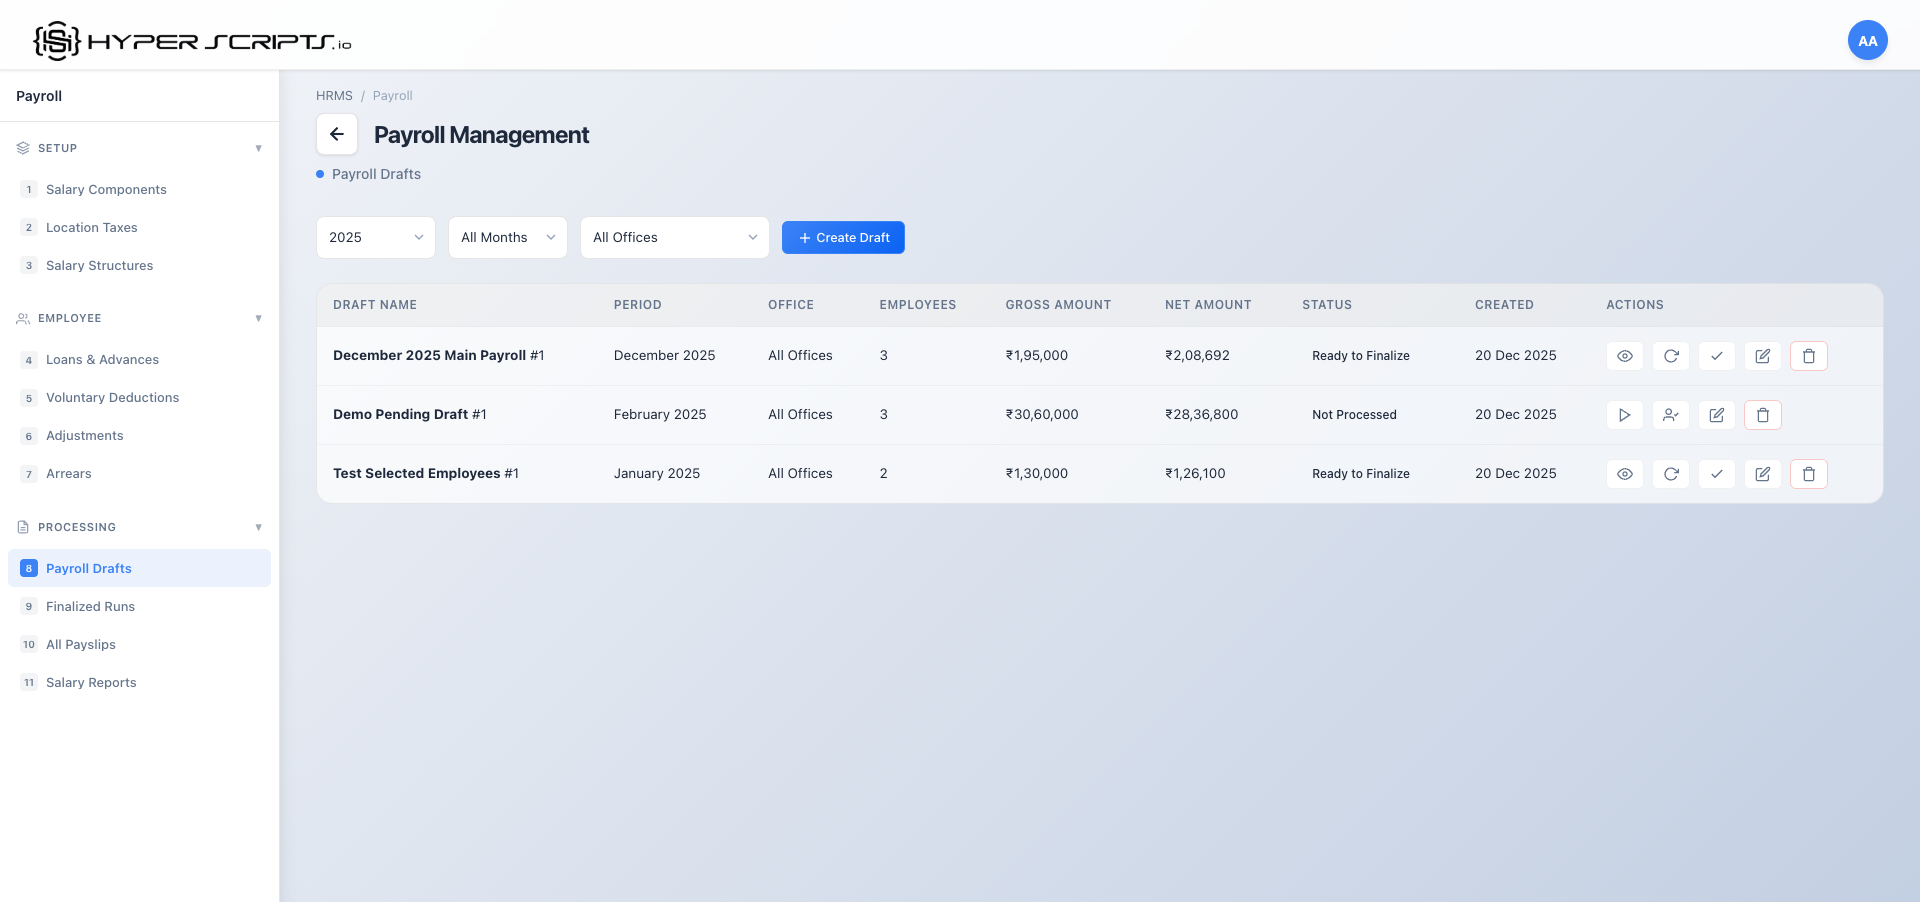
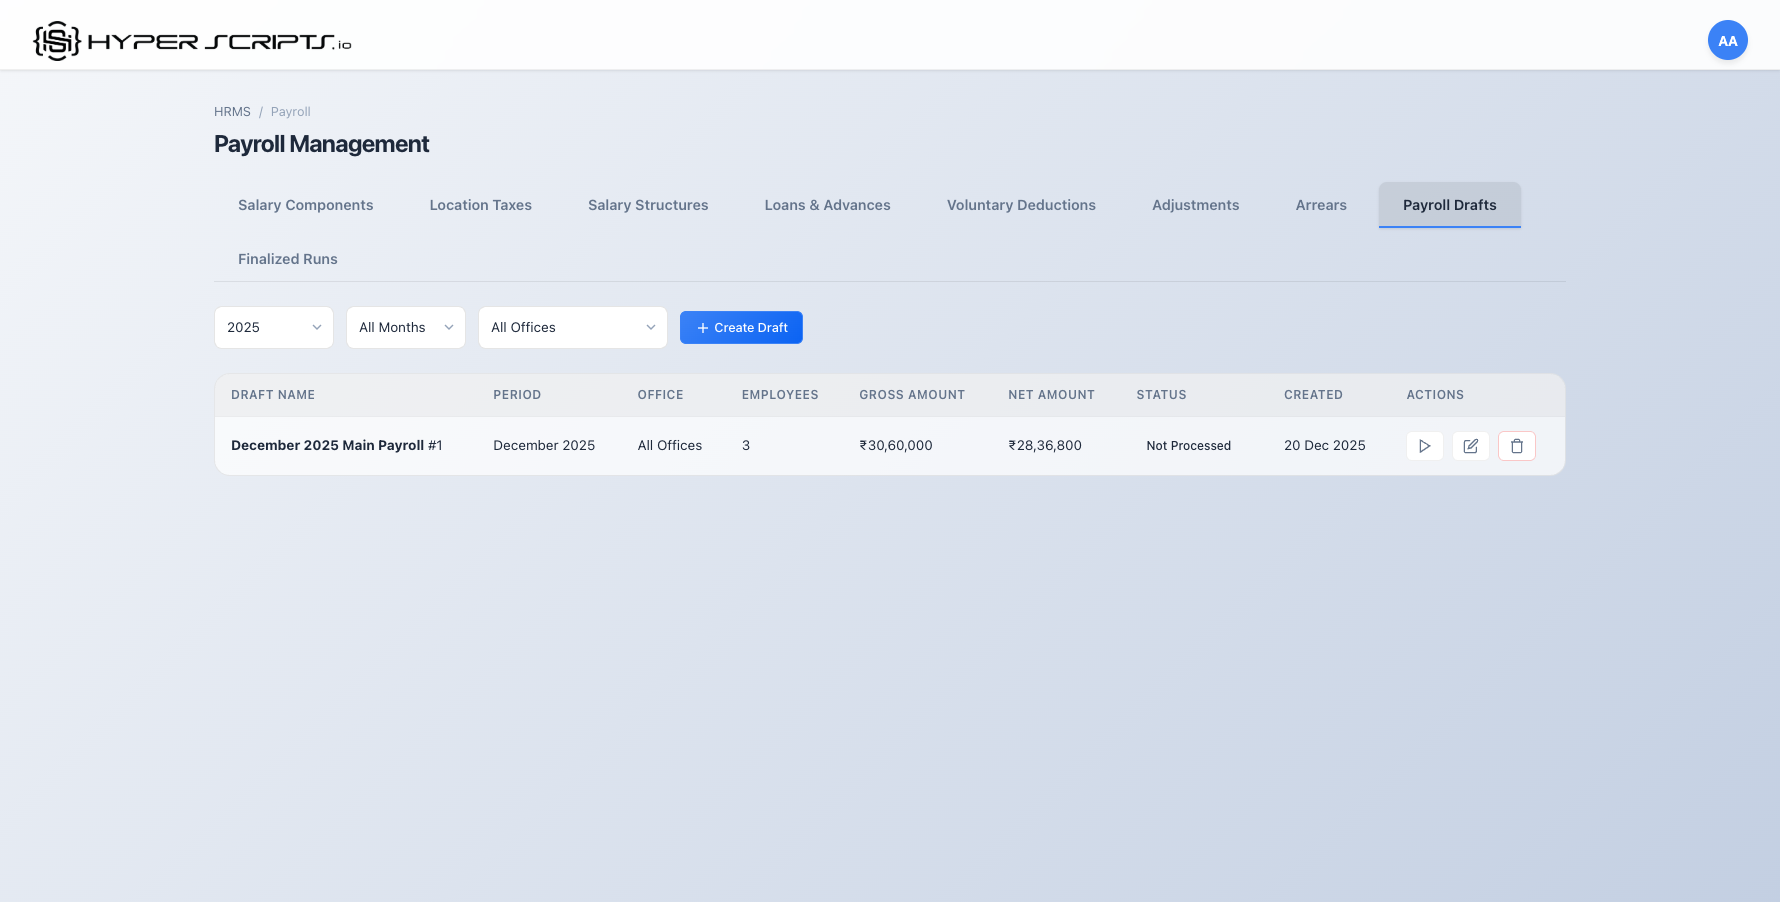
6 Payroll Drafts
Payroll Drafts are where you create and process monthly payroll before finalizing. Drafts can be reviewed, modified, and recalculated until you're ready to finalize.
Step-by-Step: Creating and Processing a Payroll Draft
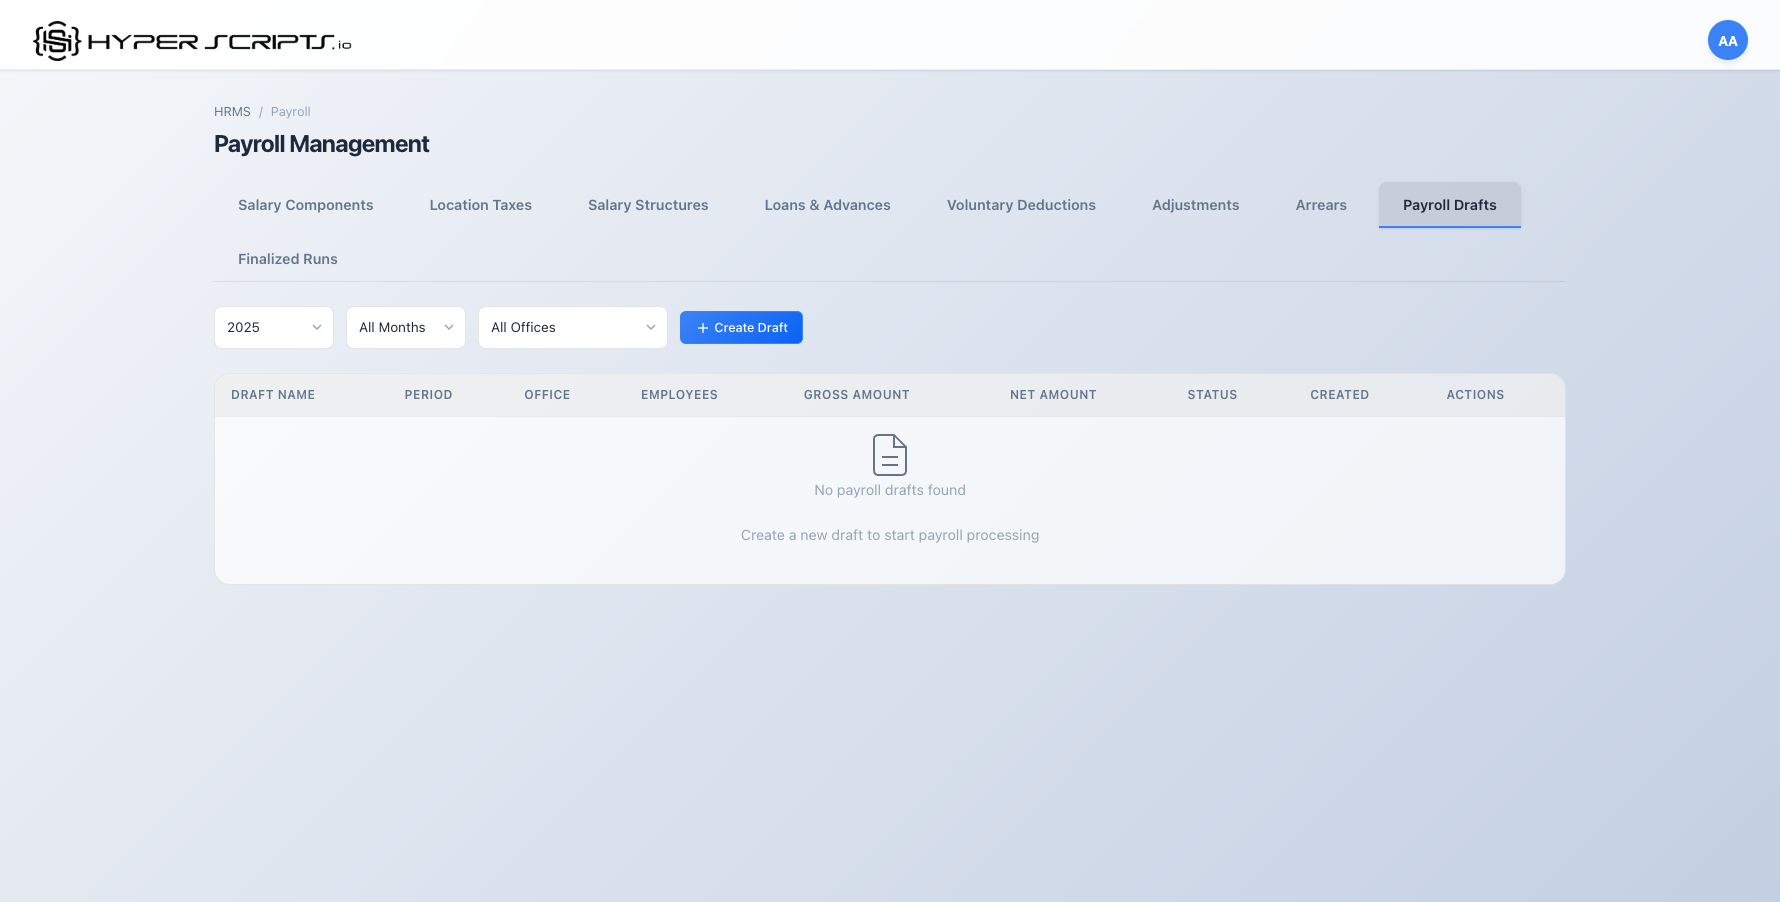
Step 1: View the Drafts Tab
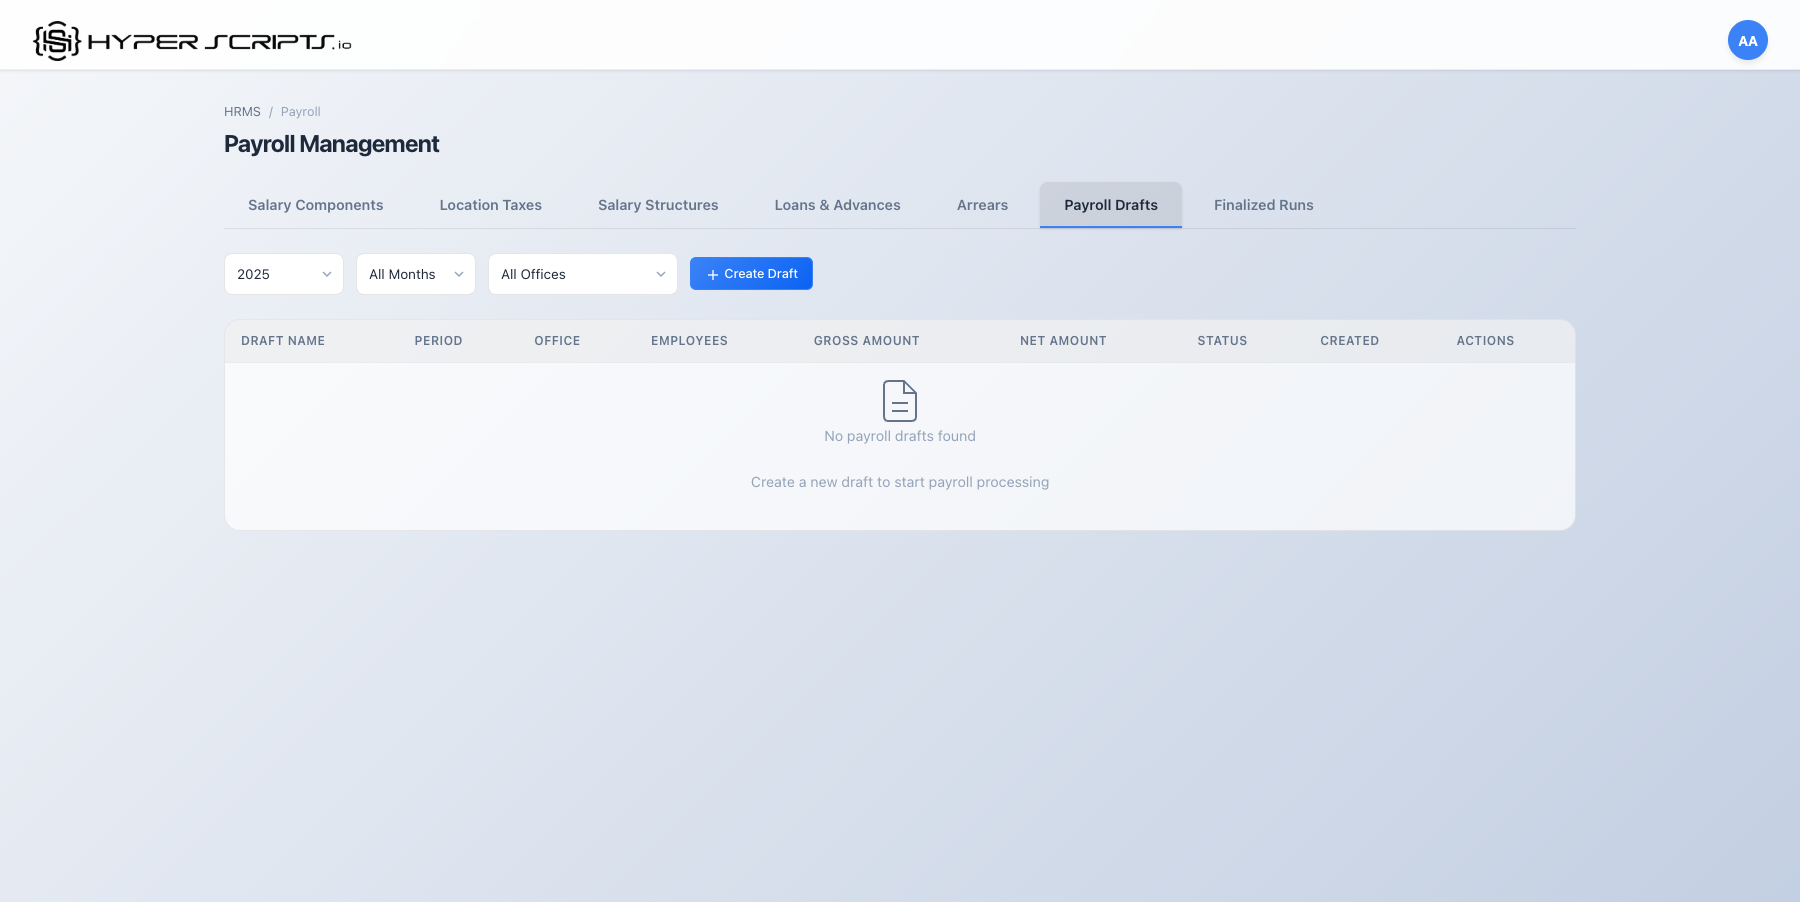
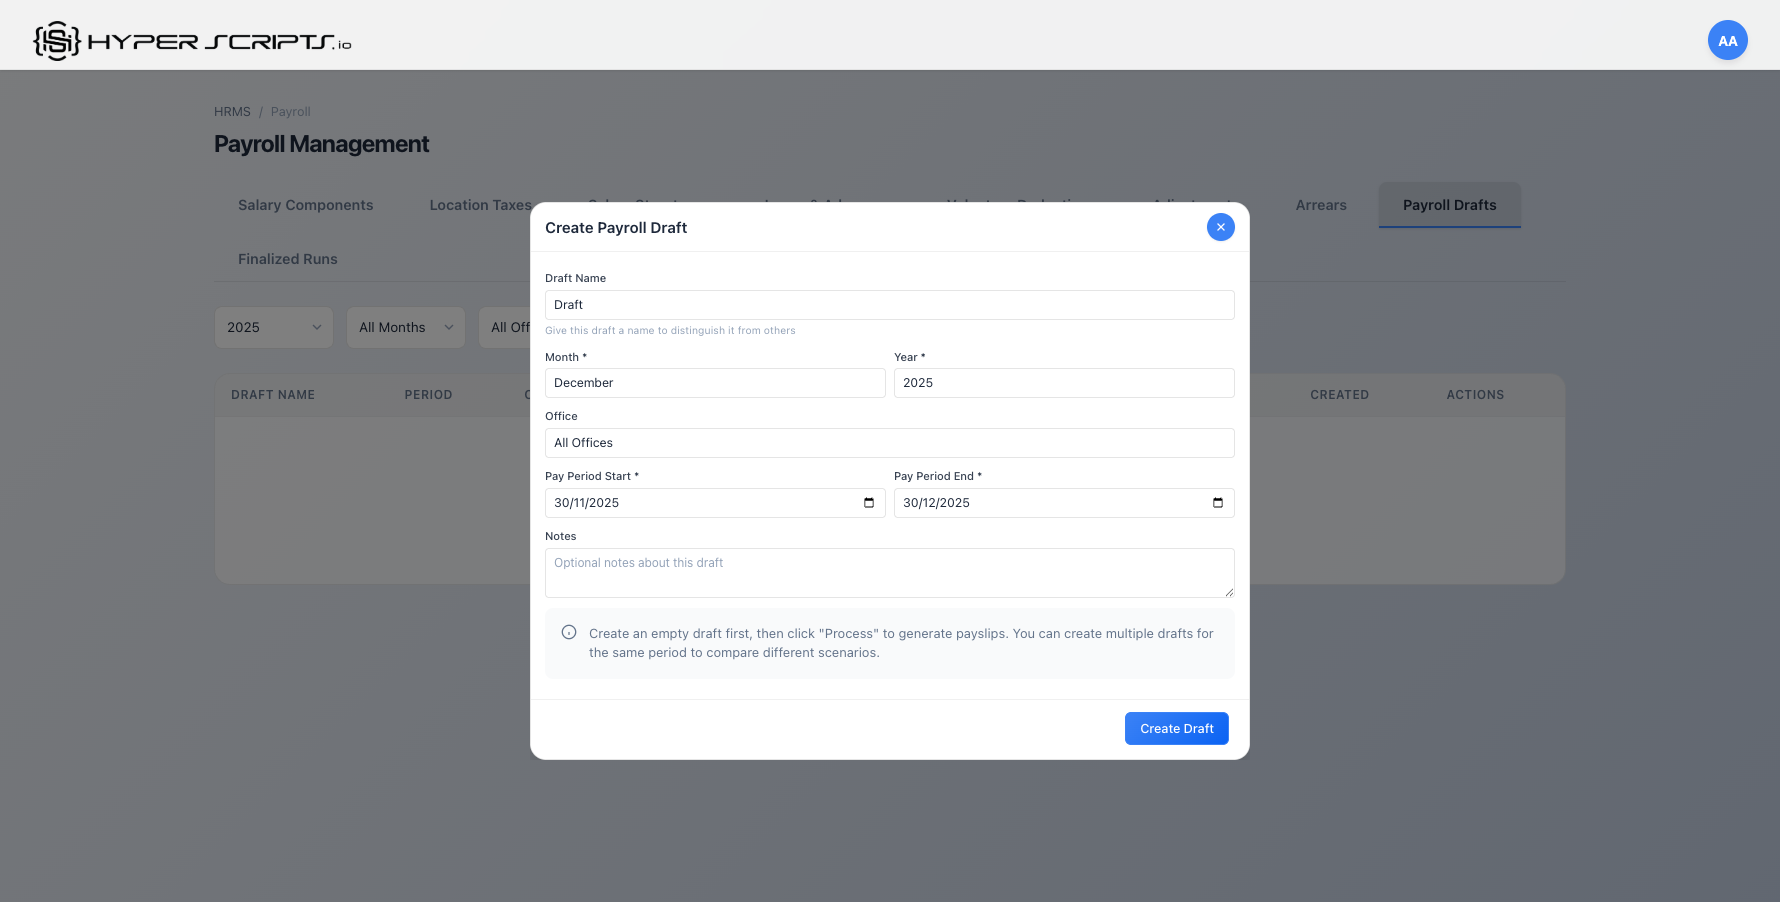
Step 2: Click Create Draft

Using the Month Picker
The Create Draft modal features an HTML5 month picker for easy period selection:
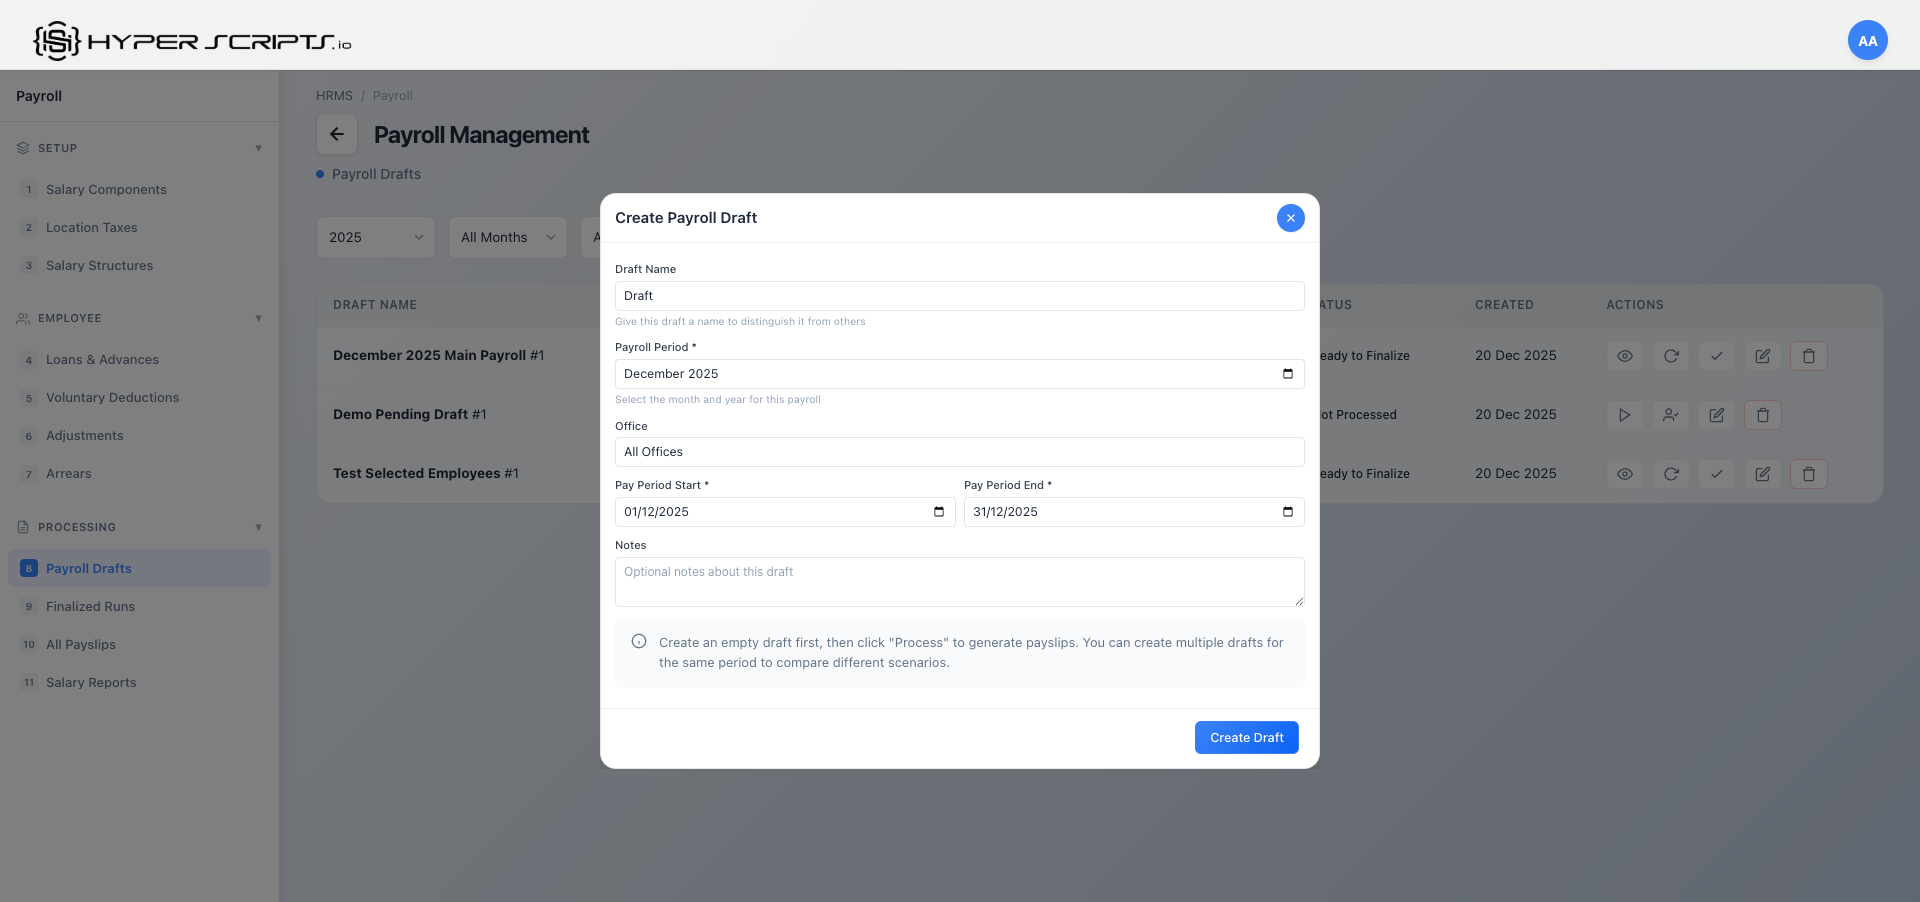
The month picker provides:
- Quick Month Selection: Click to open a calendar-style month/year picker
- Keyboard Navigation: Use arrow keys to navigate months
- Validation: Prevents selecting future months or already-finalized periods
- Format: Displays as "YYYY-MM" but shows friendly format in UI
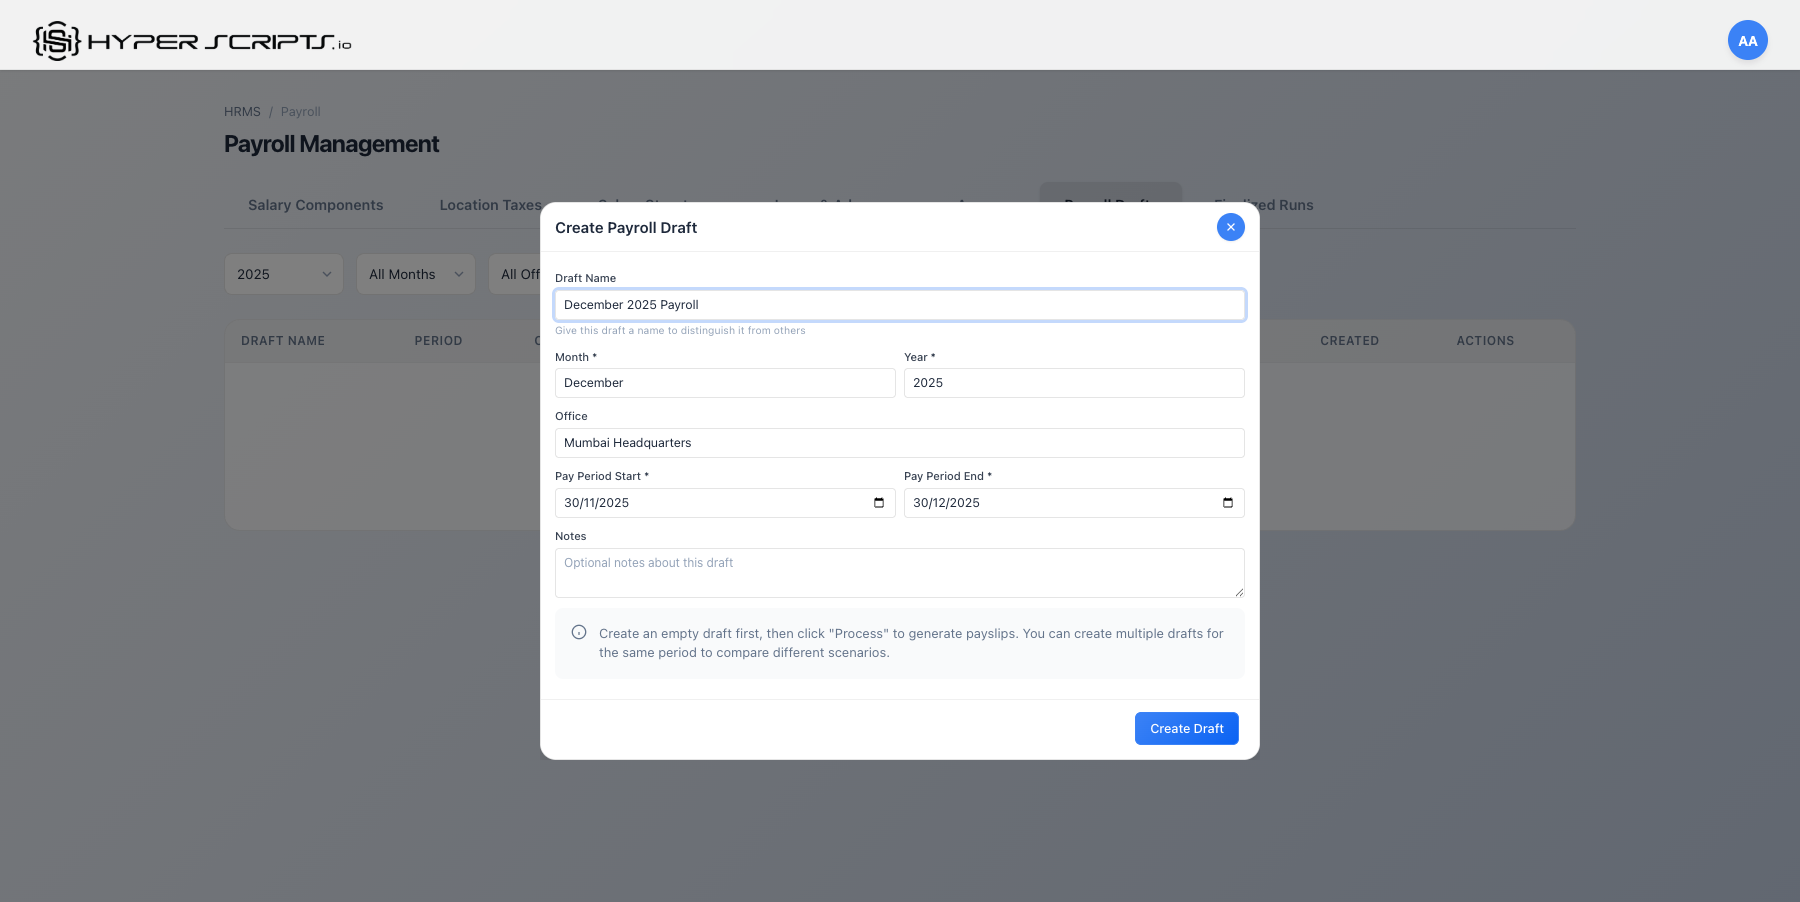
Step 3: Fill Draft Details
Step 4: View Created Draft
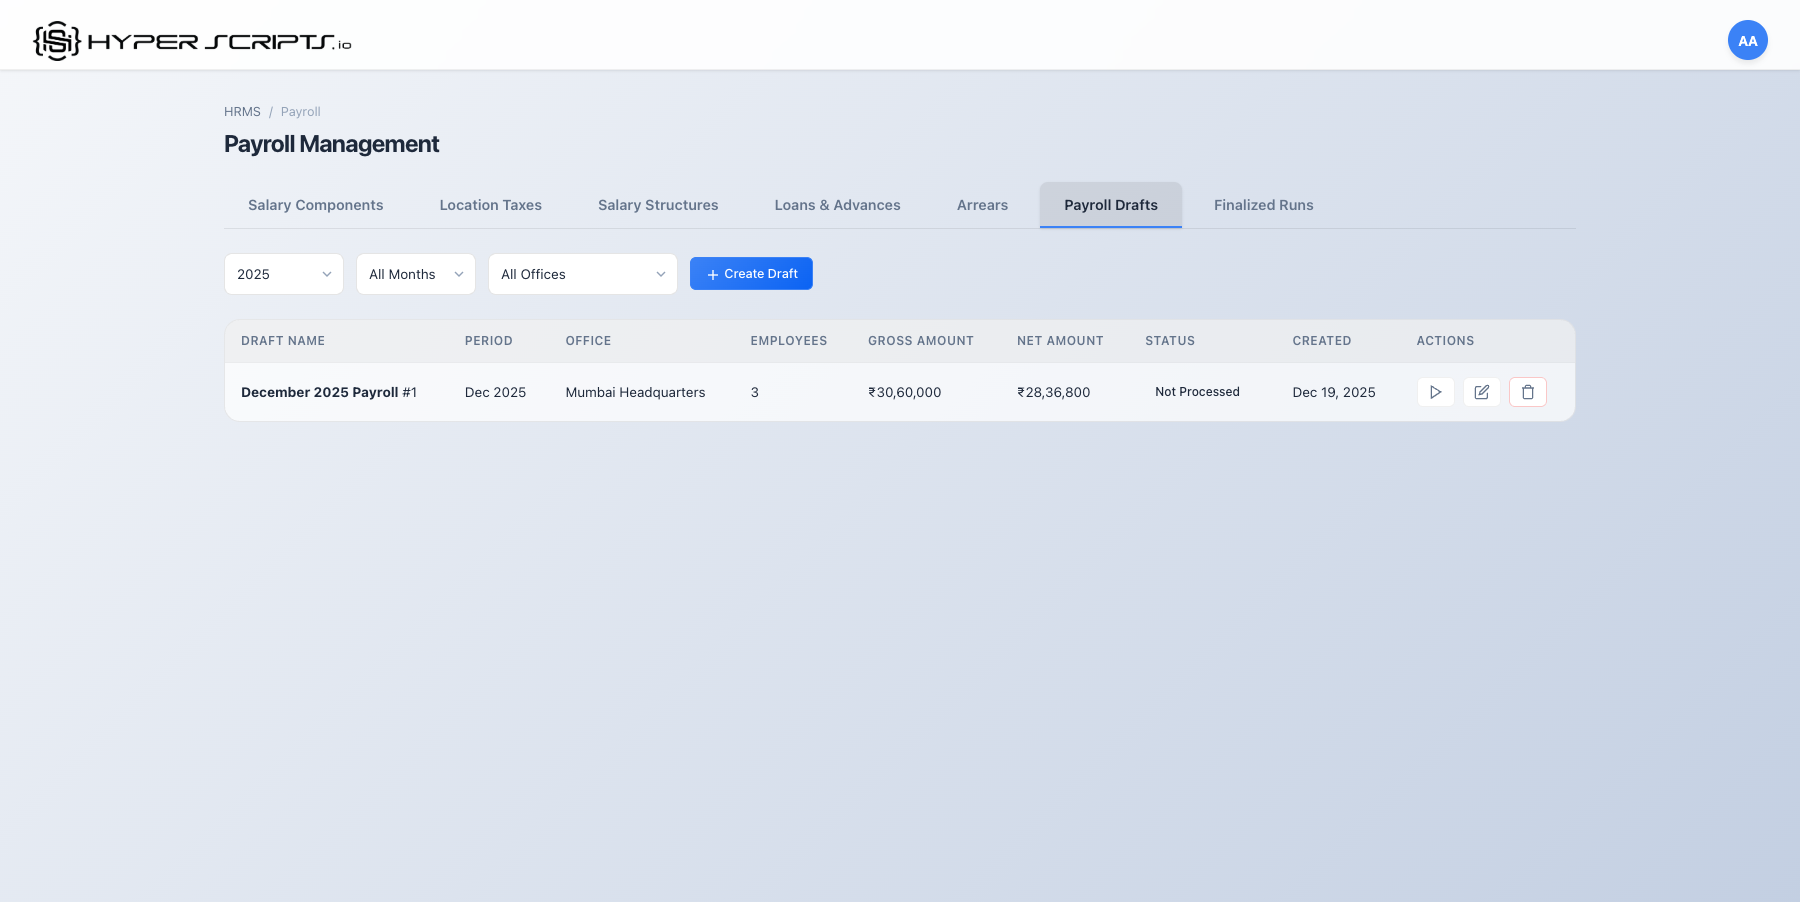
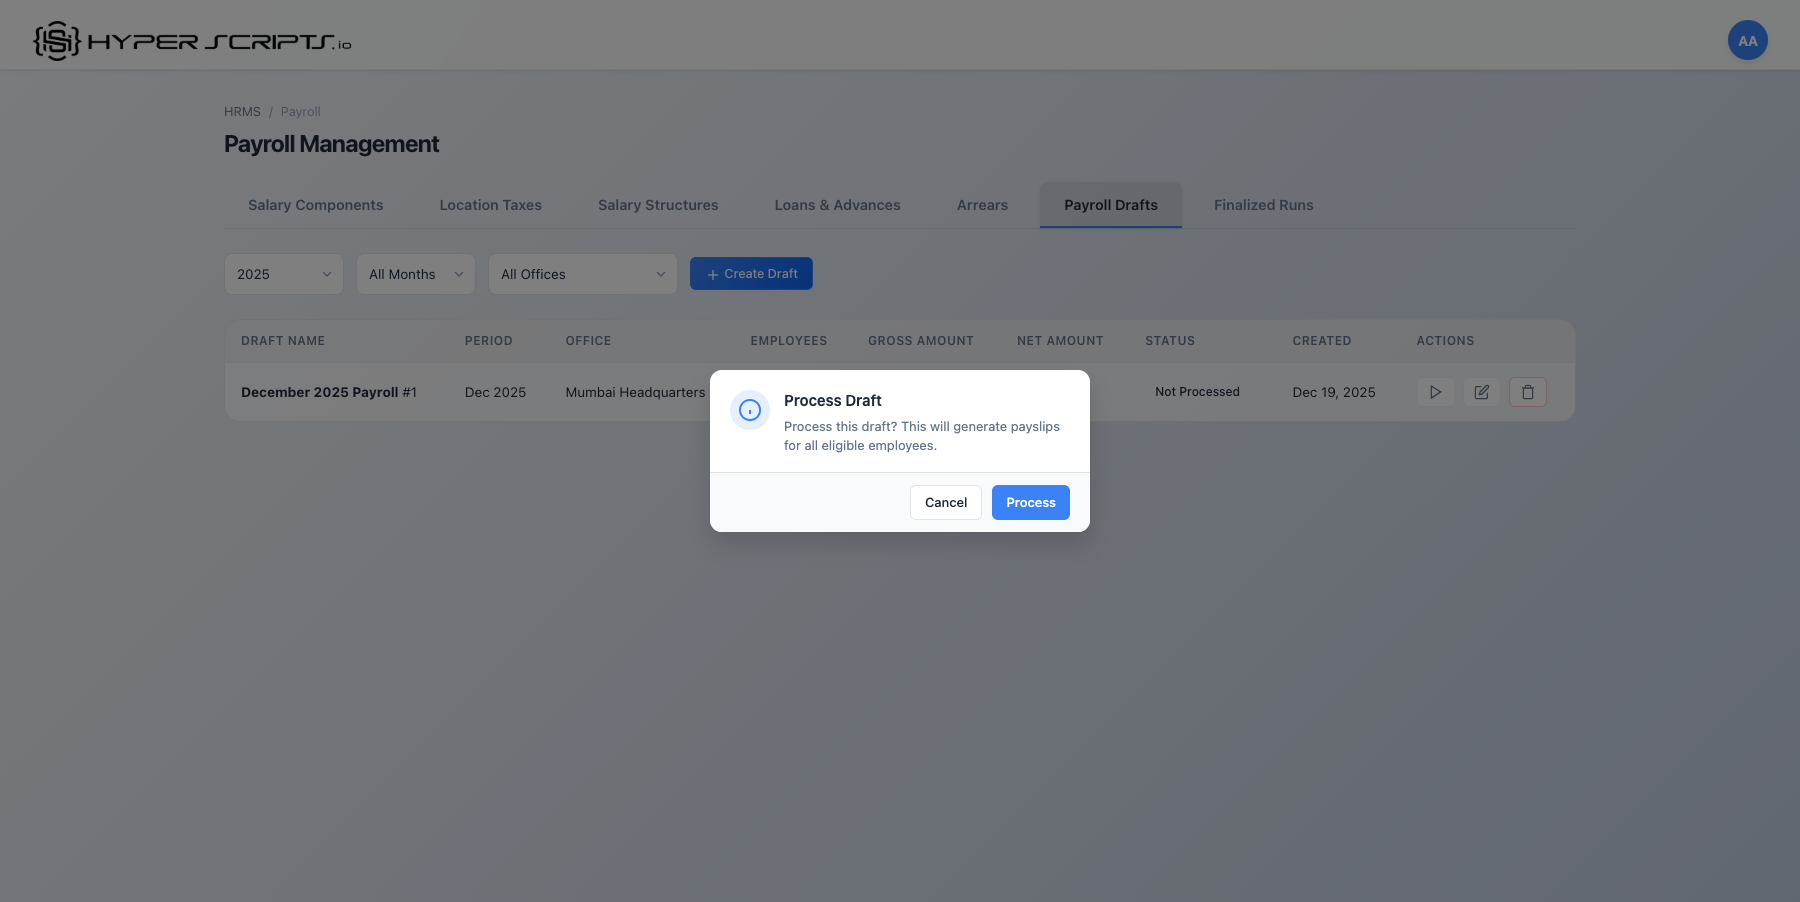
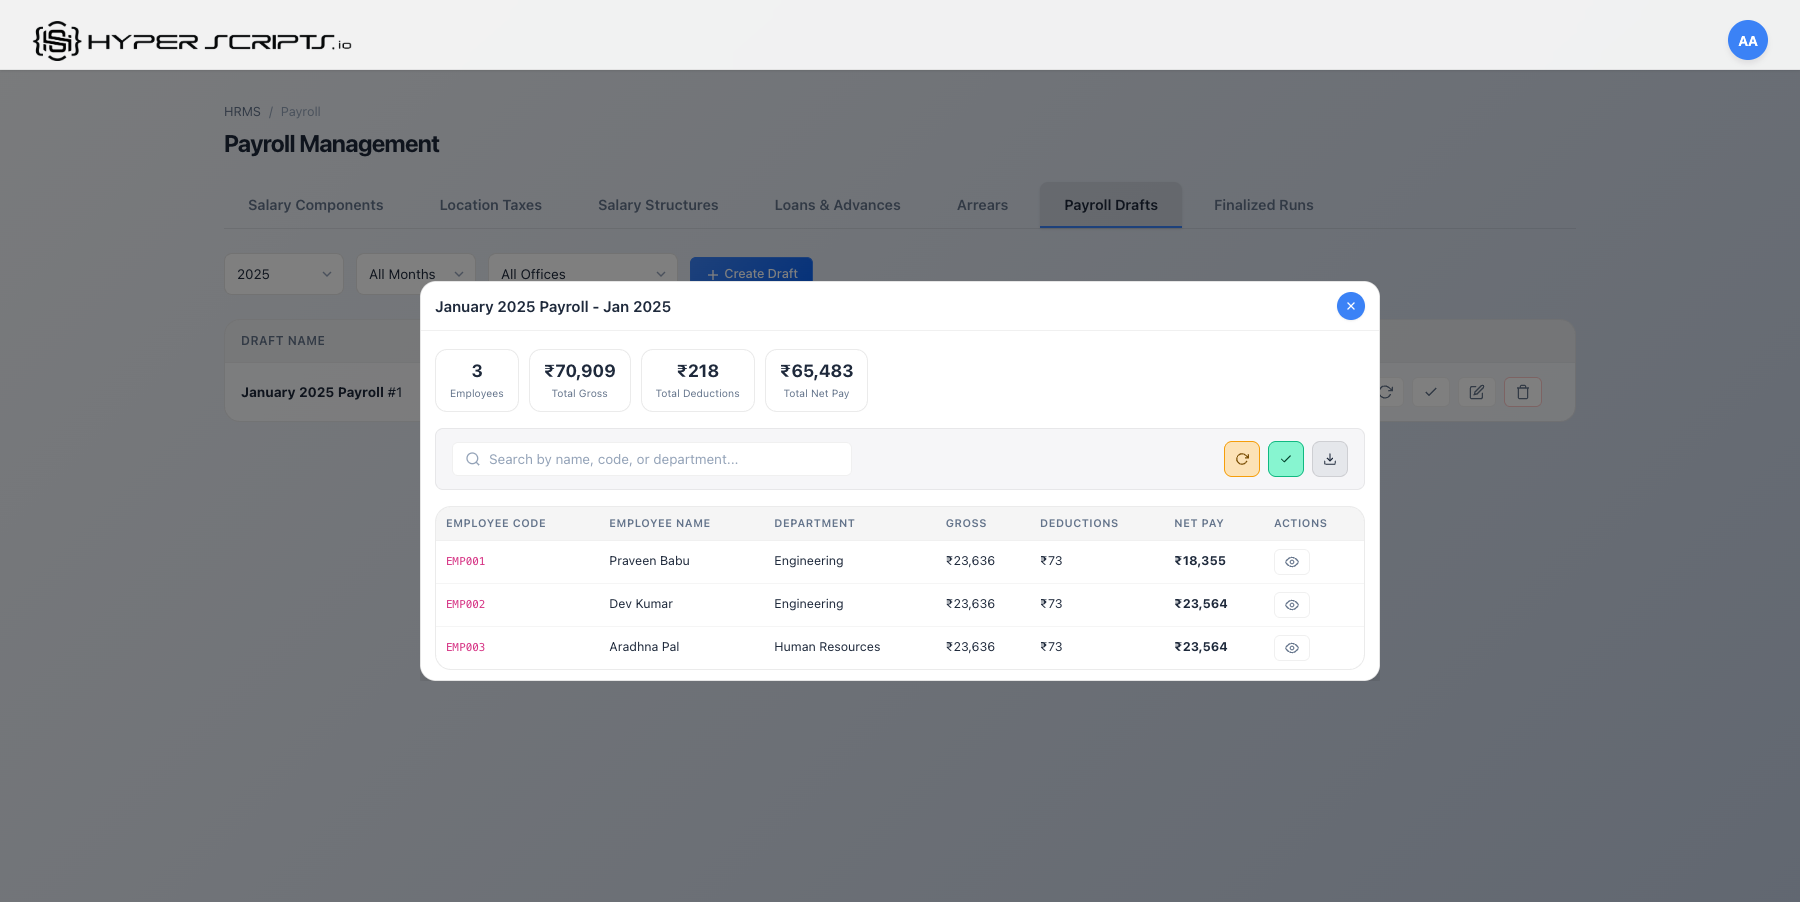
Step 5: Process the Draft
Click the Process button to calculate all employee payslips:
Step 6: Review Processed Payslips
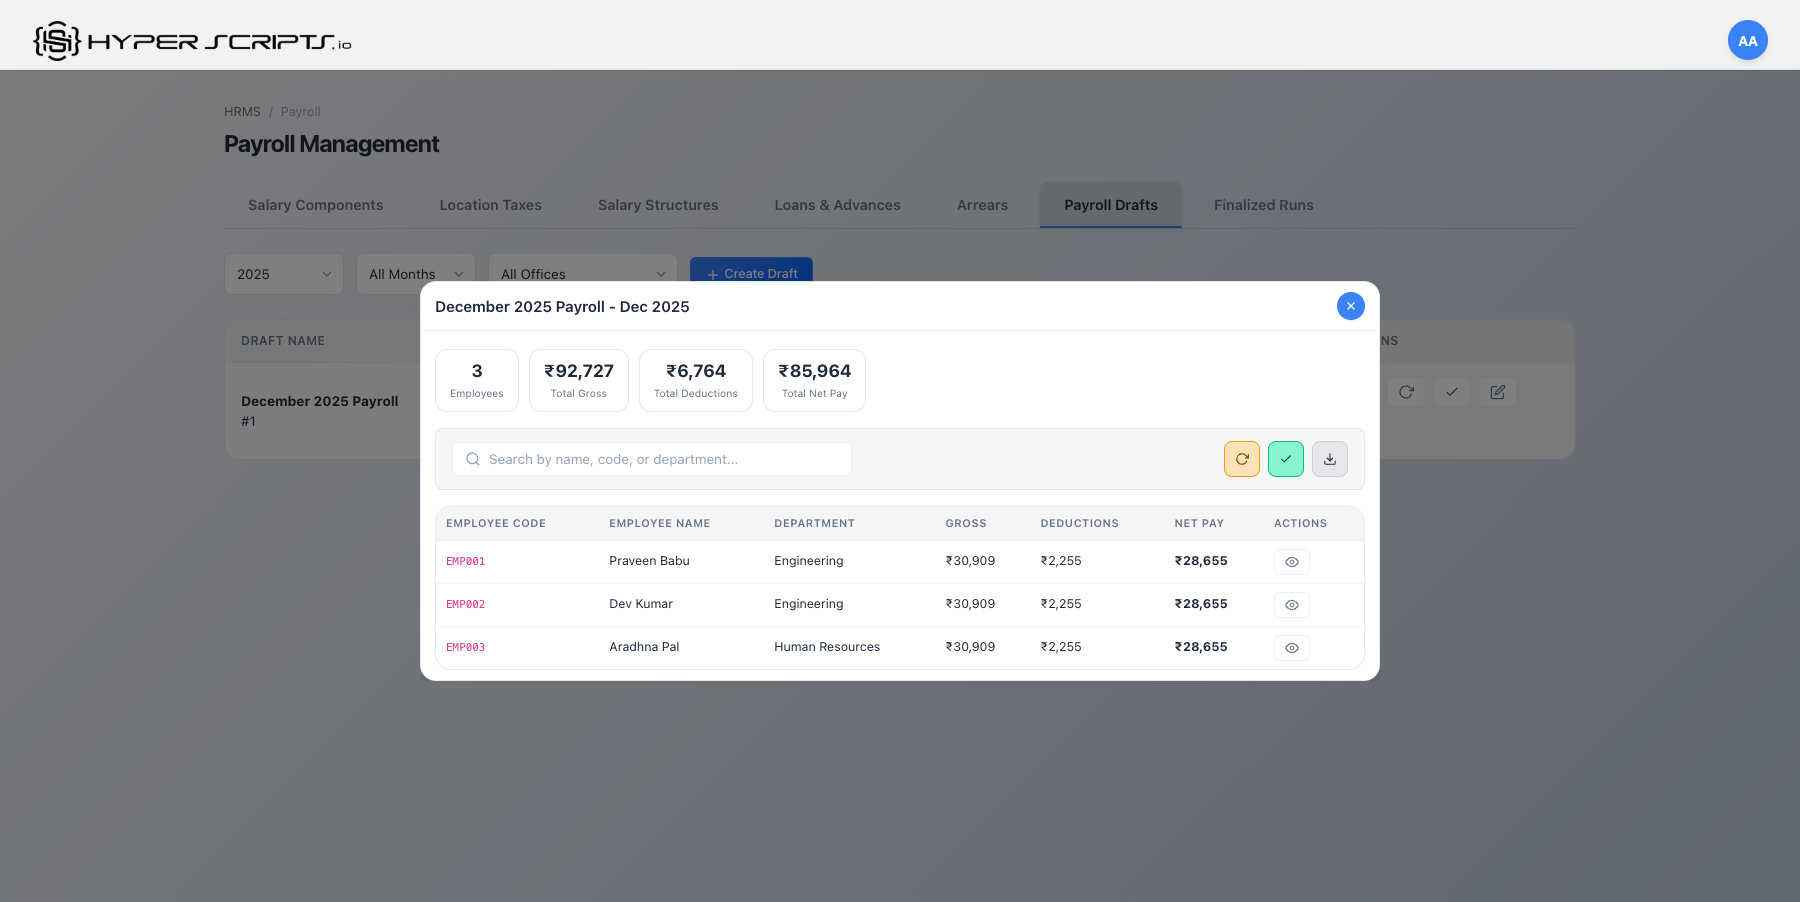
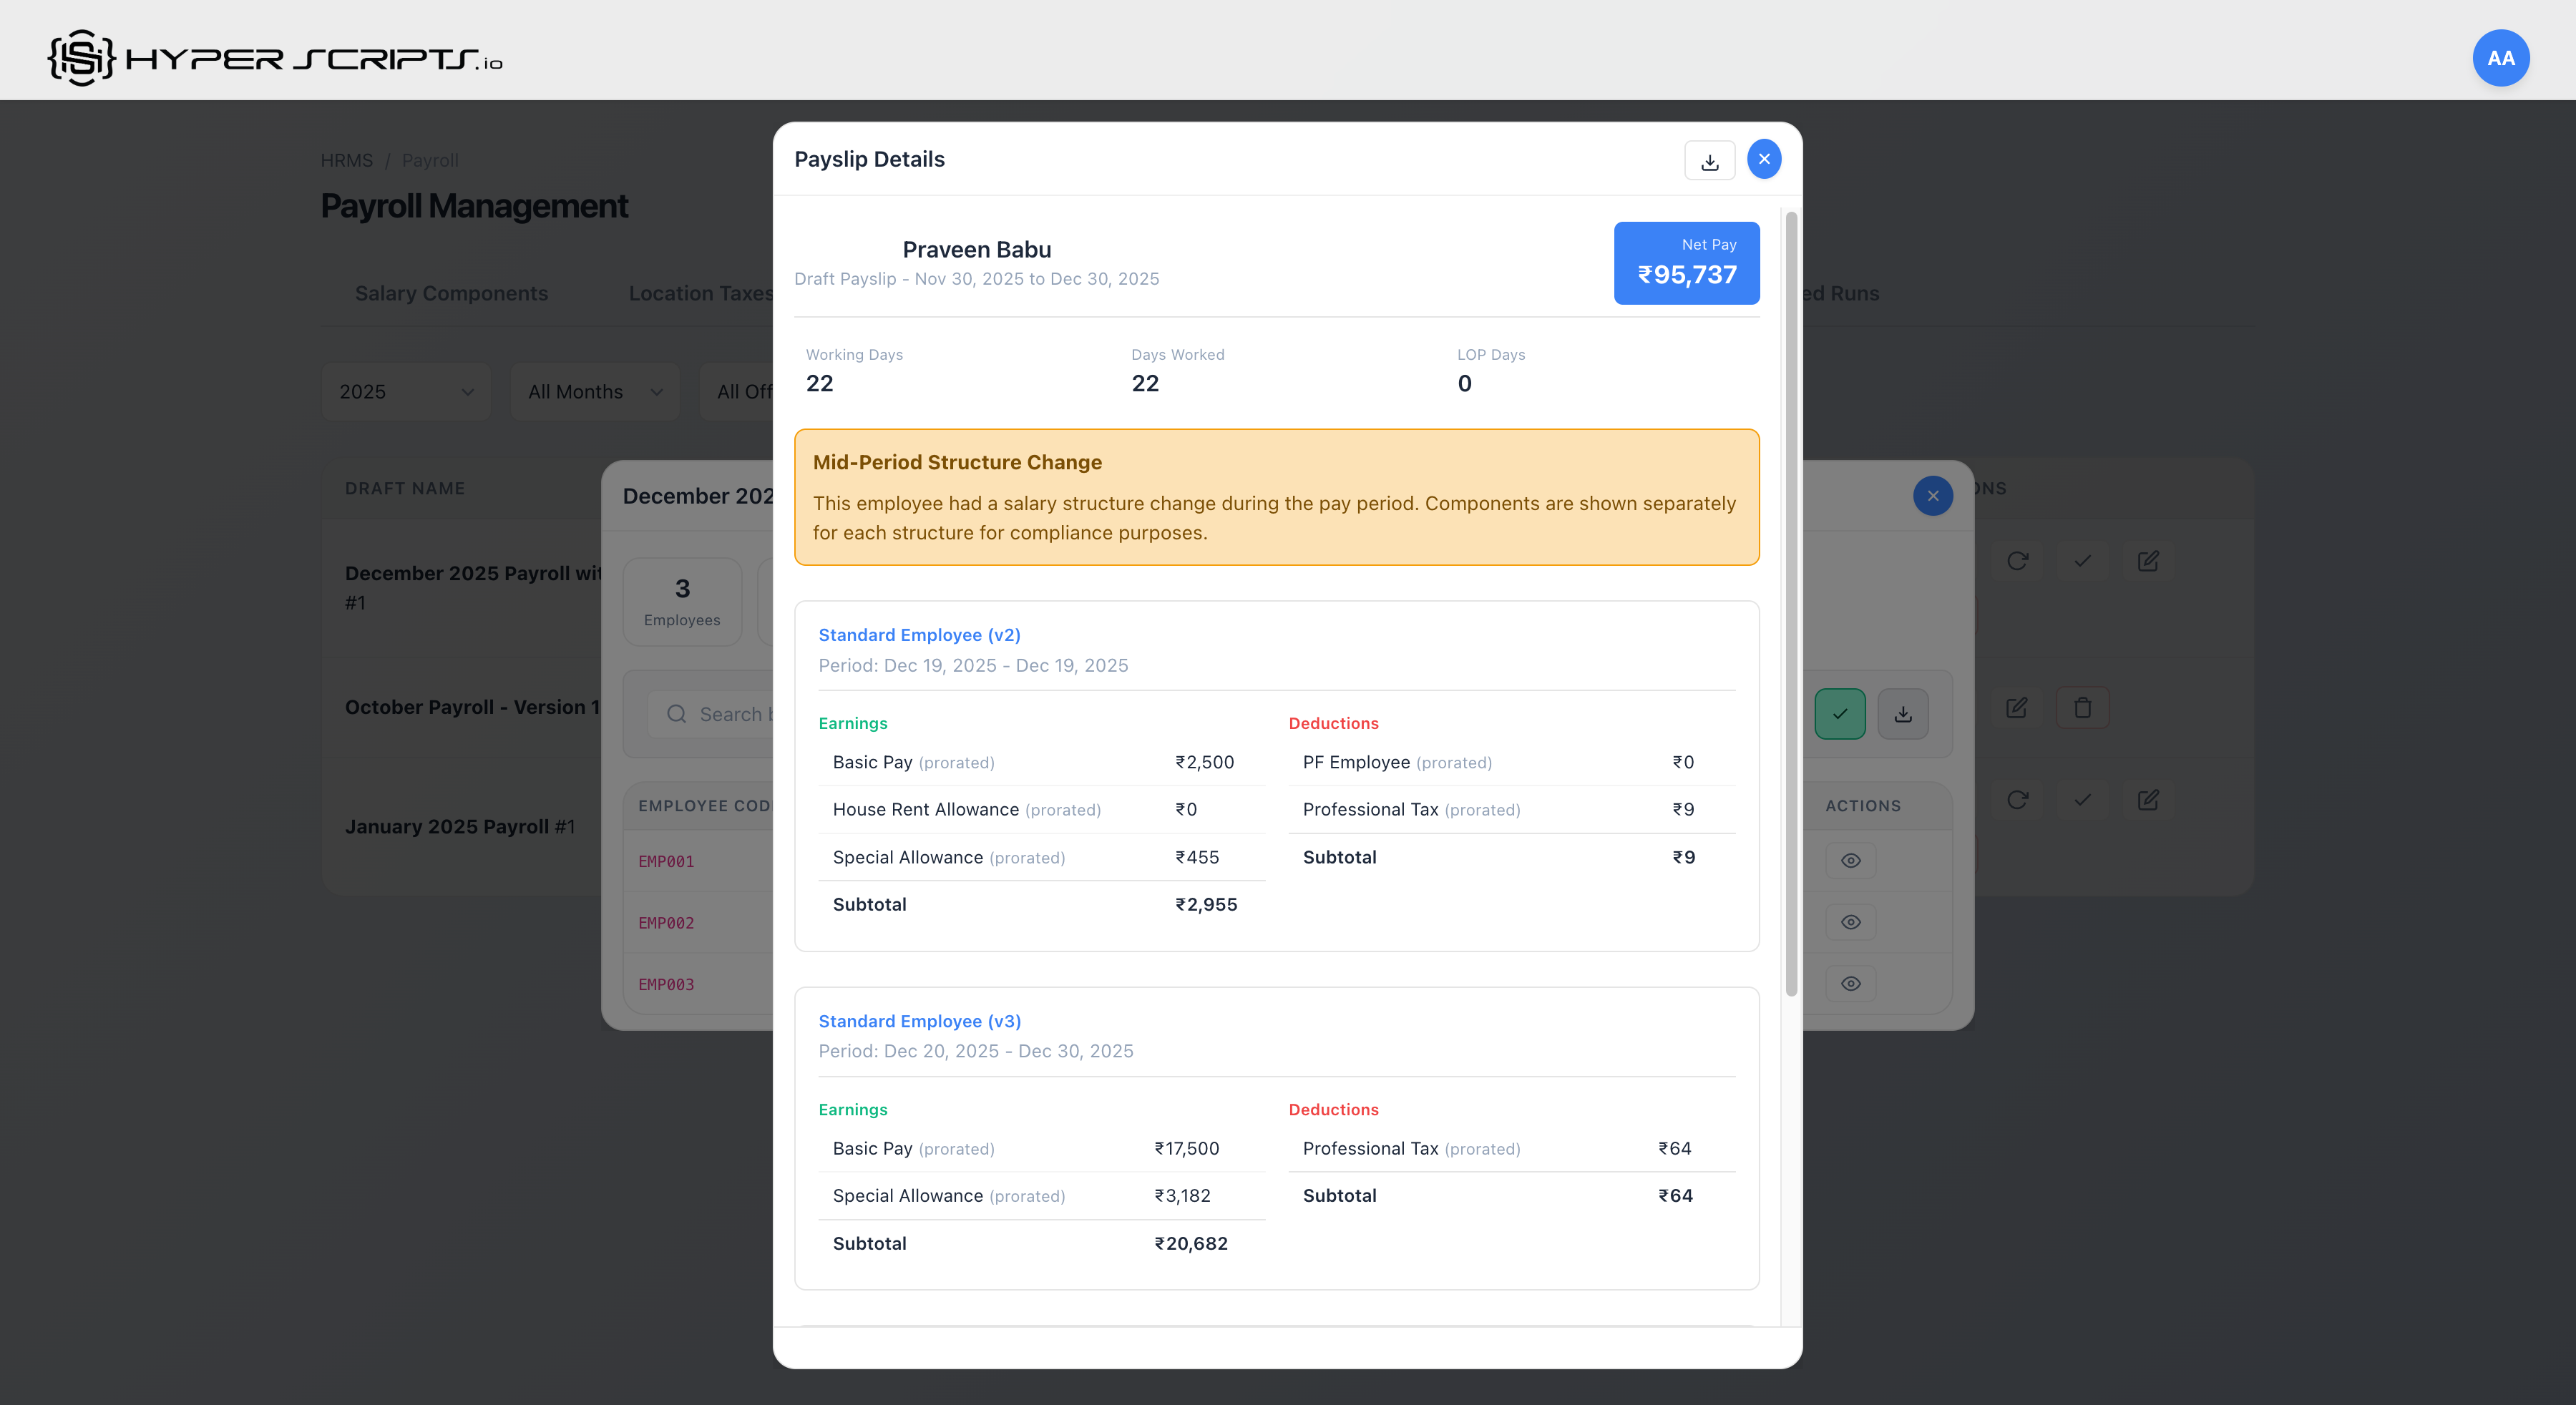
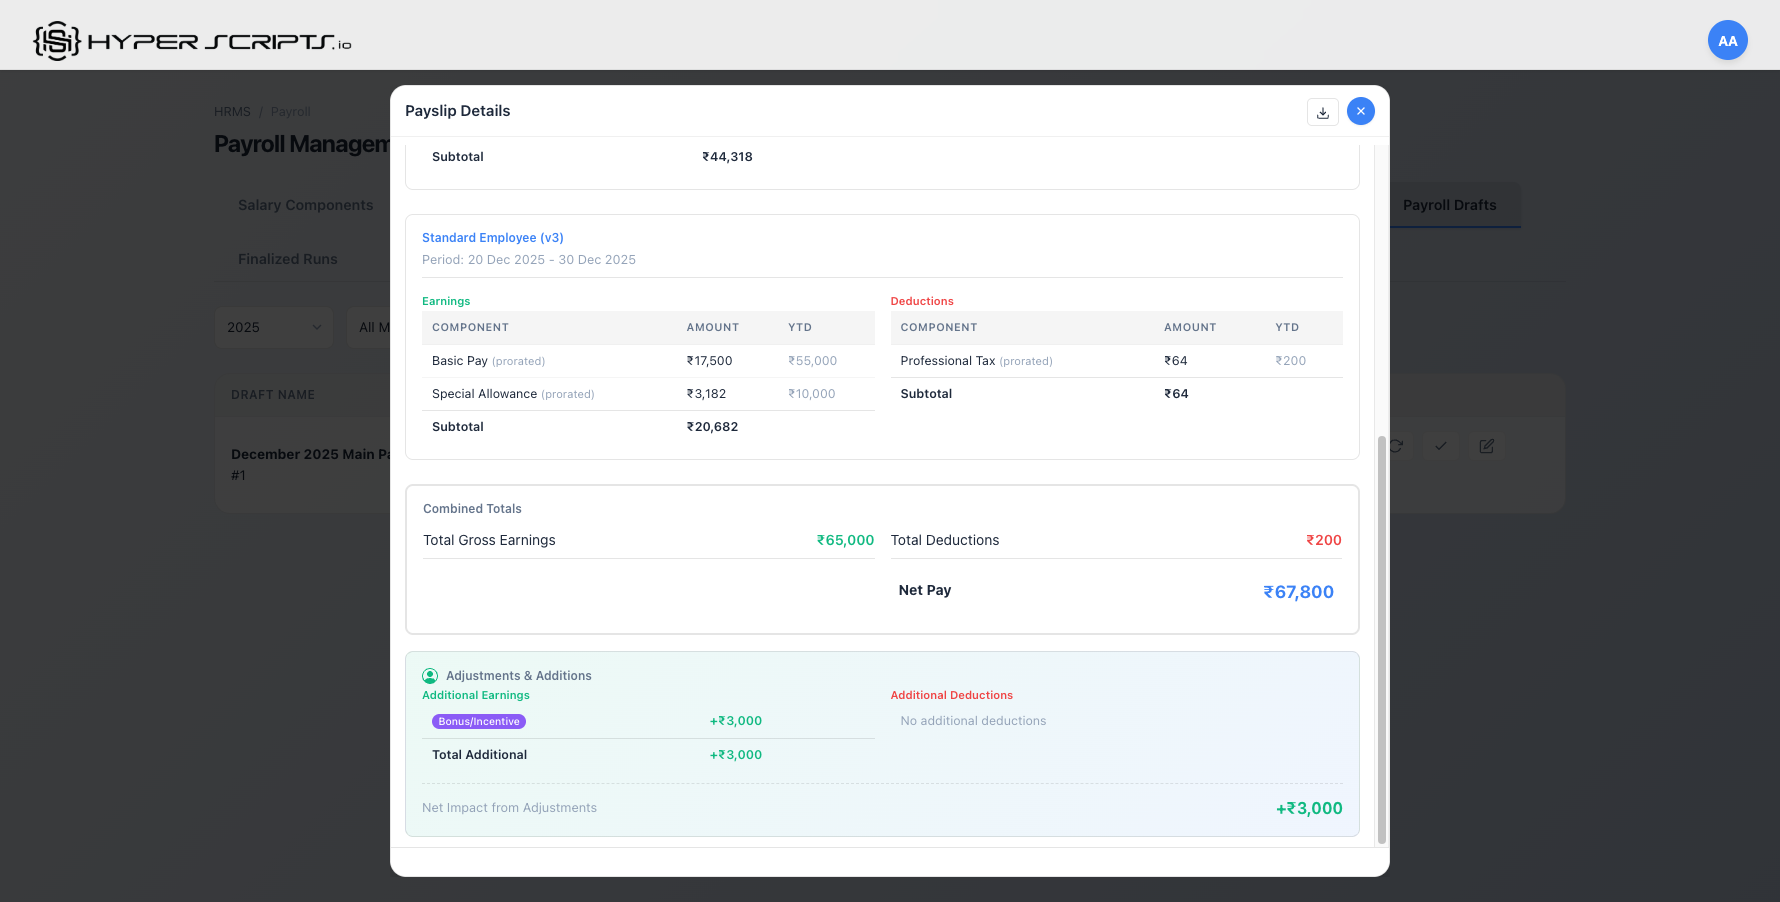
Step 7: View Individual Payslip Details
Click the "View Details" button on any employee row to see their complete payslip breakdown:
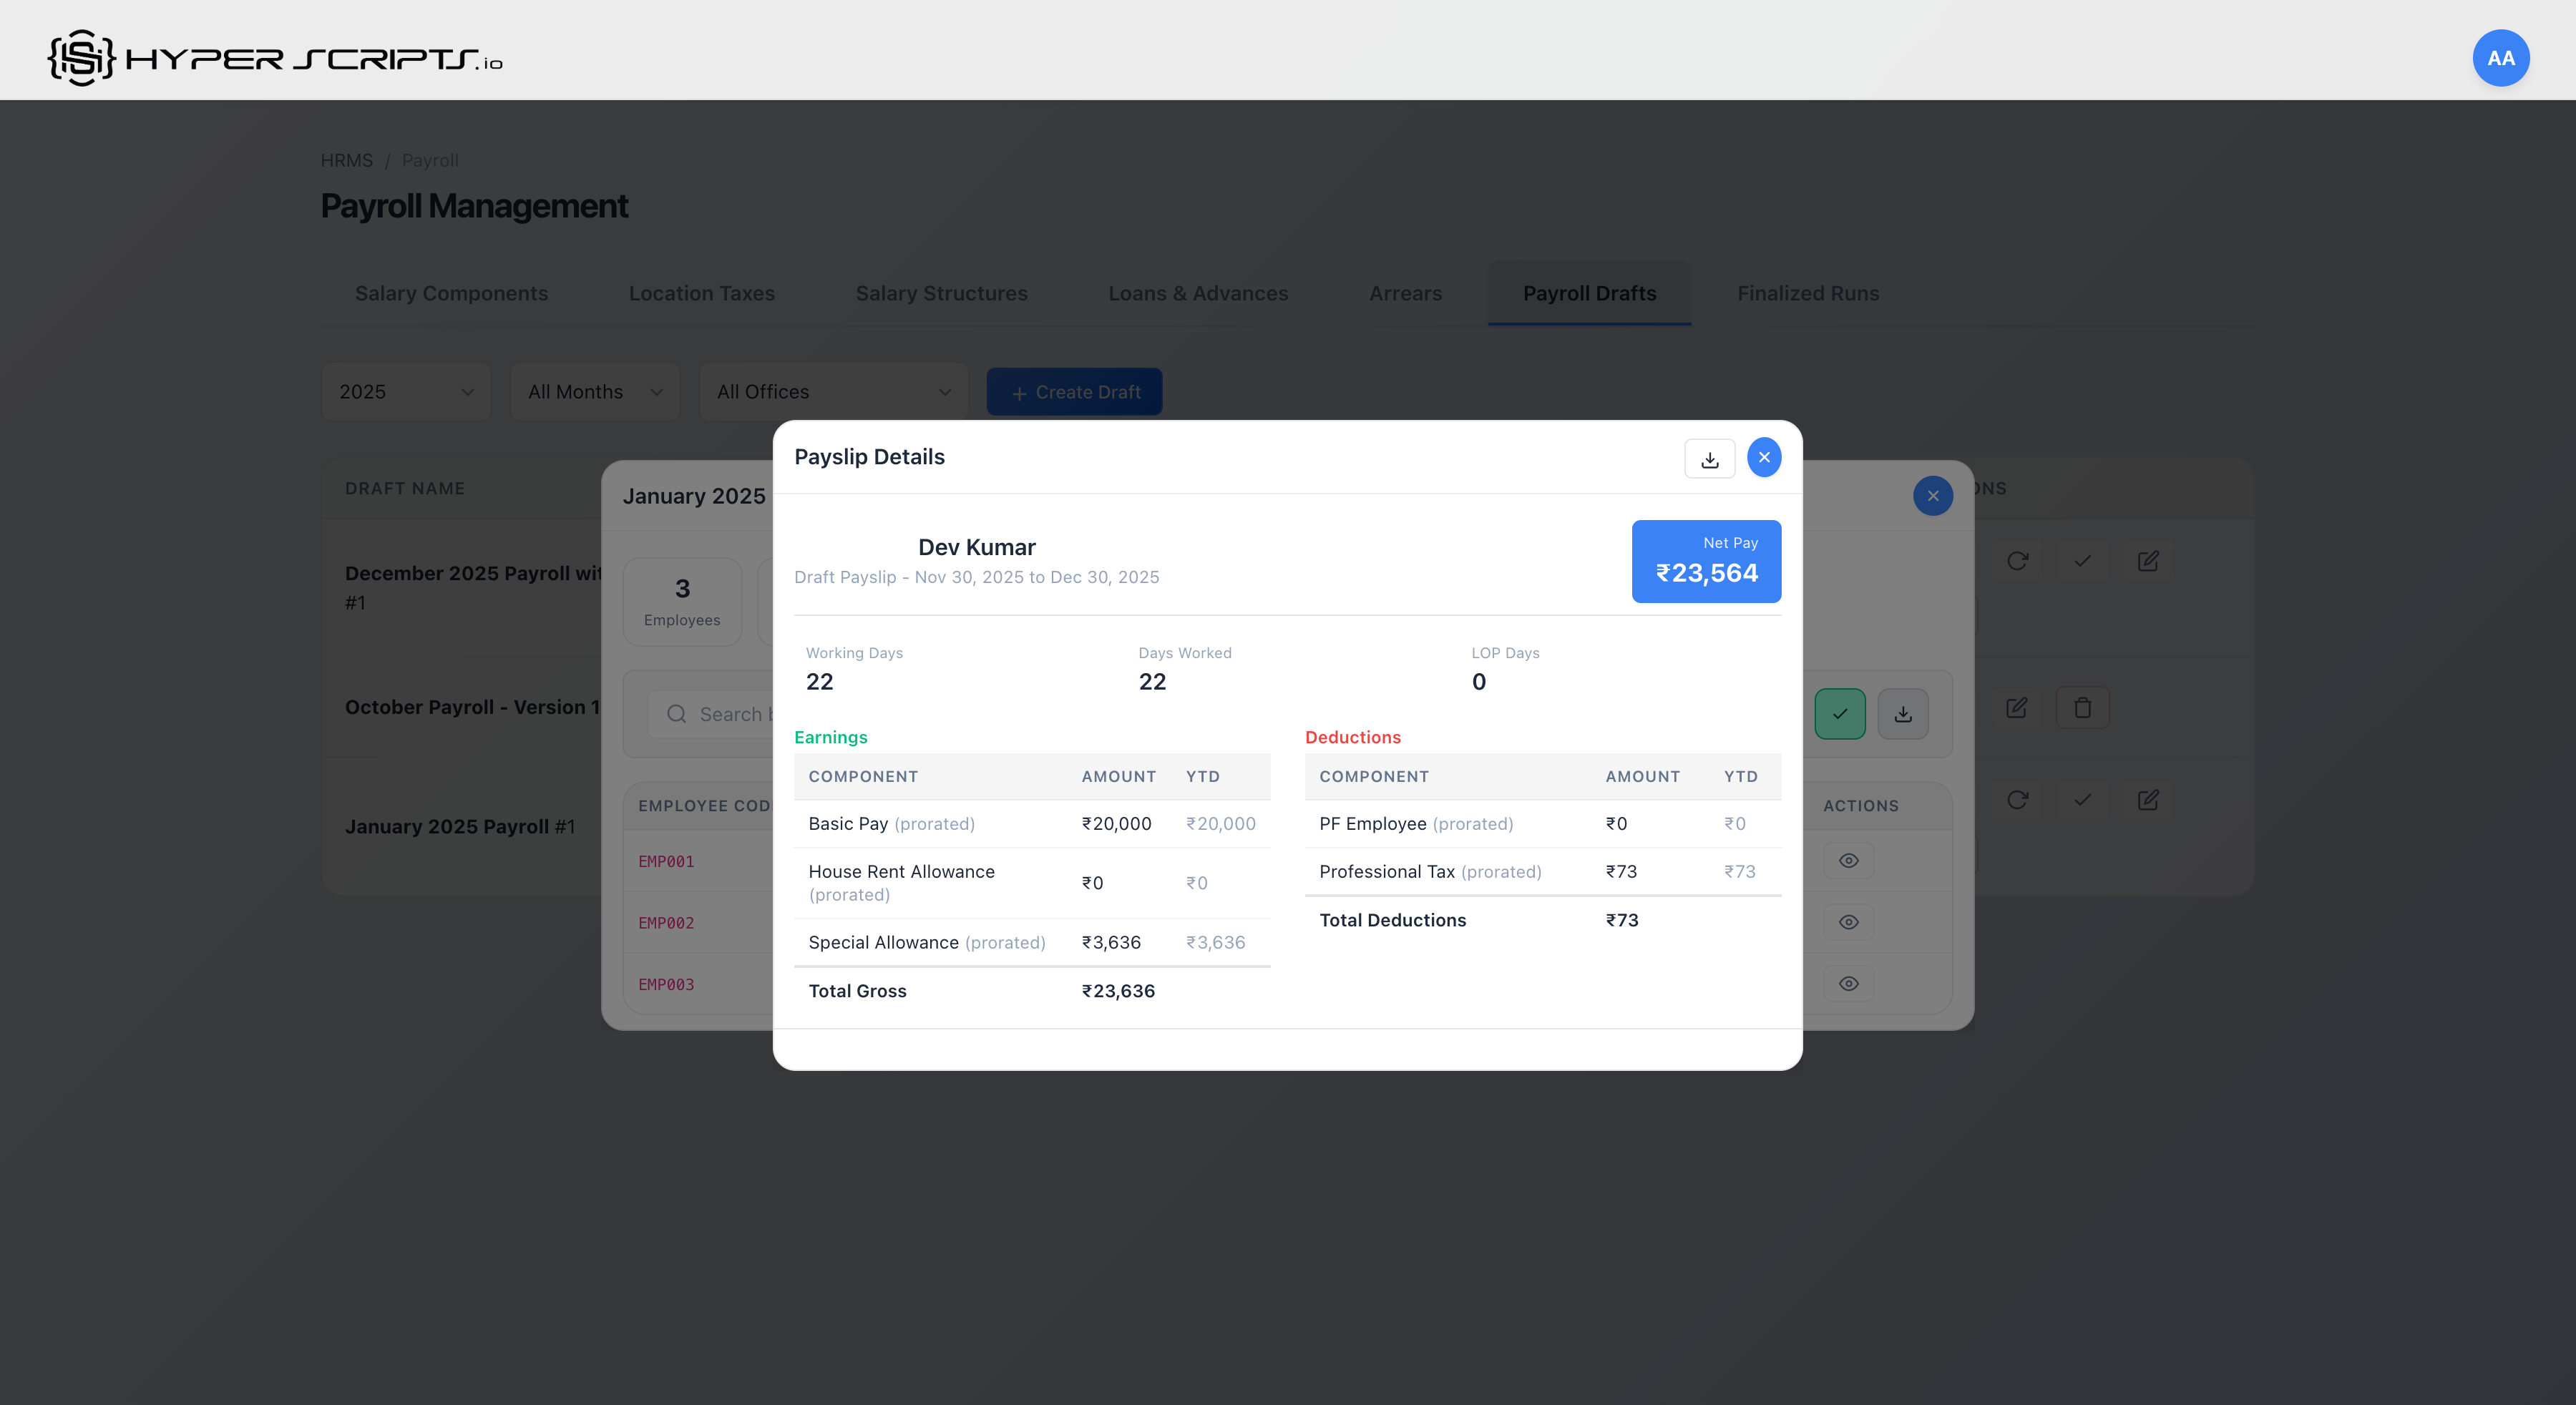
The payslip details modal displays:
- Employee Info: Name, payslip period, and net pay summary
- Attendance Summary: Working days, days worked, and LOP (Loss of Pay) days
- Earnings Table: All earning components with current month amount and Year-to-Date (YTD) totals
- Deductions Table: All deduction components with current month amount and YTD totals
- Download PDF: Generate and download a formal payslip document
Year-to-Date (YTD) Tracking
Each payslip component displays a YTD column showing the cumulative amount paid for that component from the start of the financial year (April) to the current payslip period:
| Column | Description | Example |
|---|---|---|
| Component | Name of the salary component | Basic Pay, HRA, Professional Tax |
| Amount | Amount for the current payslip period | ₹20,000 |
| YTD | Cumulative amount from financial year start | ₹2,00,000 (10 months × ₹20,000) |
- Employees can verify their year-to-date earnings for tax planning
- HR can quickly verify cumulative deductions like PF and Professional Tax
- Useful for generating Form 16 and other statutory reports
- YTD resets at the start of each financial year (April)
Step 8: Finalize the Draft
When satisfied with all payslips, finalize the draft:


Draft Status Transitions
Payroll drafts have different statuses, and the available actions change based on the current status:
Status: "Not Processed" (Pending)
When a draft is first created, it has no payslips yet. The following actions are available:
| Action | Description |
|---|---|
| Process All | Calculate payslips for ALL employees in the selected office(s) |
| Process Selected | Open a modal to select specific employees to process |
| Rename | Change the draft name for better organization |
| Delete | Remove the empty draft |
Process Selected Employees Modal
Click "Process Selected" to open a modal where you can choose specific employees:
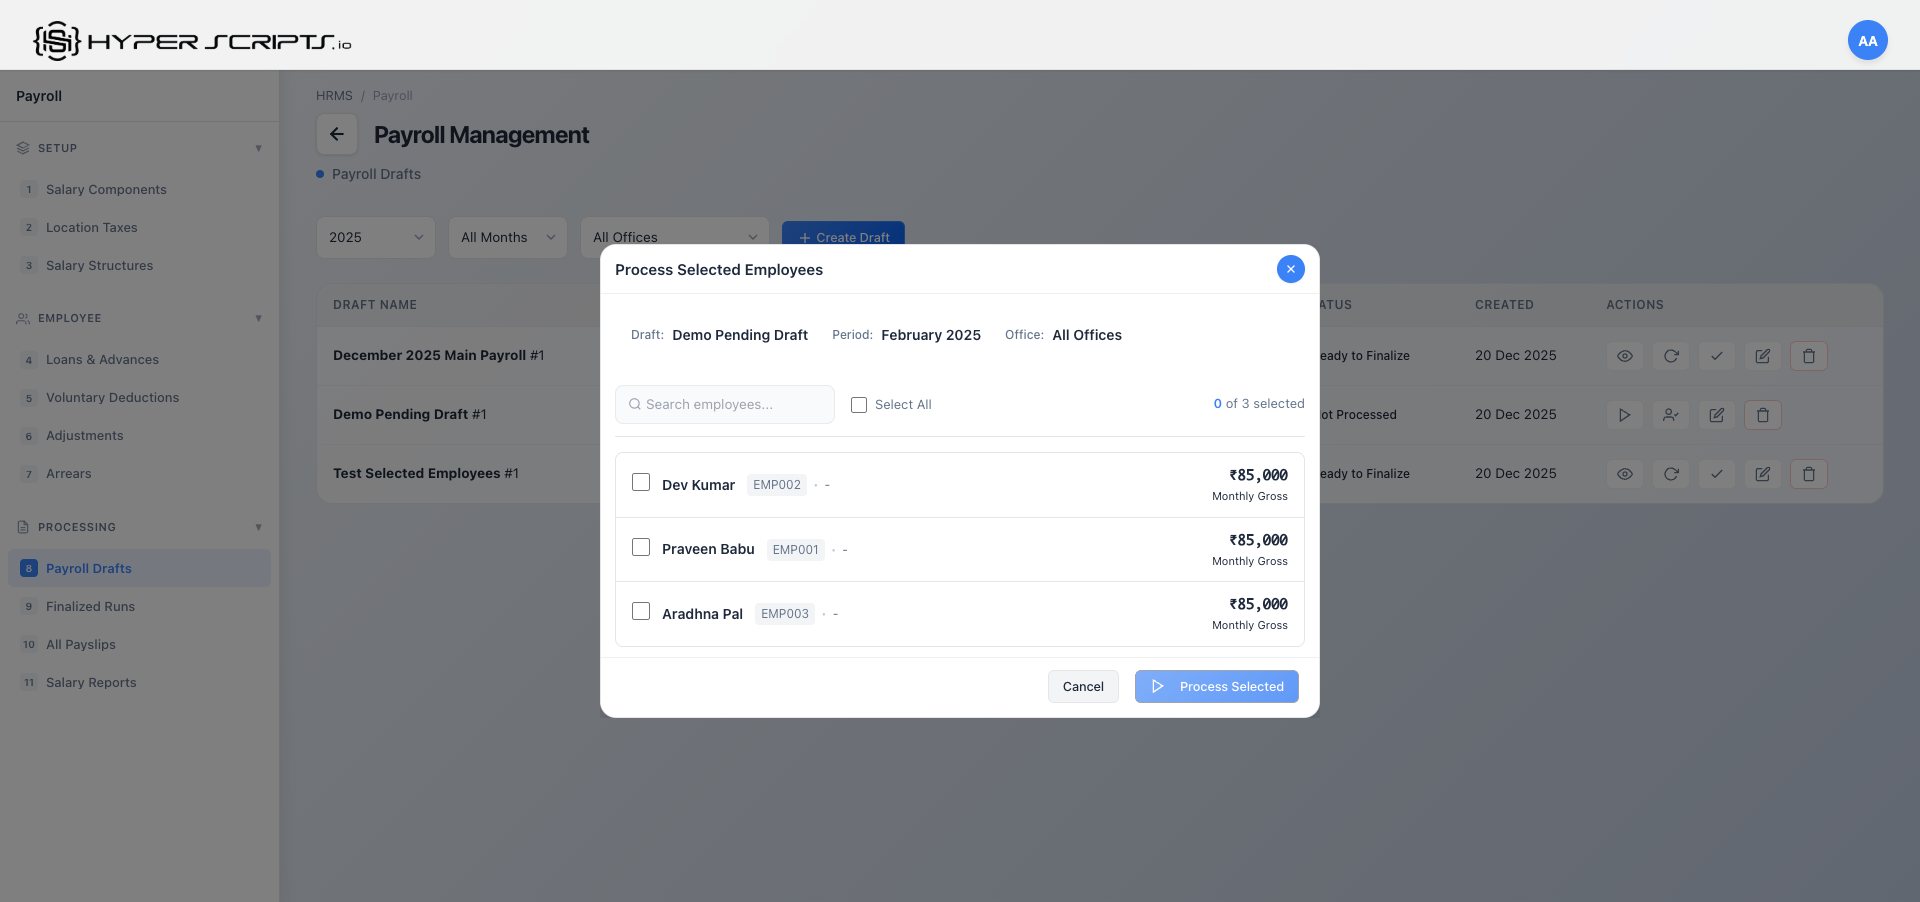
Use cases for Process Selected:
- Testing: Process a few employees first to verify calculations
- New Joiners: Process mid-month joiners separately
- Corrections: Re-process specific employees after fixing data
- Department-wise: Process one department at a time in large organizations
Status: "Processed" (Ready to Finalize)
After processing, the draft shows payslips and different action buttons:

| Action | Description |
|---|---|
| Recalculate | Re-process all payslips after making changes to attendance, adjustments, or salaries |
| Finalize | Lock the draft and move it to Finalized Runs for approval |
| Rename | Change the draft name |
| Delete | Remove the draft and all its payslips |
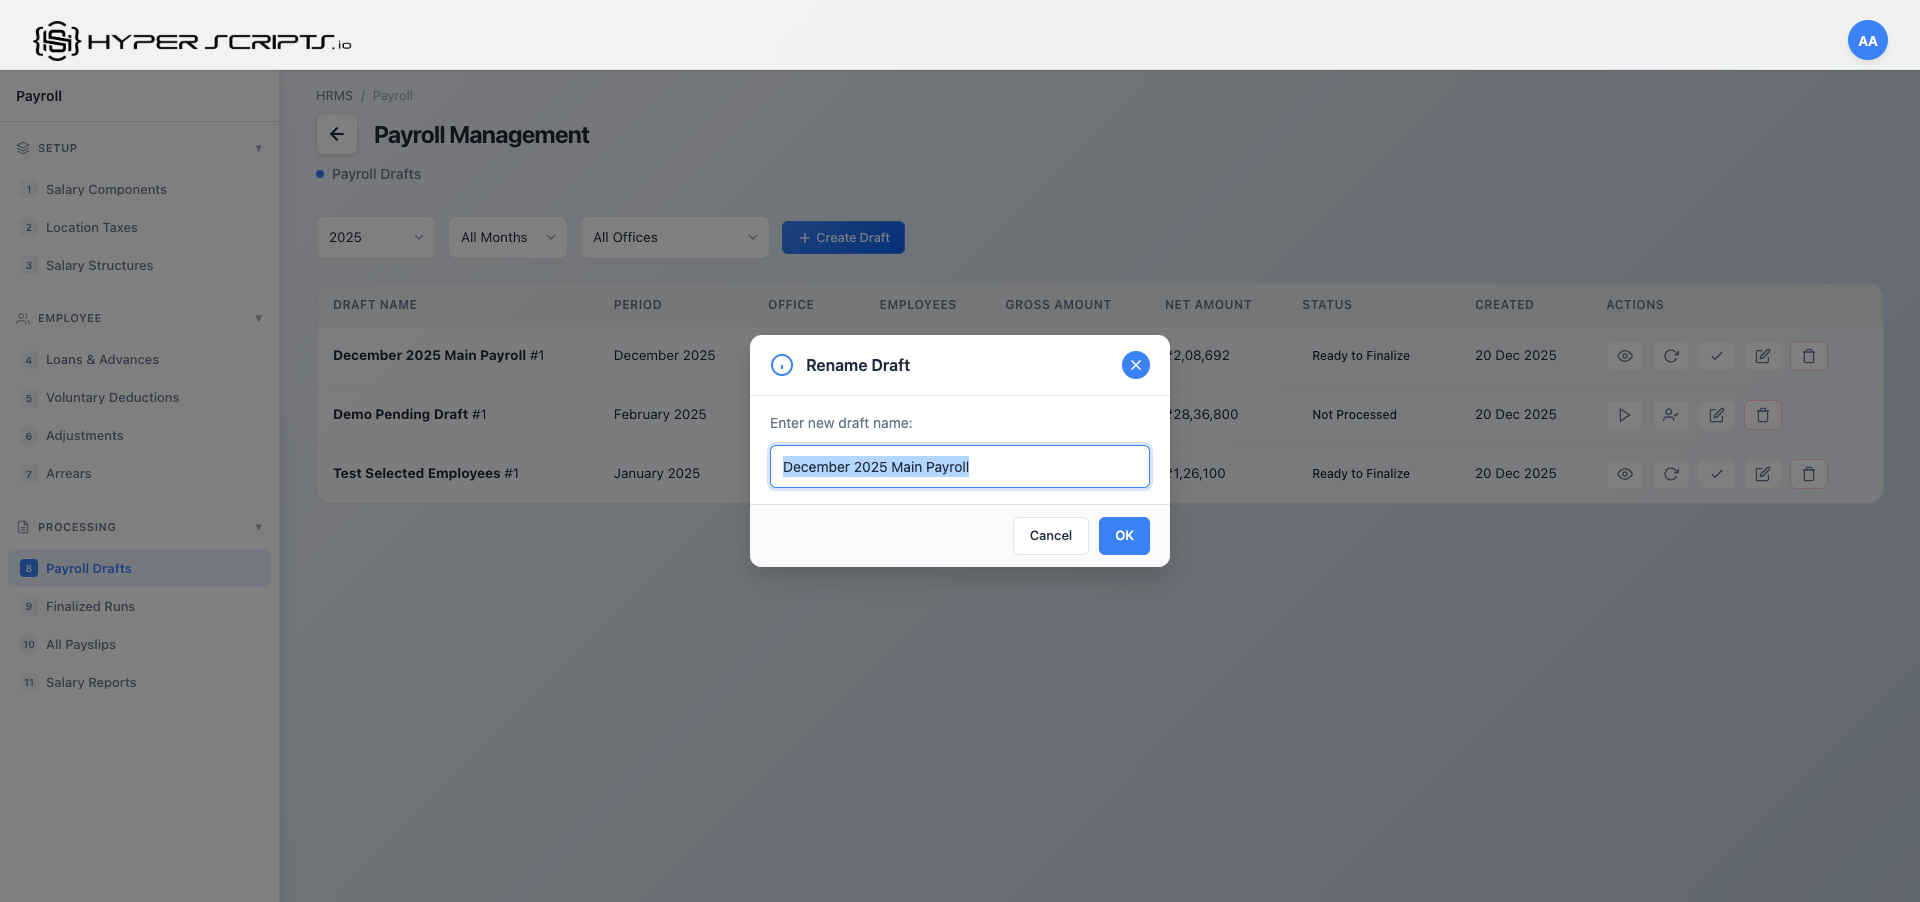
Rename Draft Feature
Click the Rename button to change a draft's name:
December 2025 - All Officesfor company-wide draftsDecember 2025 - Mumbai Officefor office-specific- Add "(Revised)", "(Corrected)", "(Final)" suffixes as needed
Draft Actions Summary
| Action | Description | When to Use |
|---|---|---|
| Process All | Calculate payslips for all employees | After creating draft (first-time processing) |
| Process Selected | Calculate payslips for chosen employees only | Testing, new joiners, corrections |
| Recalculate | Re-generate all payslips with current data | After attendance corrections, adjustments, or salary changes |
| Finalize | Lock draft and create finalized run | When ready for approval and payment |
| Rename | Change draft name | For organization purposes |
| Delete | Remove draft completely | If draft was created in error |
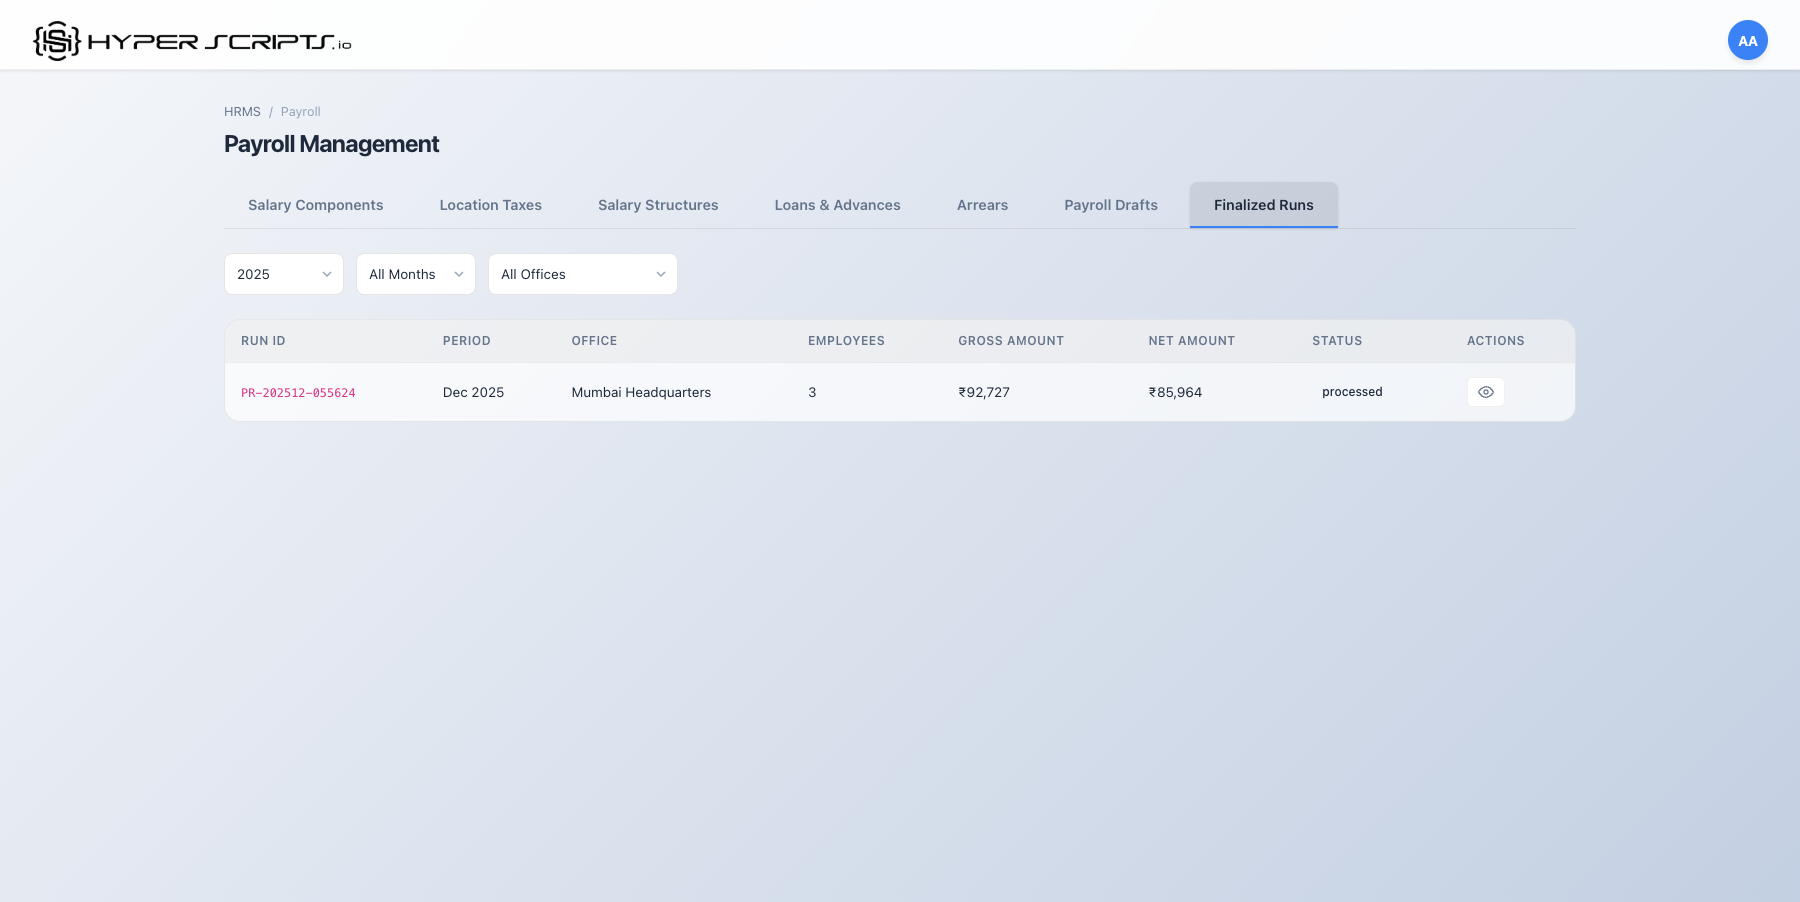
7 Finalized Runs
Finalized Runs are completed payroll periods ready for approval and payment. Once finalized, payslips are locked and cannot be modified.
Step-by-Step: Approving and Paying a Payroll Run
Step 1: View the Finalized Runs Tab
Step 2: View Run Details
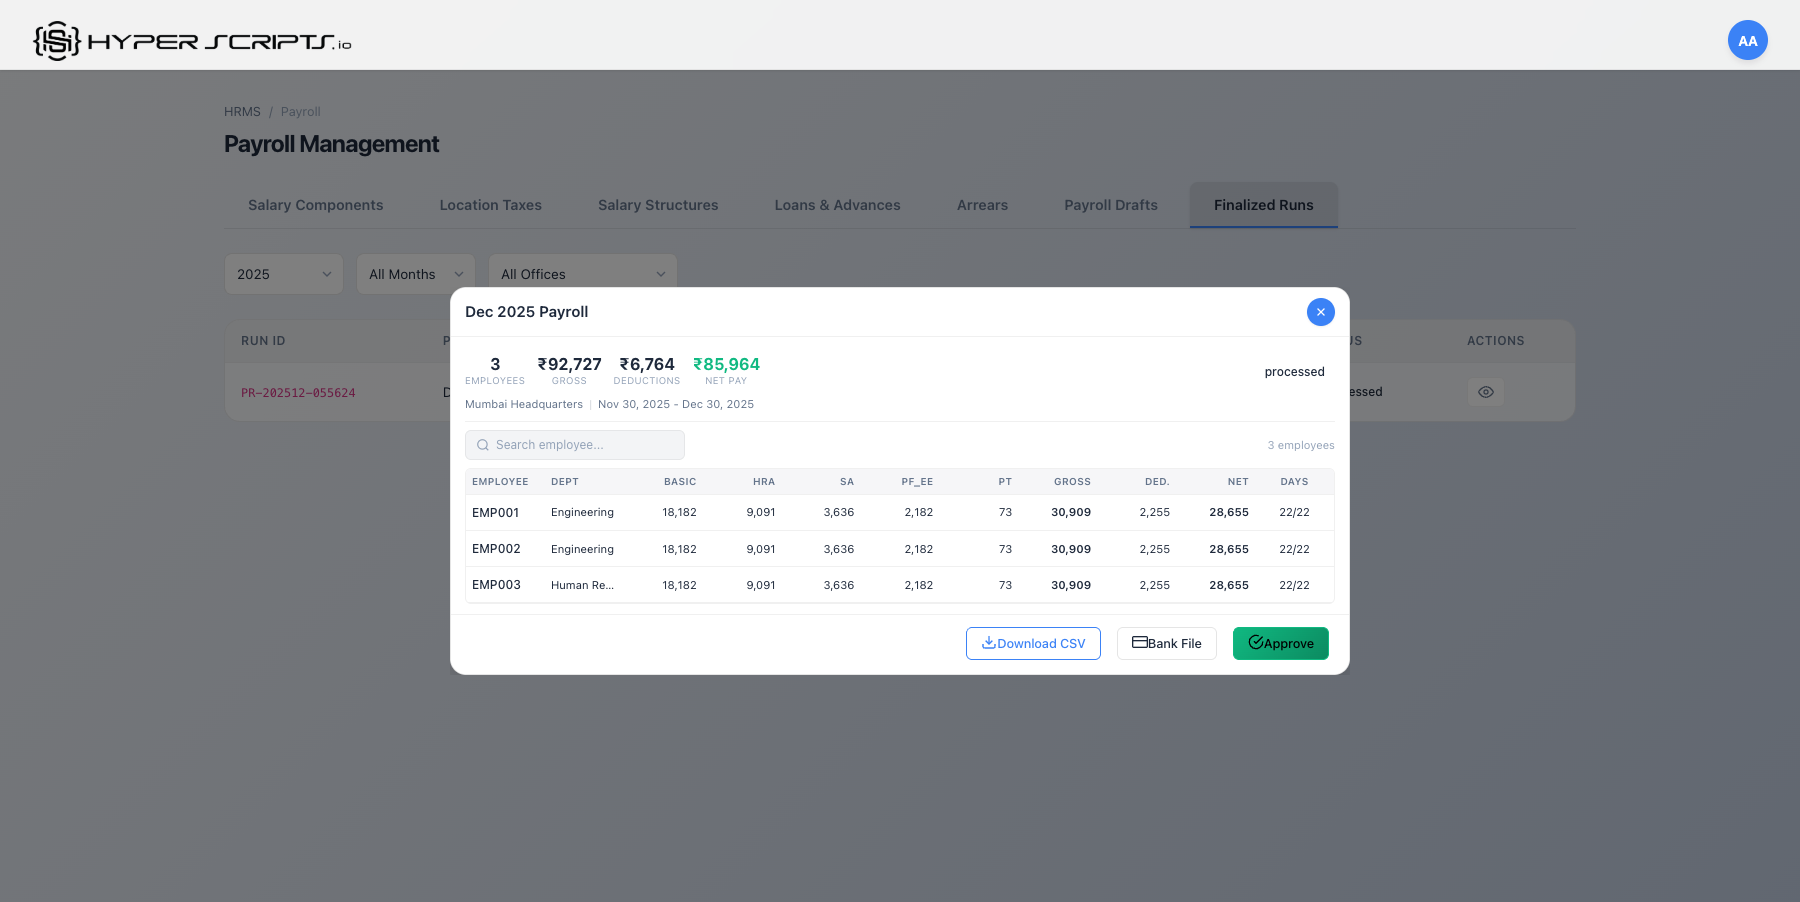
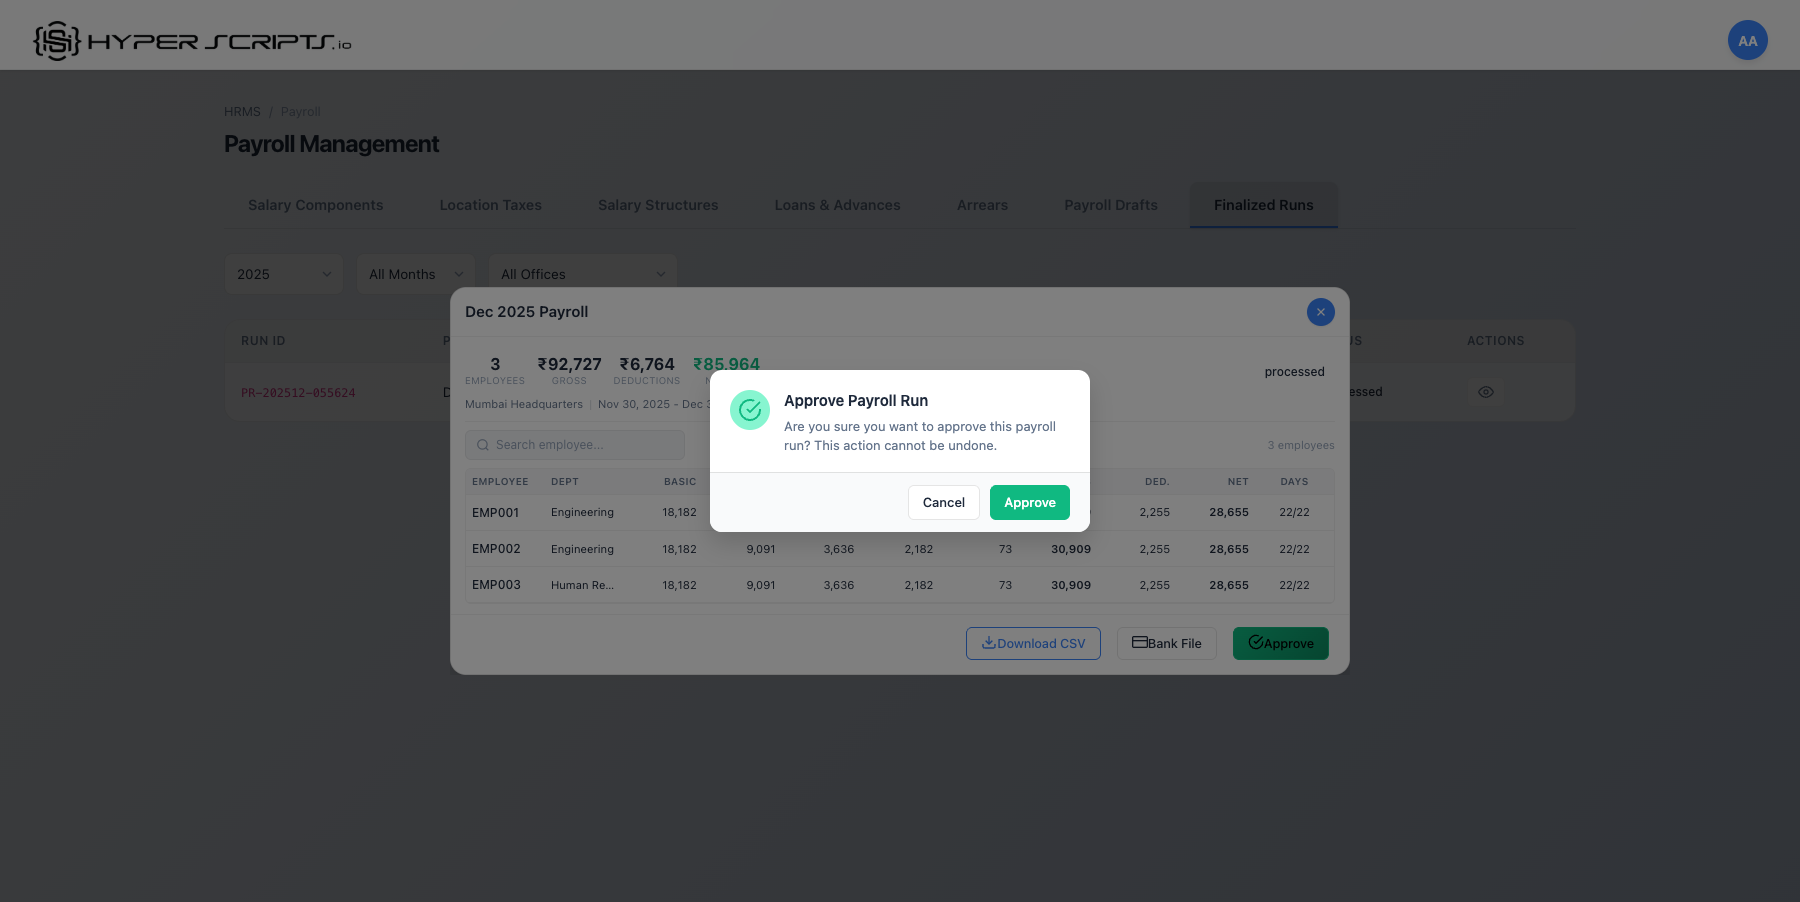
Step 3: Approve the Run
Click Approve to mark the run as approved for payment:
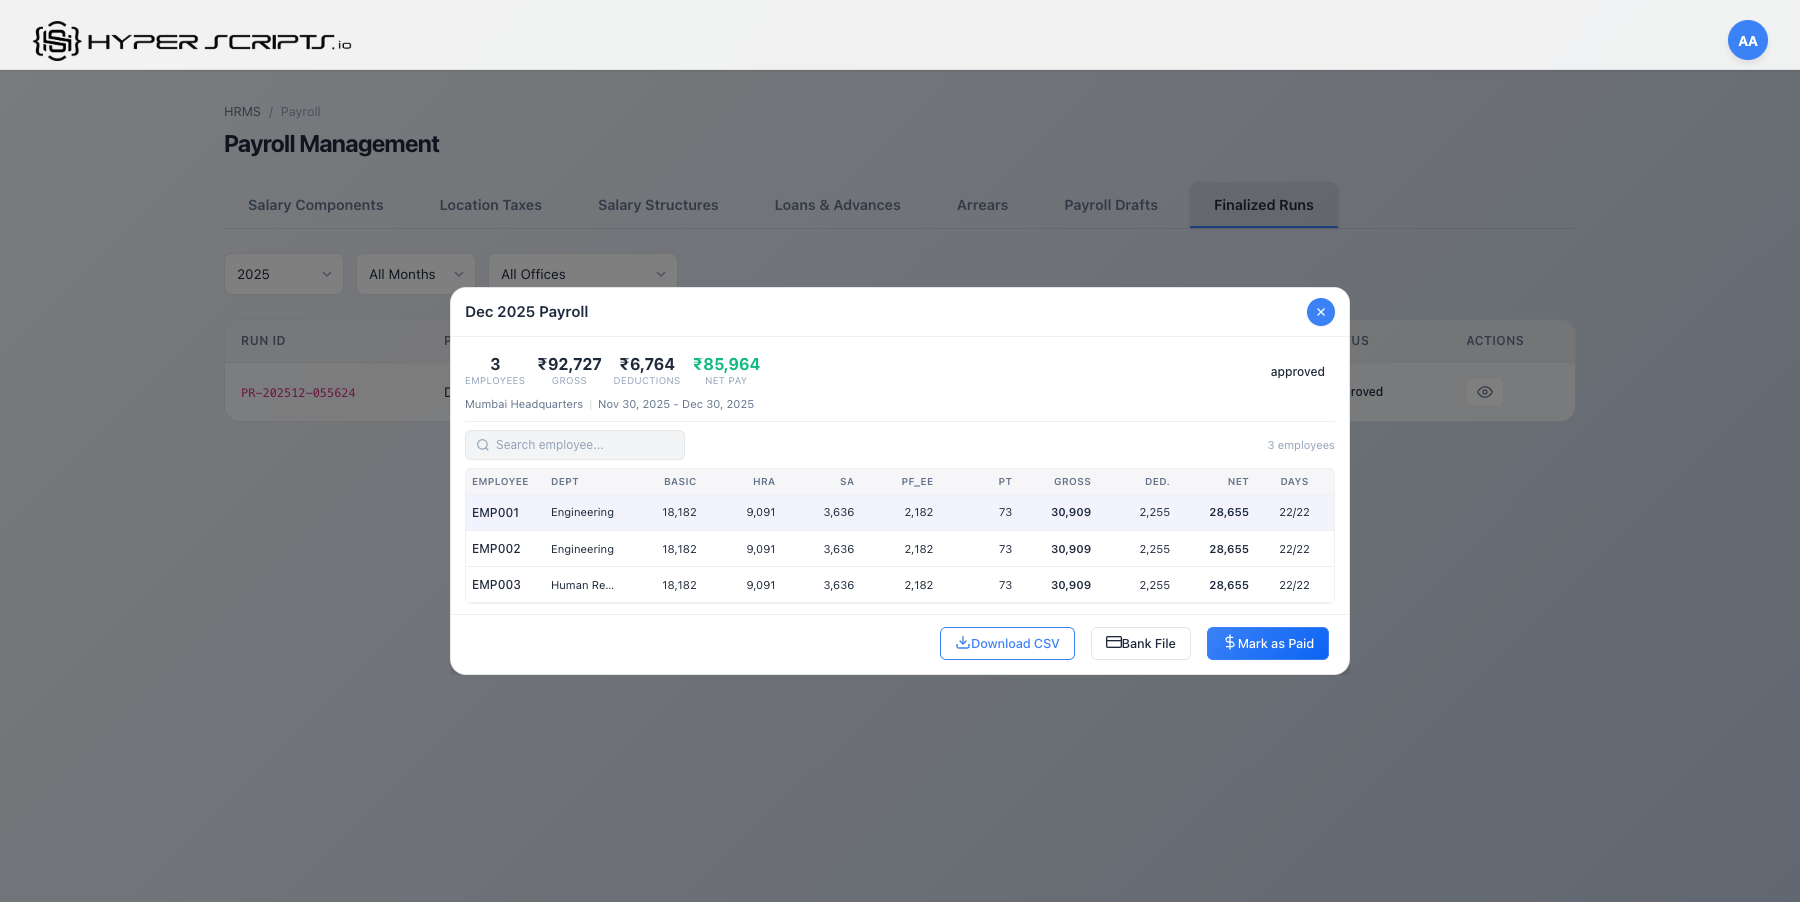
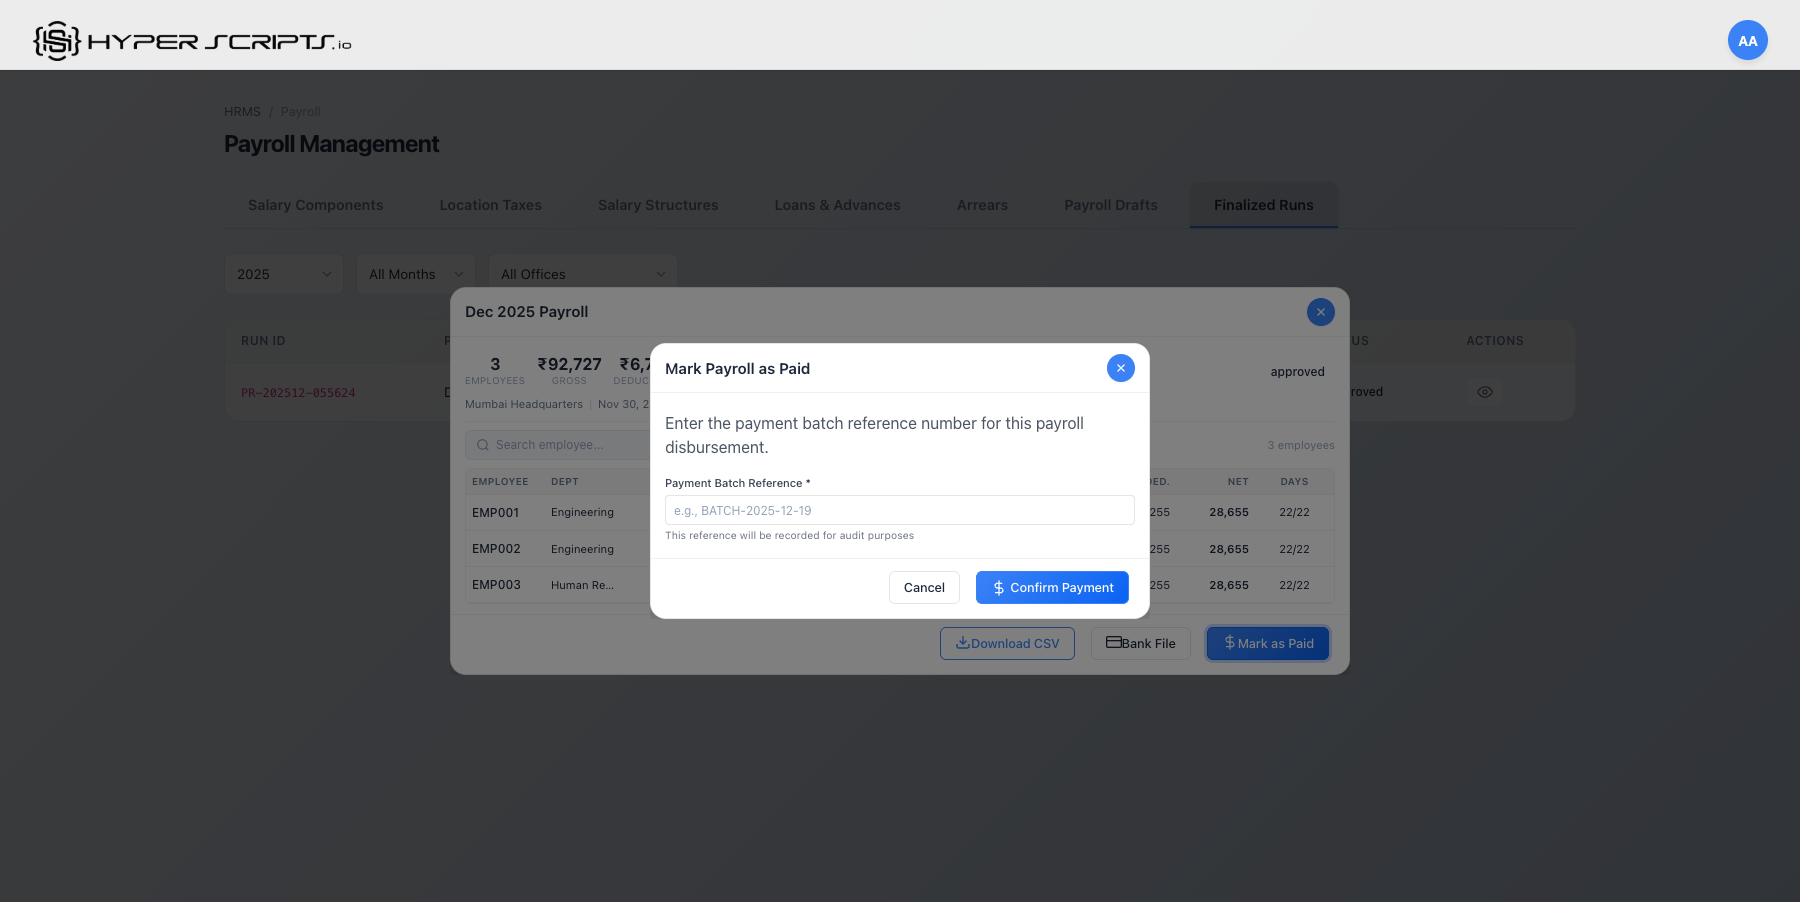
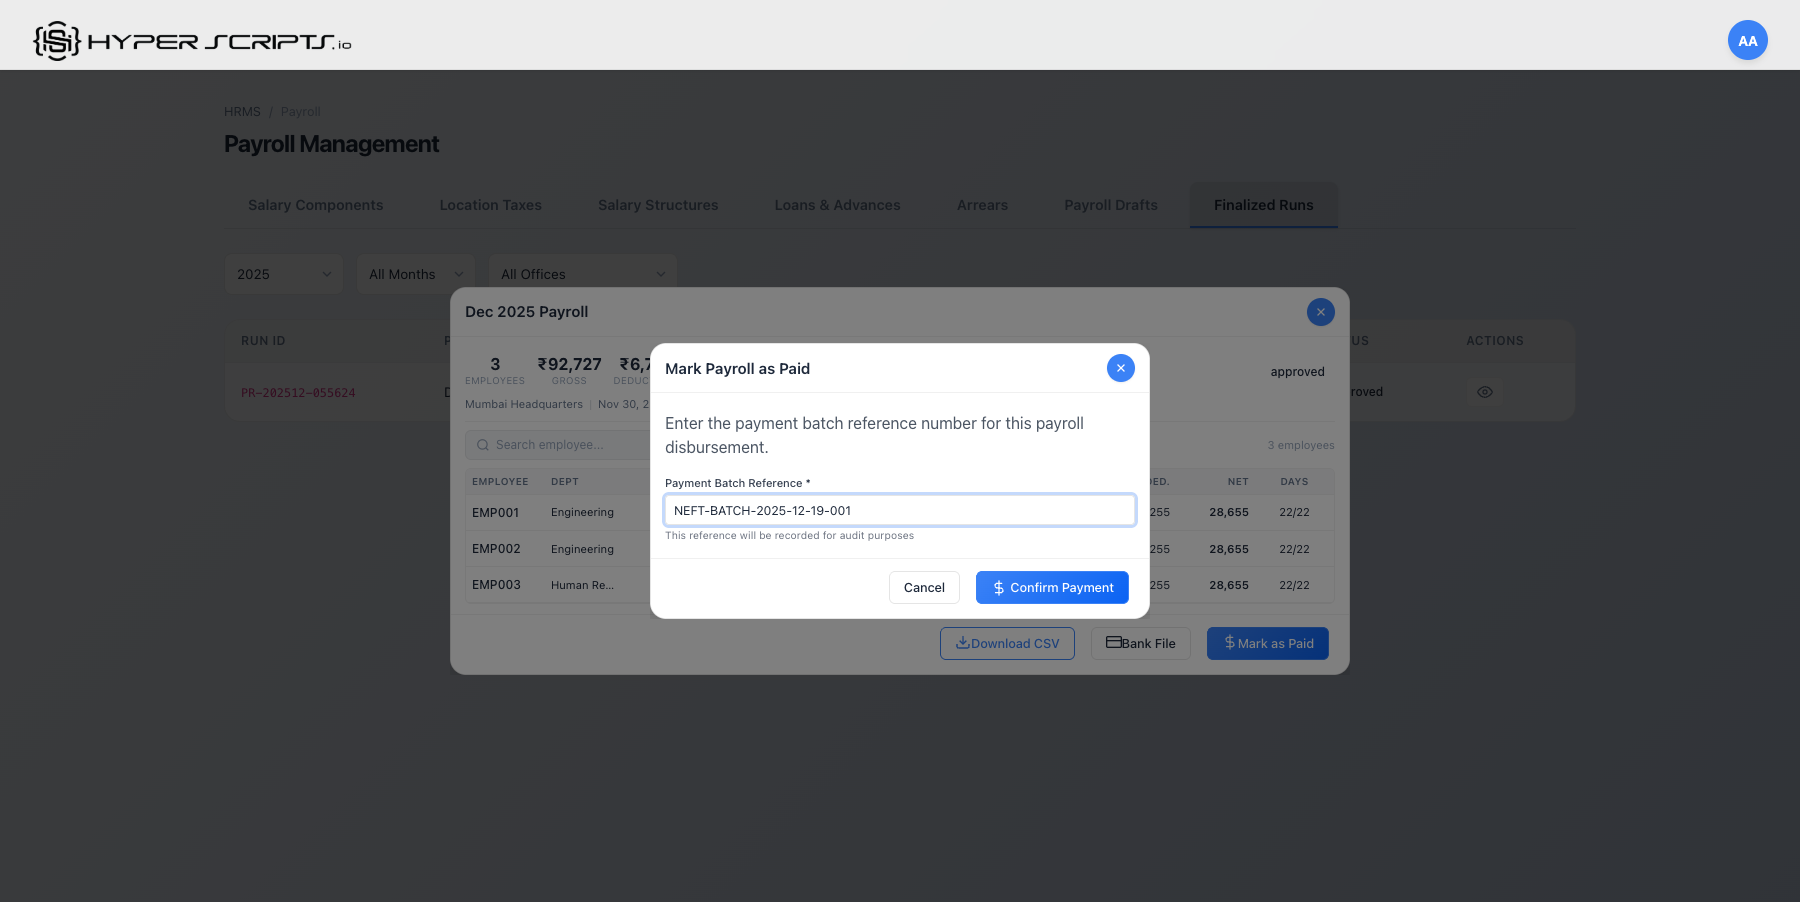
Step 4: Mark as Paid
After disbursing salaries, mark the run as paid:
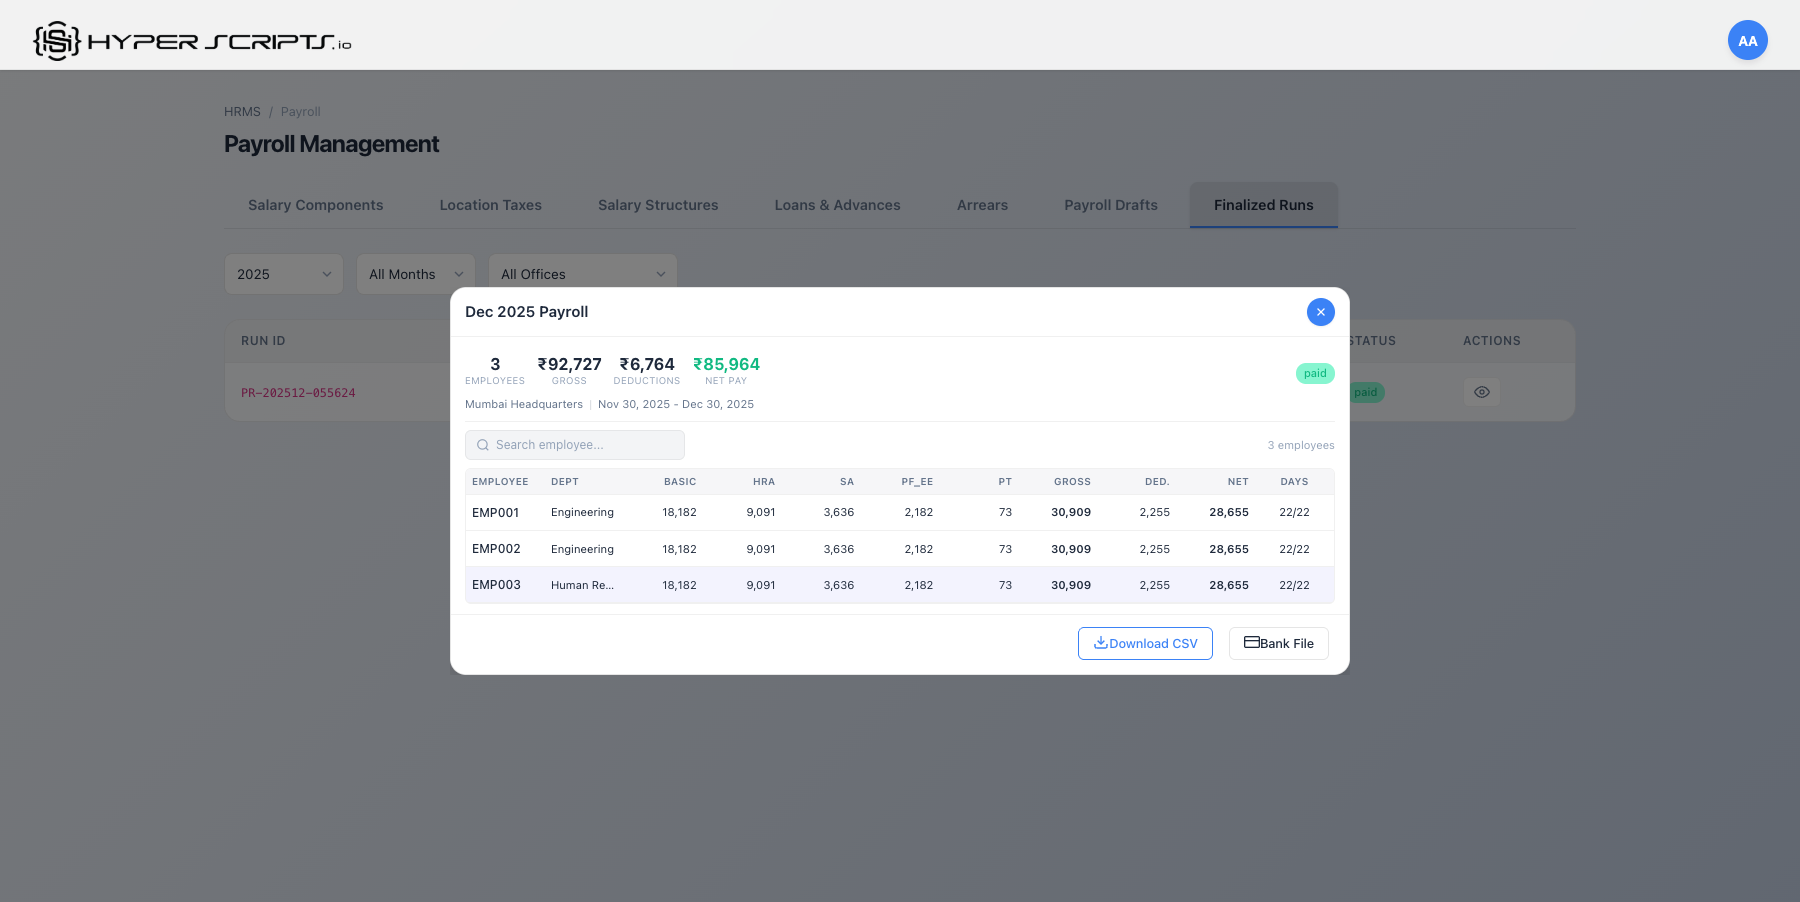
Run Status Progression
| Status | Description | Next Action |
|---|---|---|
| Processed | Just finalized, awaiting approval | Approve |
| Approved | Approved for payment | Mark as Paid |
| Paid | Salaries disbursed | Complete |
8 Loans & Advances
The Loans & Advances feature allows employees to apply for salary advances or loans that are automatically deducted from their monthly payroll as EMI.
| Applied | Employee submits loan request → appears in "Pending" queue |
| Approved | HR Admin reviews and approves → EMI schedule generated |
| Disbursed | HR marks as disbursed with reference number → funds released |
| Active | EMI auto-deducted each payroll → balance reduces monthly |
| Closed | Final EMI paid → loan marked complete automatically |
Key Decision: Rejected loans can be re-applied. Closed loans cannot be reopened.
Understanding Loan Types
| Loan Type | Description | Interest |
|---|---|---|
| Salary Advance | Short-term advance against upcoming salary | Usually interest-free |
| Personal Loan | Longer-term loan with EMI repayment | May include interest |
| Emergency Loan | Quick disbursement for emergencies | May be interest-free |
Step-by-Step: Complete Loan Lifecycle
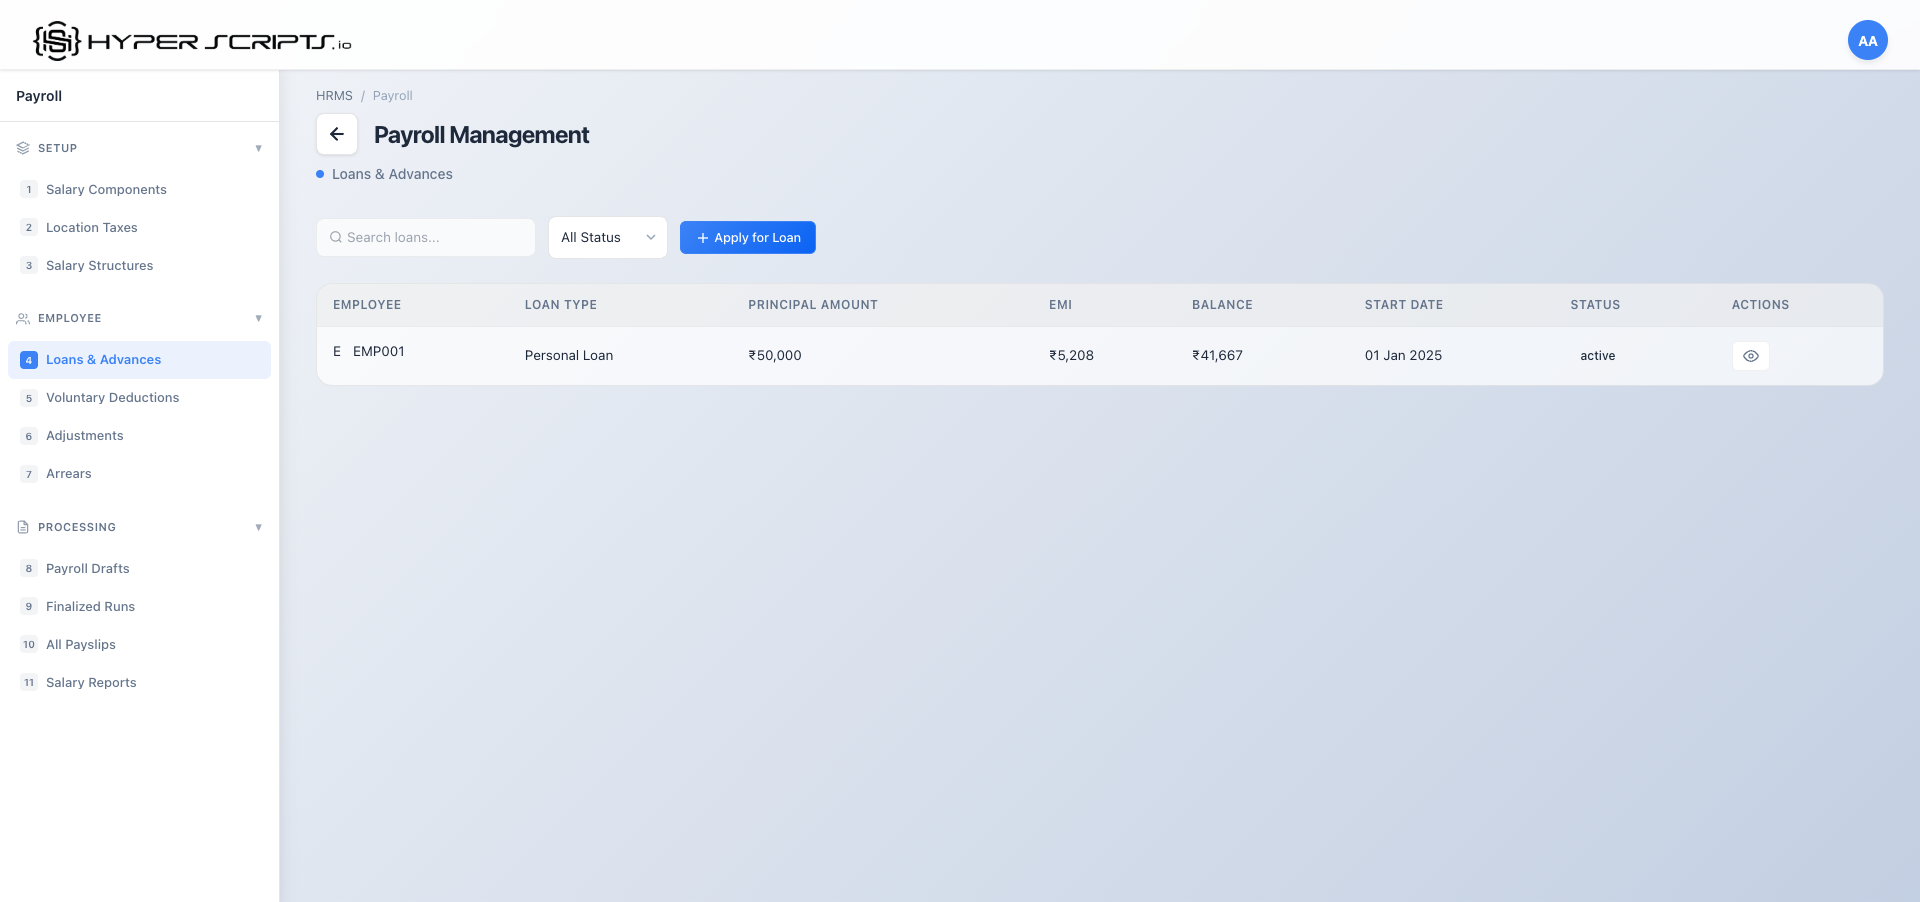
Step 1: View the Loans Tab
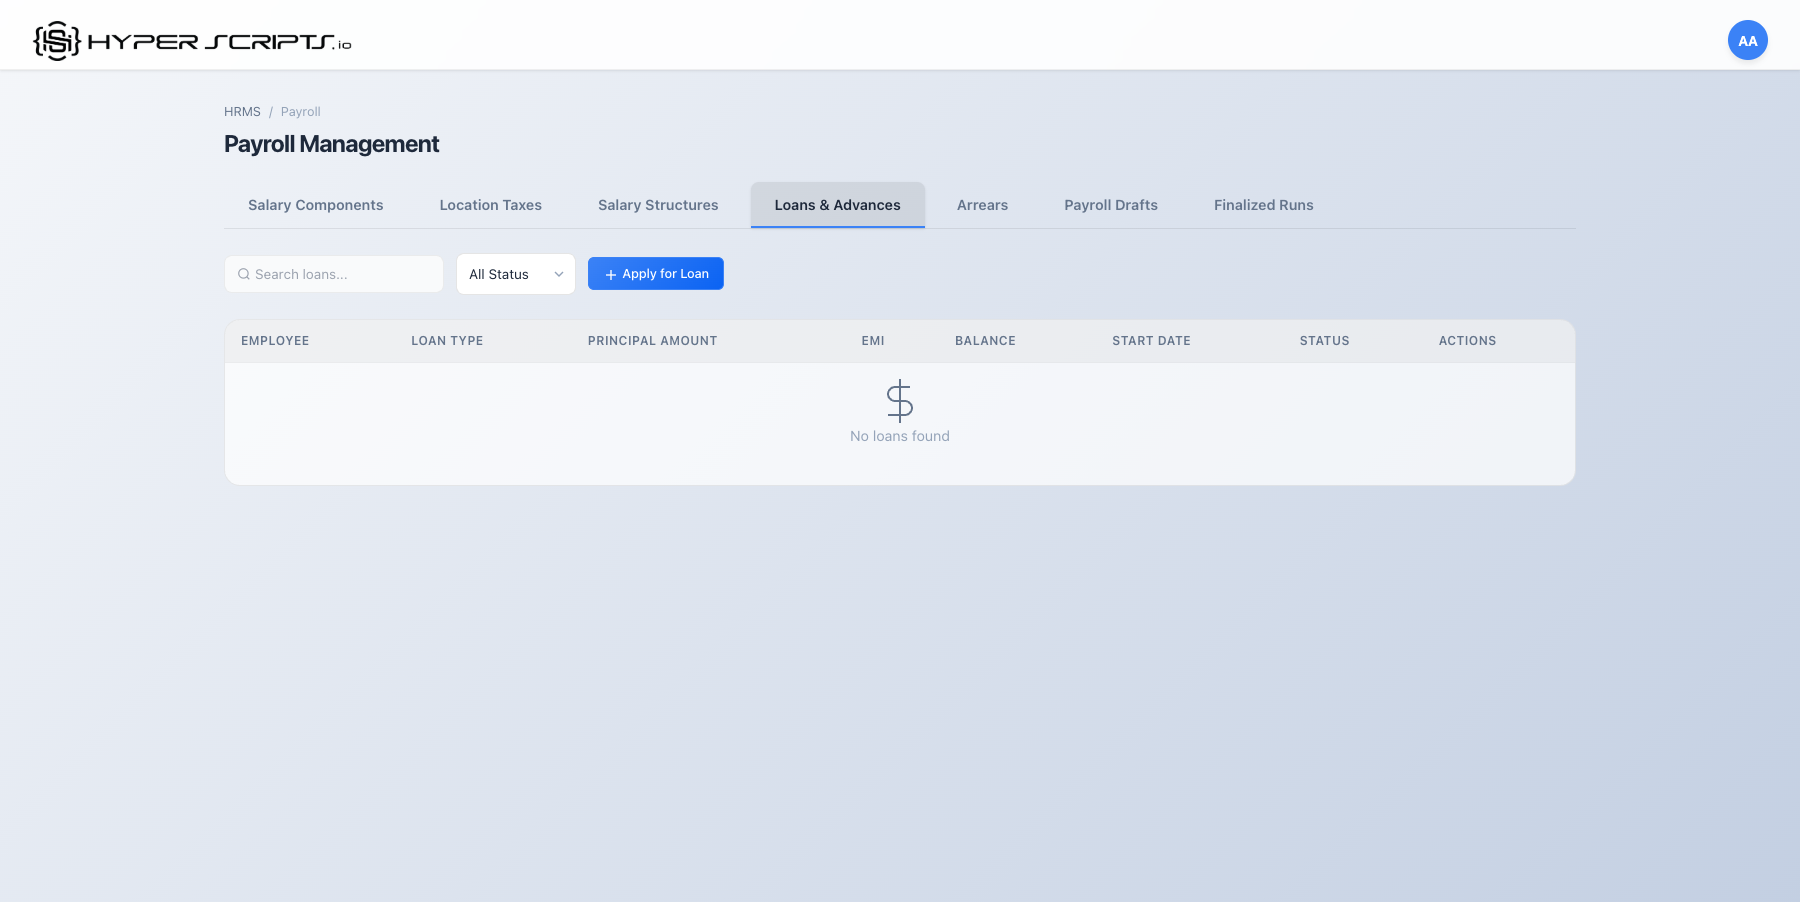
Filtering Loans by Status
The Loans tab includes a status filter dropdown to quickly view loans in different stages:
| Filter Option | Shows |
|---|---|
| All Status | All loans regardless of status |
| Active | Disbursed loans with ongoing EMI deductions |
| Pending | Loan applications awaiting HR approval |
| Completed | Fully repaid loans (all EMIs paid) |
- Filter by Pending to review loan applications needing approval
- Filter by Active to monitor ongoing loan repayments
- The count badge on each filter shows how many loans match that status
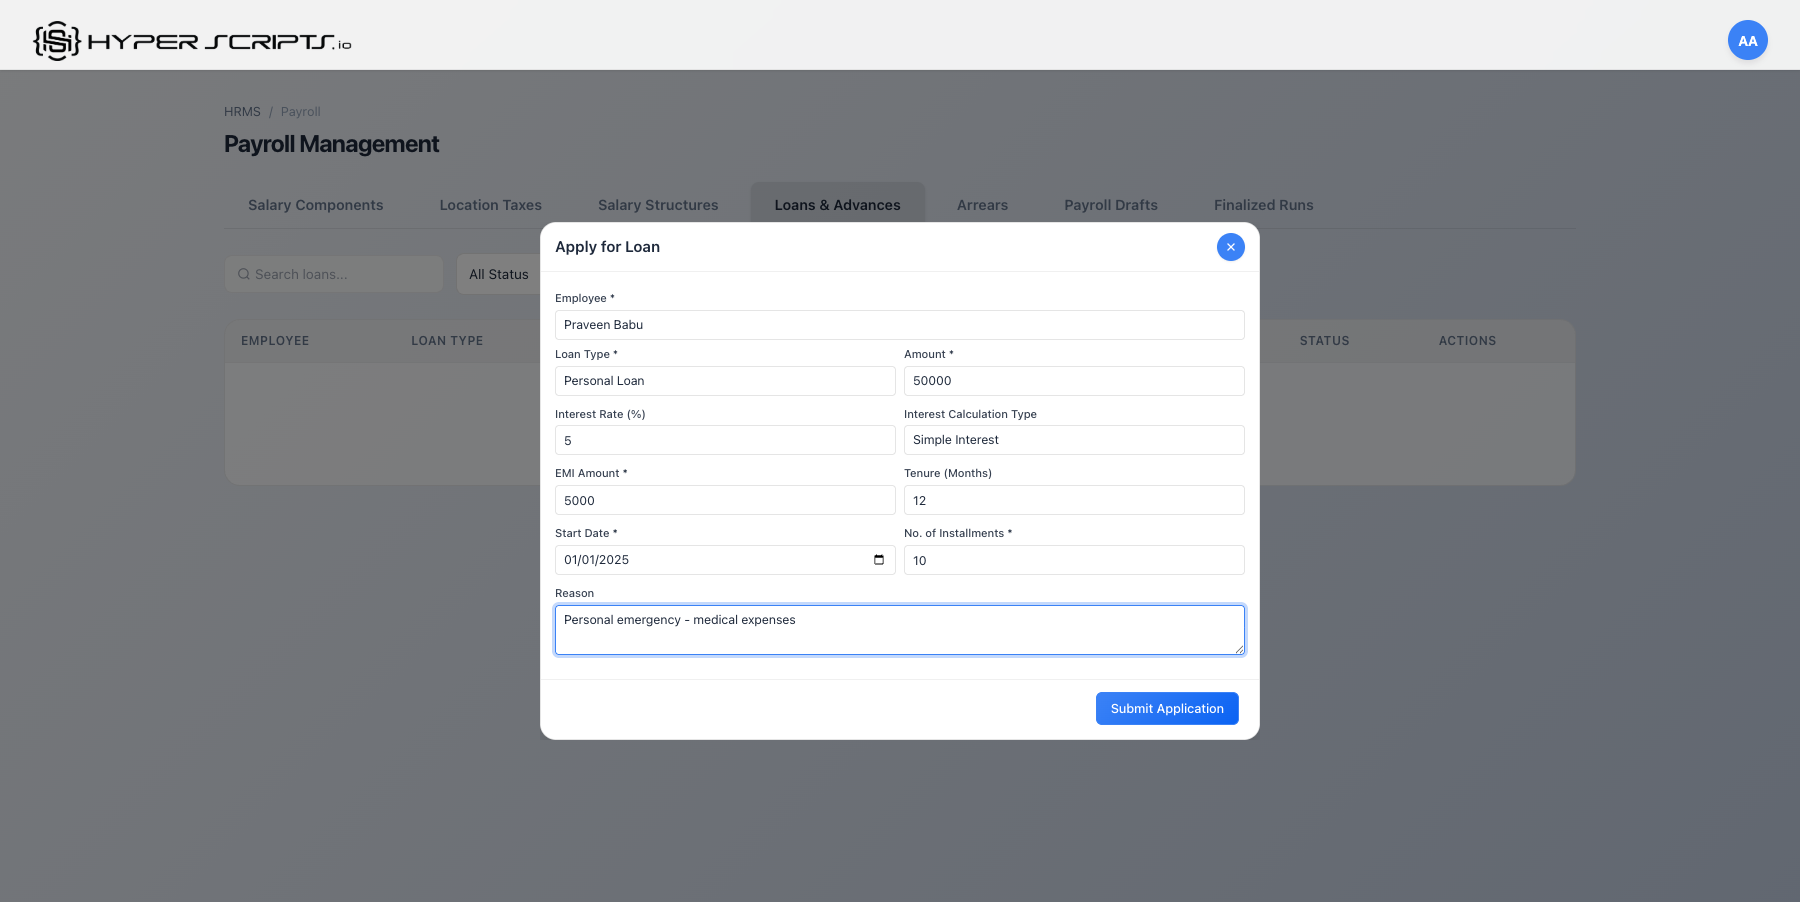
Step 2: Apply for a Loan
Click "Apply for Loan" to open the application modal:

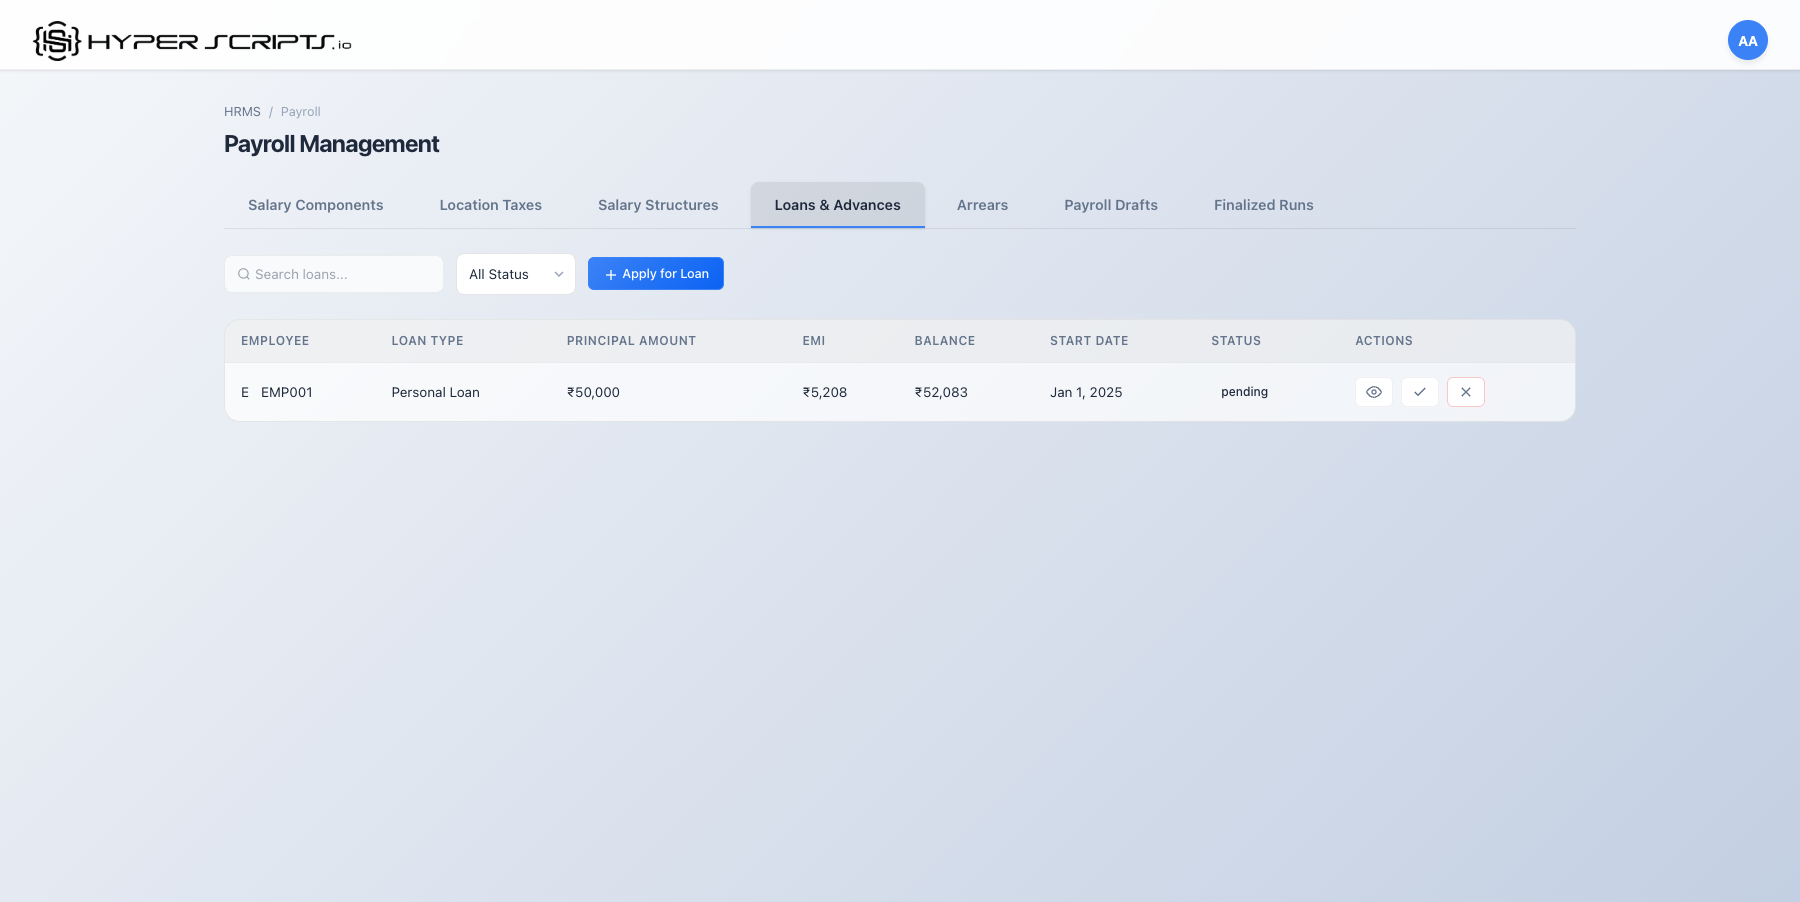
Step 3: View Pending Loan
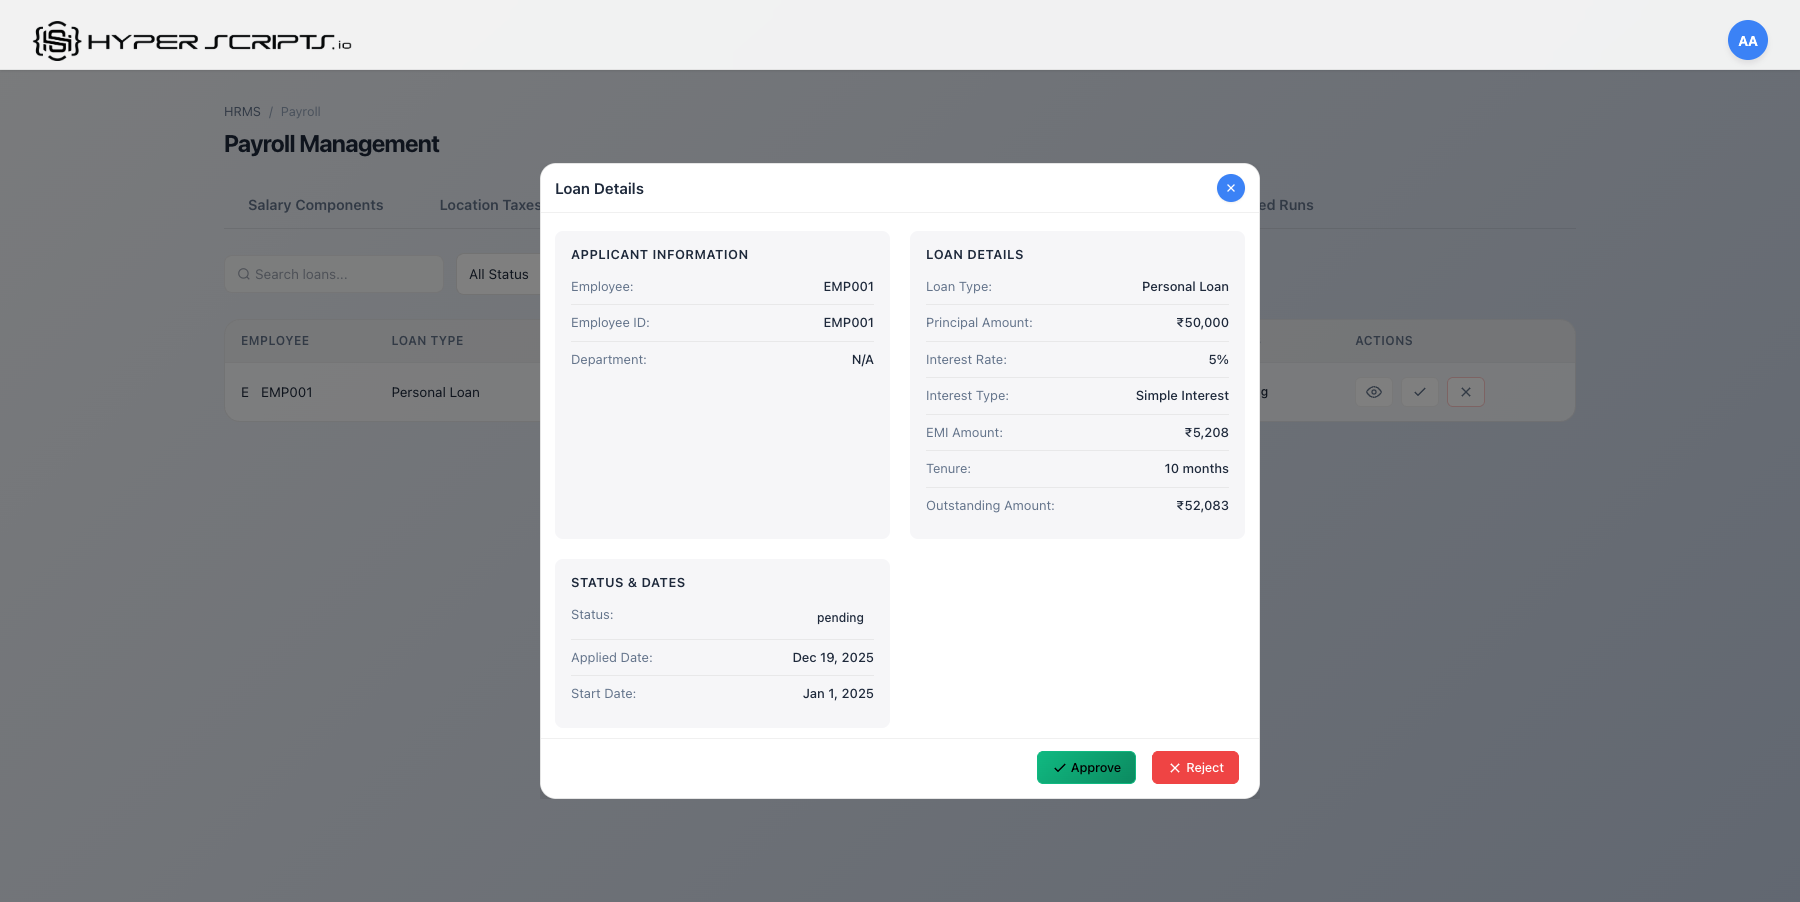
Step 4: View Loan Details
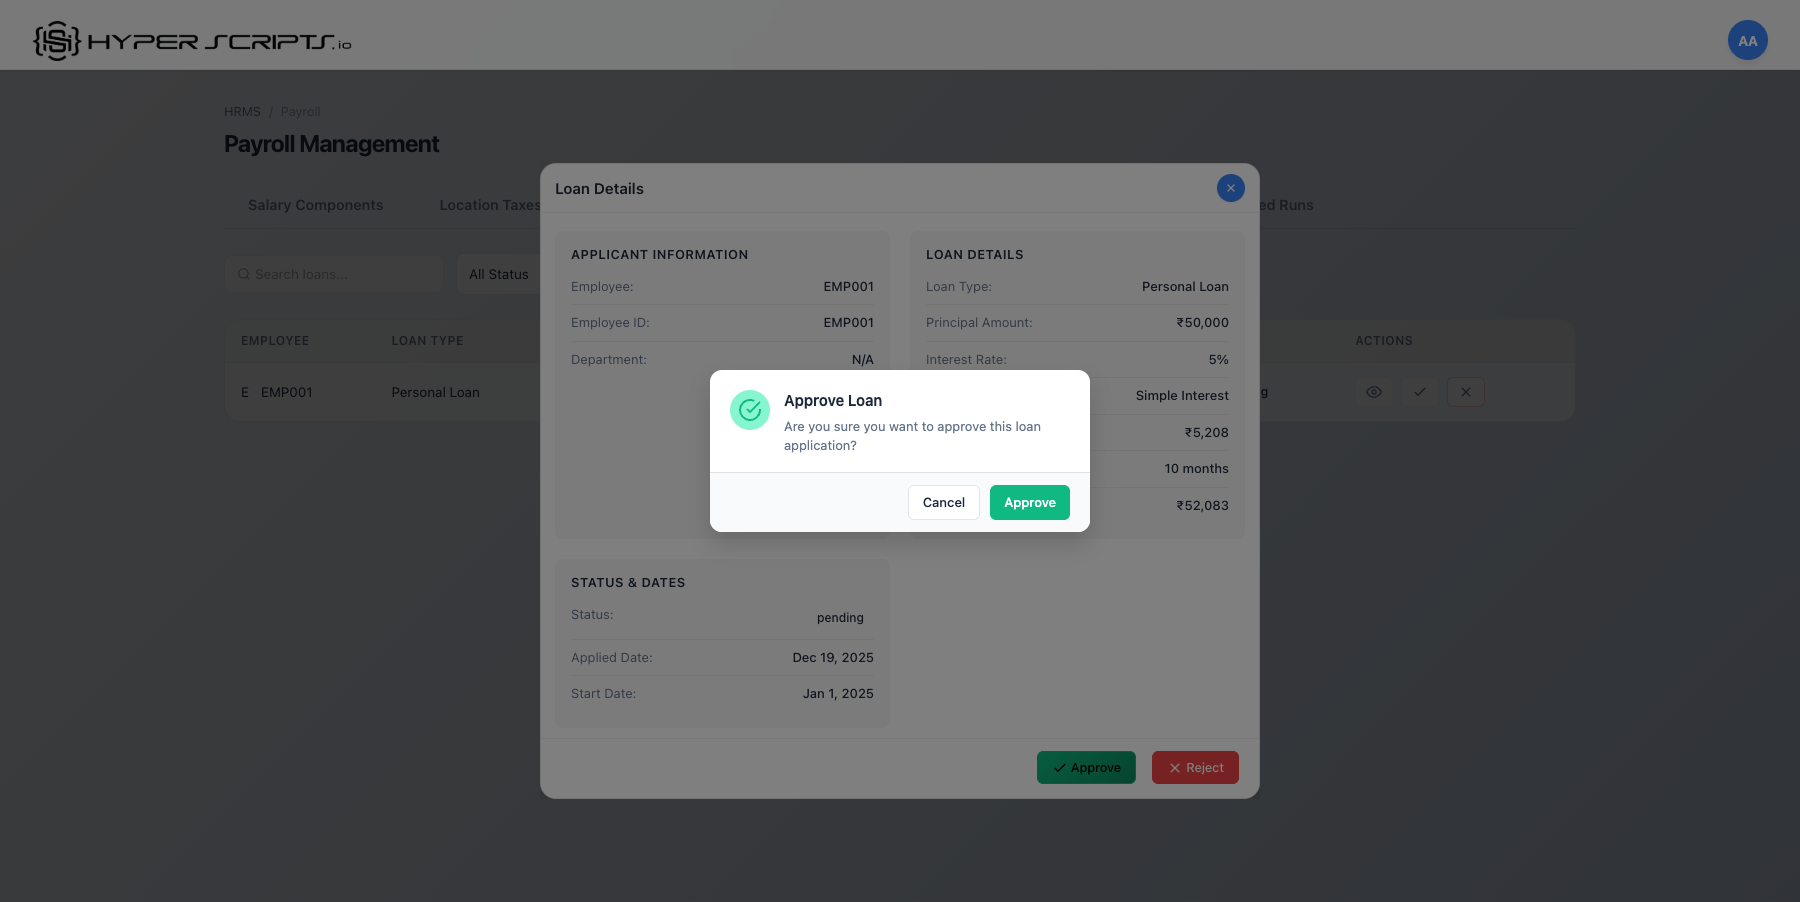
Step 5: Approve the Loan (HR Admin)

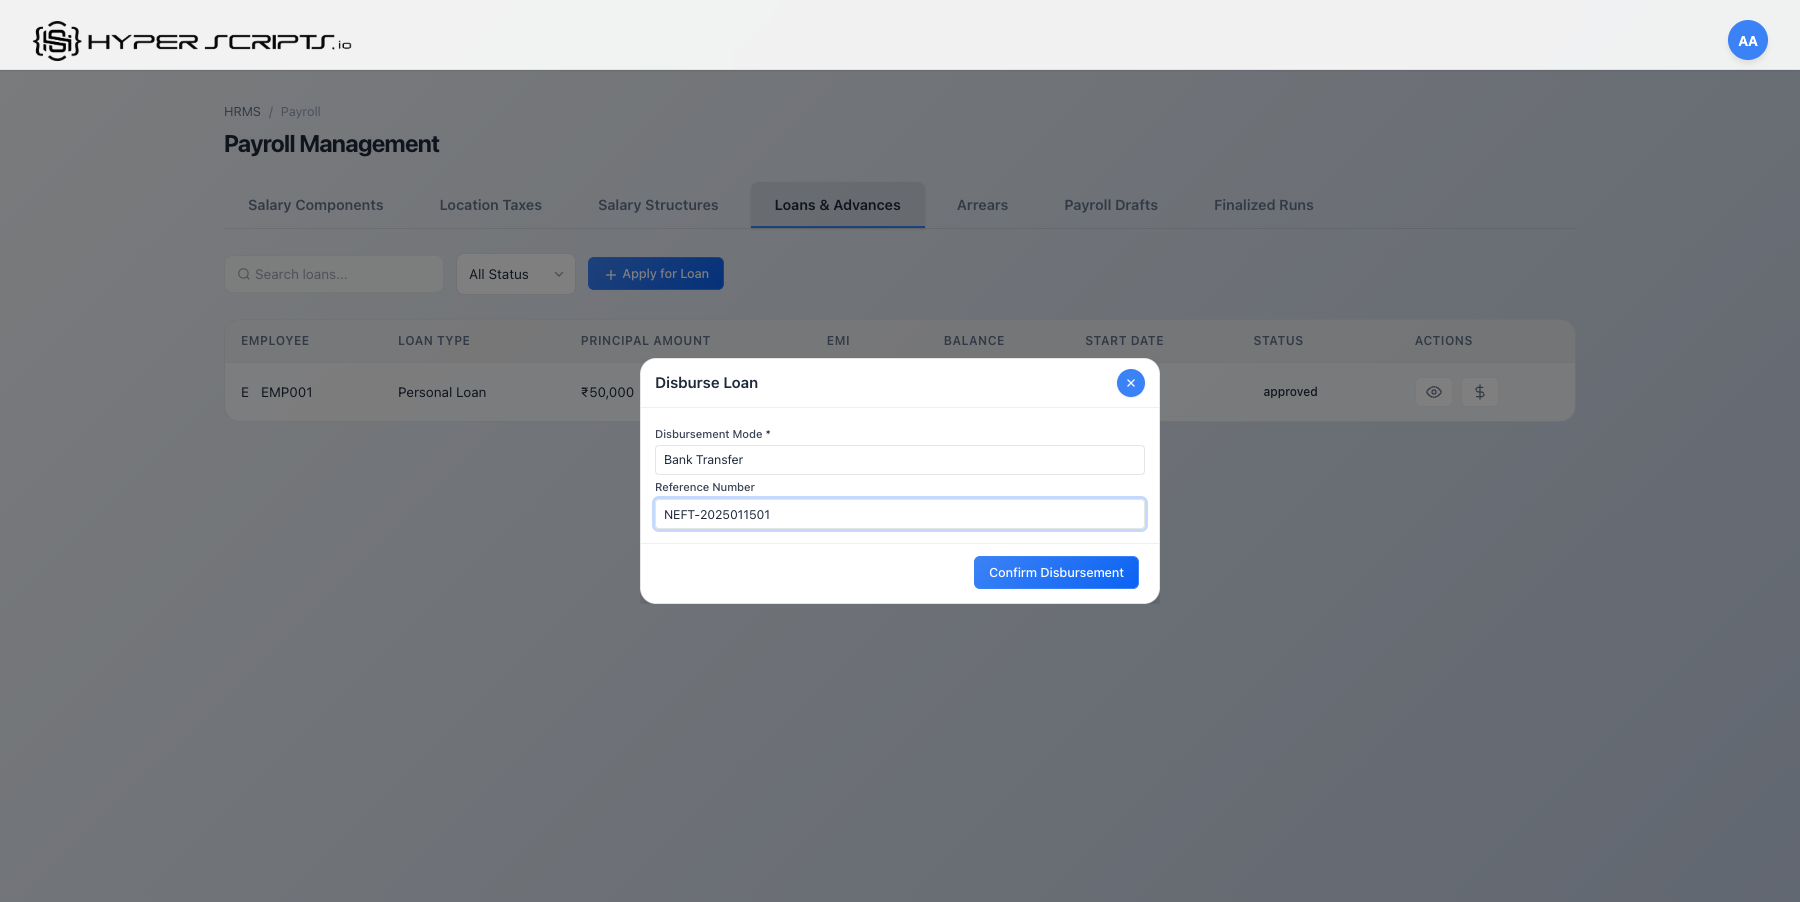
Step 6: Disburse the Loan
After approval, disburse the loan to the employee:

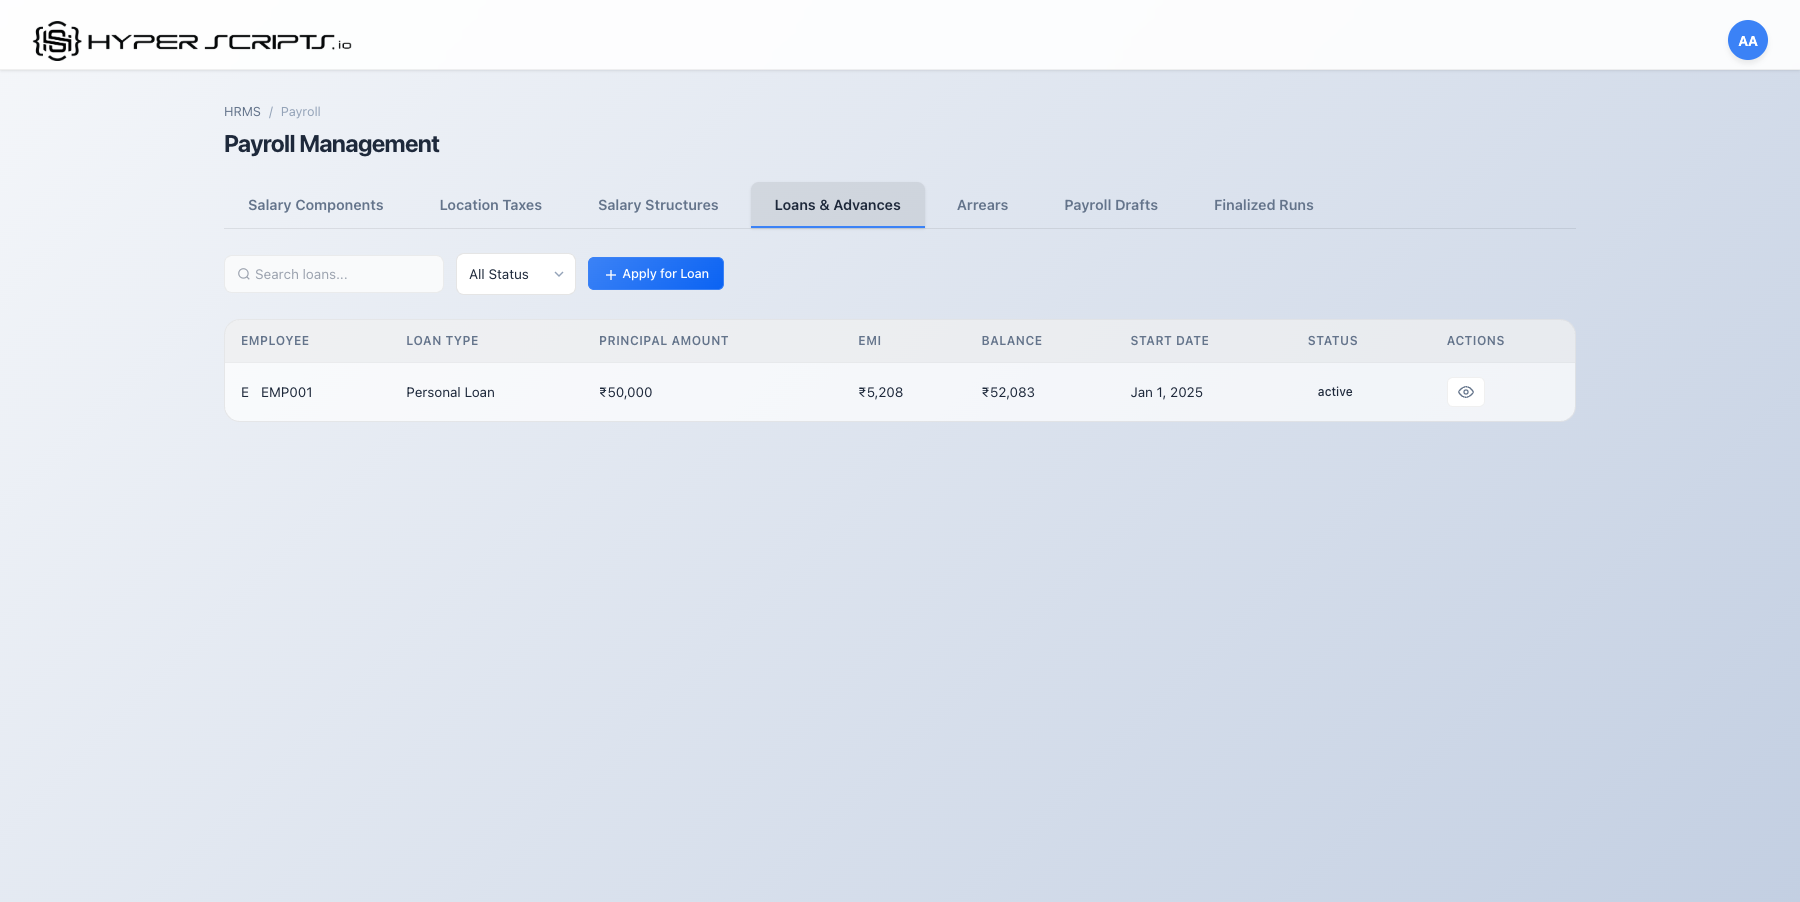
Step 7: EMI Deduction in Payroll
Once active, the loan EMI is automatically deducted from monthly payroll:

Loan Status Progression
| Status | Description | Next Action |
|---|---|---|
| Pending | Application submitted, awaiting HR review | Approve or Reject |
| Approved | Approved by HR, awaiting disbursement | Disburse |
| Active | Loan disbursed, EMI being deducted monthly | Automatic EMI |
| Completed | All EMIs paid, loan closed | None |
| Rejected | Application rejected by HR | None |
9 Arrears Management
Arrears are salary differences that arise when salary changes are applied retroactively. The system automatically calculates arrears when you create a salary structure version with a past effective date.
Arrears Lifecycle Summary
Before diving into details, here's the complete arrears workflow at a glance:
| Status | What It Means | What You Can Do |
|---|---|---|
| Pending | Arrears calculated but not yet included in payroll | Review details, Apply, or Cancel |
| Applied | Arrears queued for next payroll run | View only (will be in next payslip) |
| Cancelled | Arrears voided (will not be paid) | View only (audit trail preserved) |
- Version Arrears: When salary structure changes retroactively (affects multiple employees)
- CTC Revision Arrears: When individual employee's CTC is revised with past date
Understanding Arrears
Arrears occur when:
- A salary structure is changed with a past effective date
- A salary increment is announced retroactively
- A new component is added with backdated effect
- An employee's CTC is revised with a past effective date
Arrears Tab Structure
The Arrears section is organized into two tabs for different types of arrears:
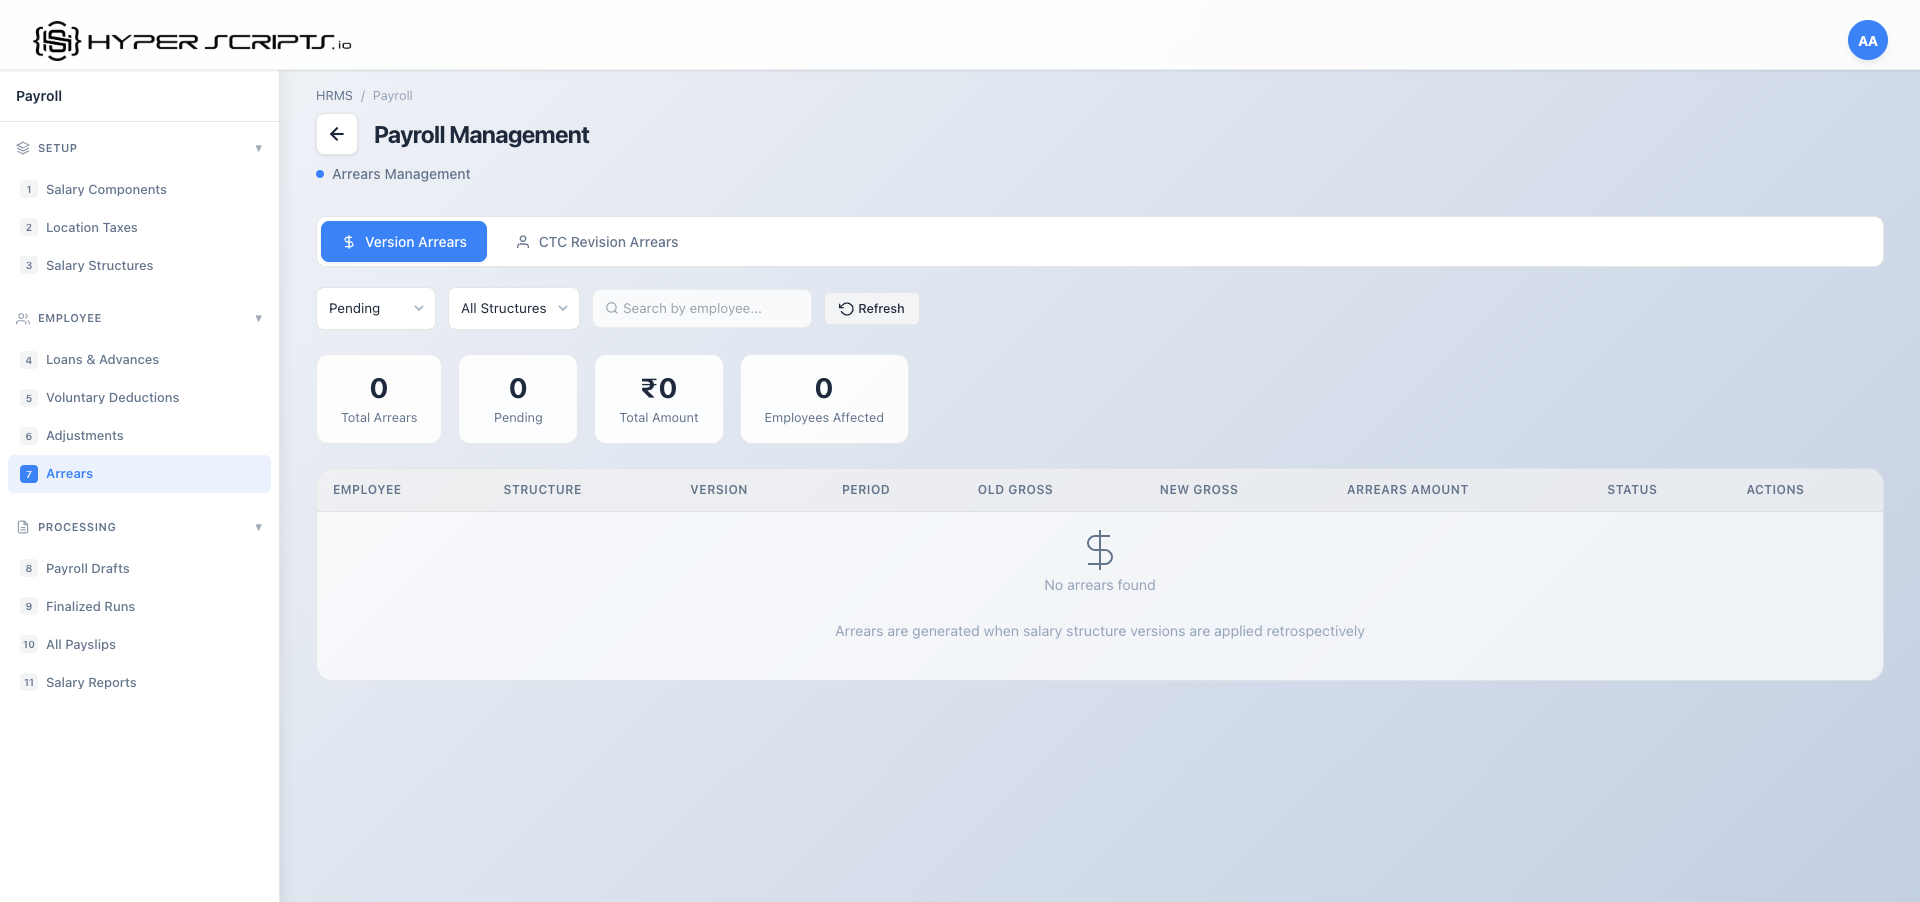
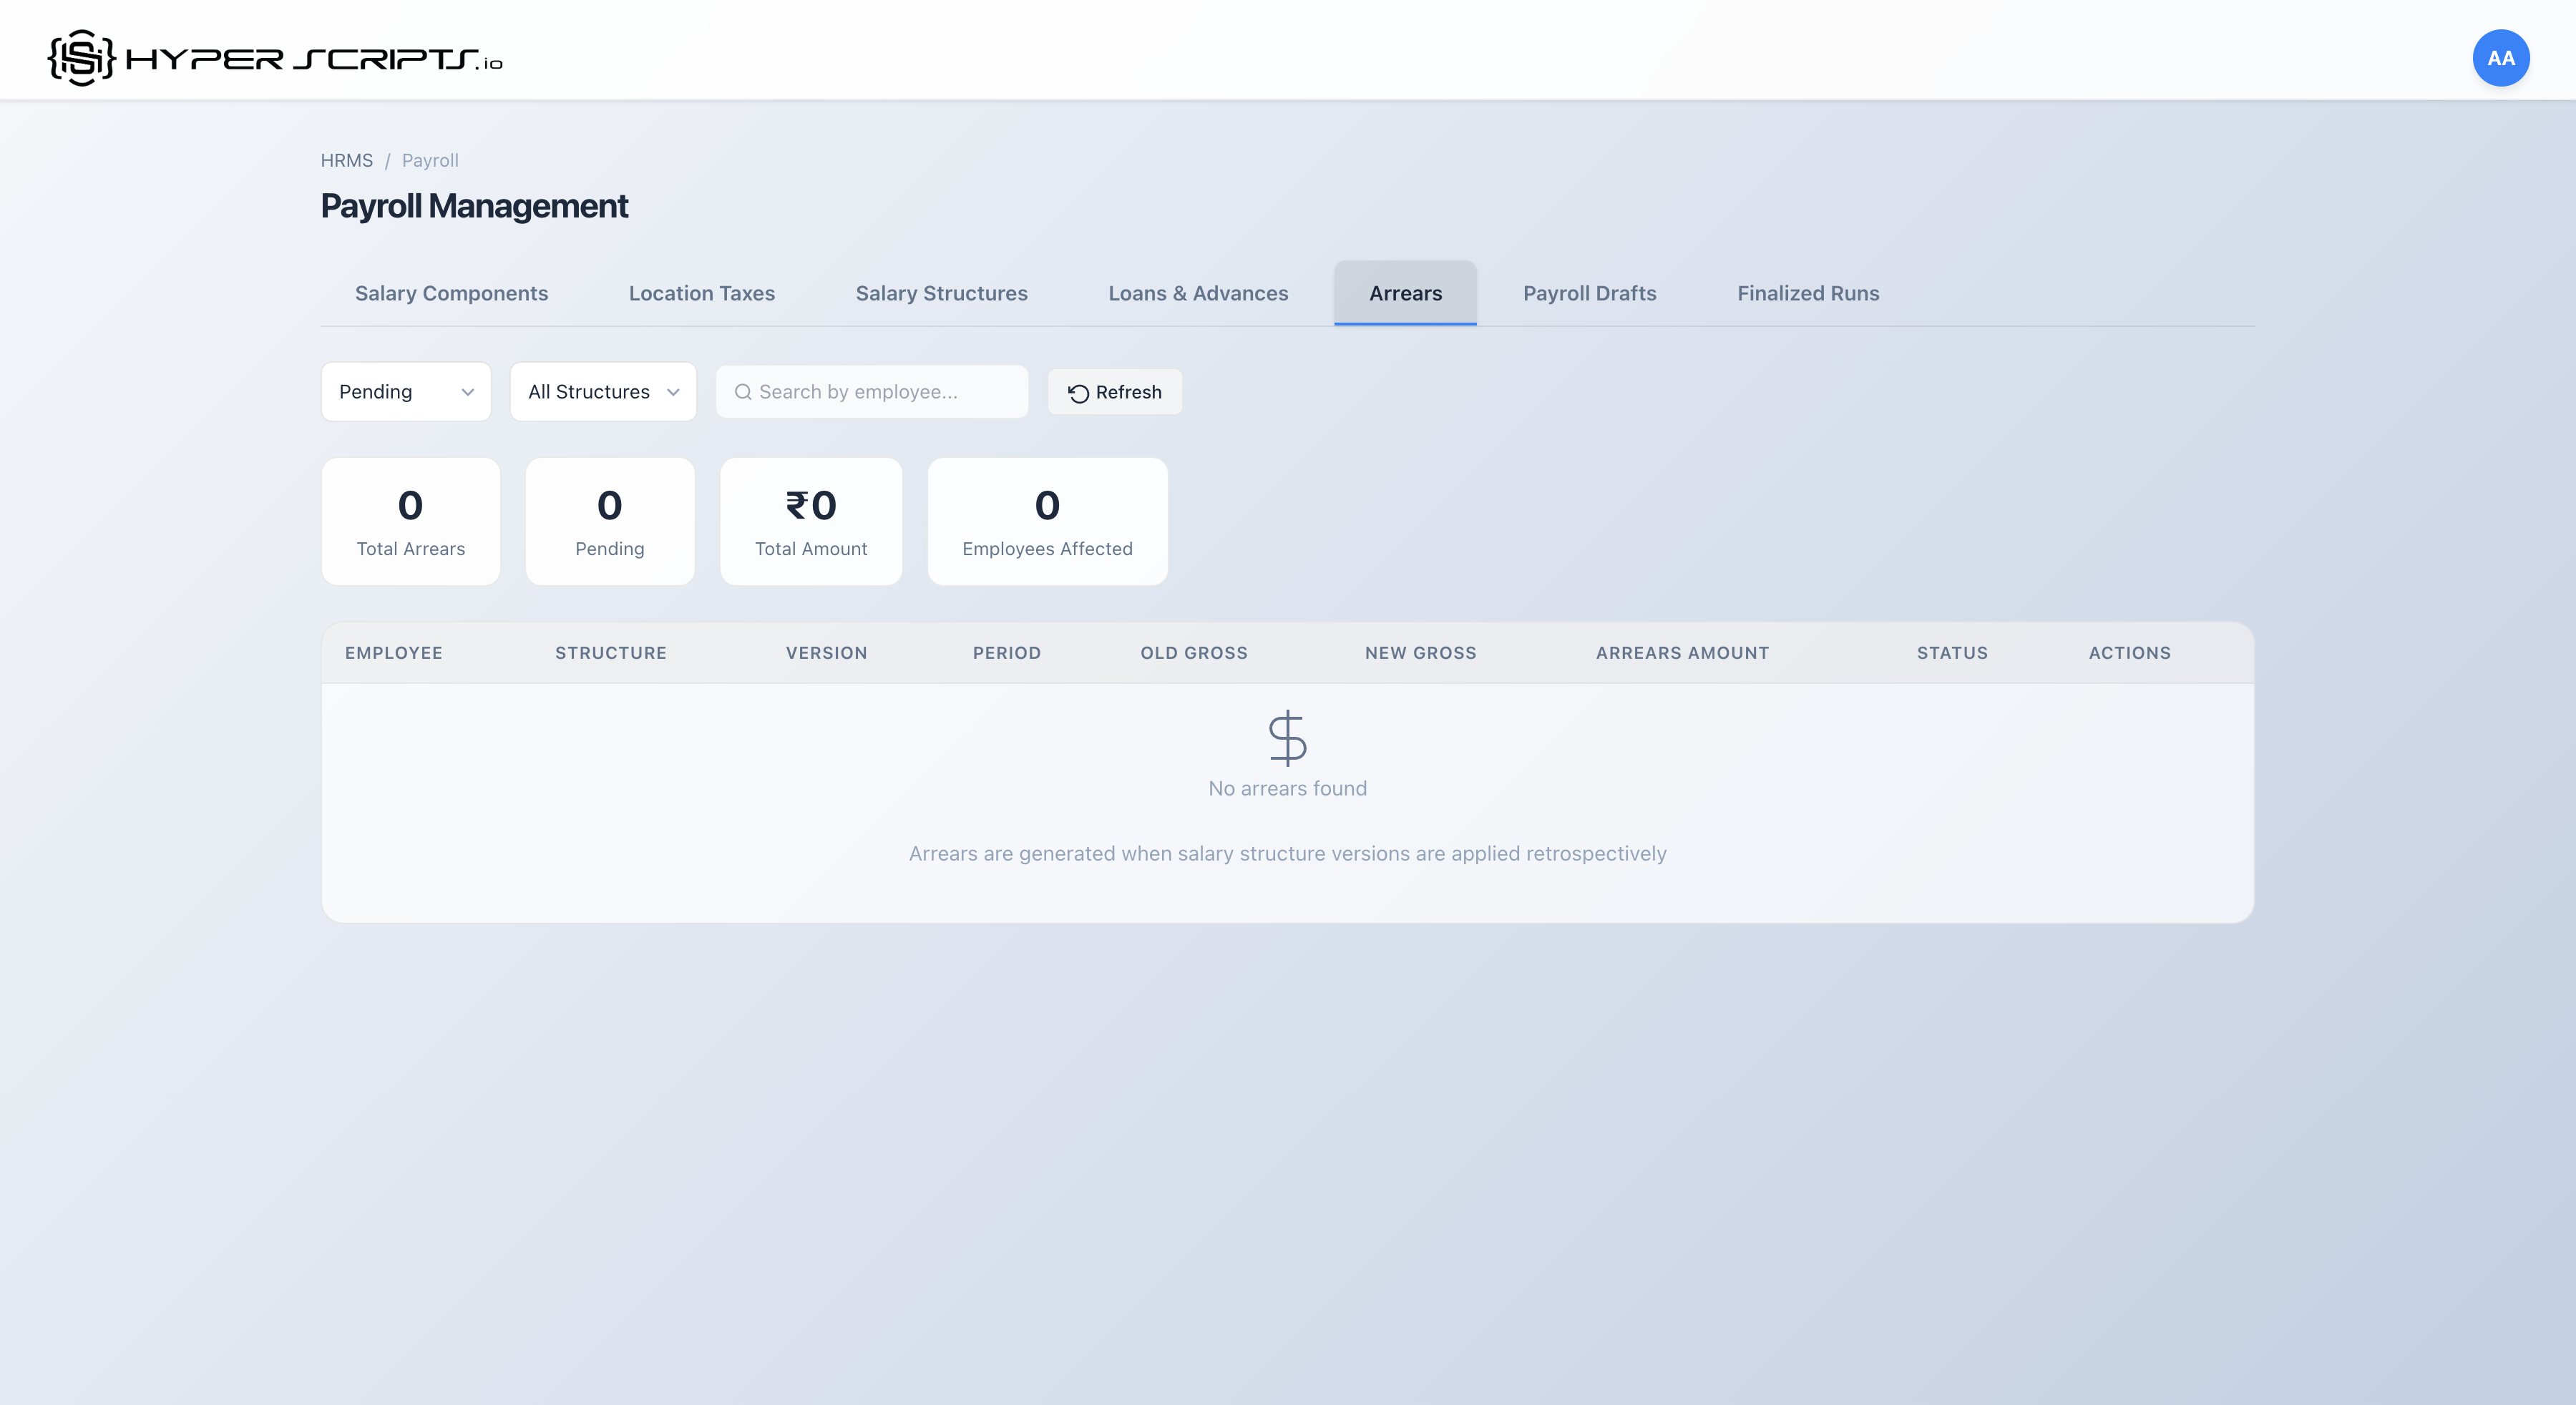
Tab 1: Version Arrears
Version Arrears are generated when a salary structure version is created with a retroactive effective date. These affect multiple employees who use the same structure.
- Trigger: Creating a new version of a salary structure with a past date
- Scope: All employees assigned to that structure
- Example: Government revises PF percentage effective April 1st (announced in July)
Tab 2: CTC Revision Arrears
CTC Revision Arrears are generated when an individual employee's CTC is revised with a retroactive effective date.
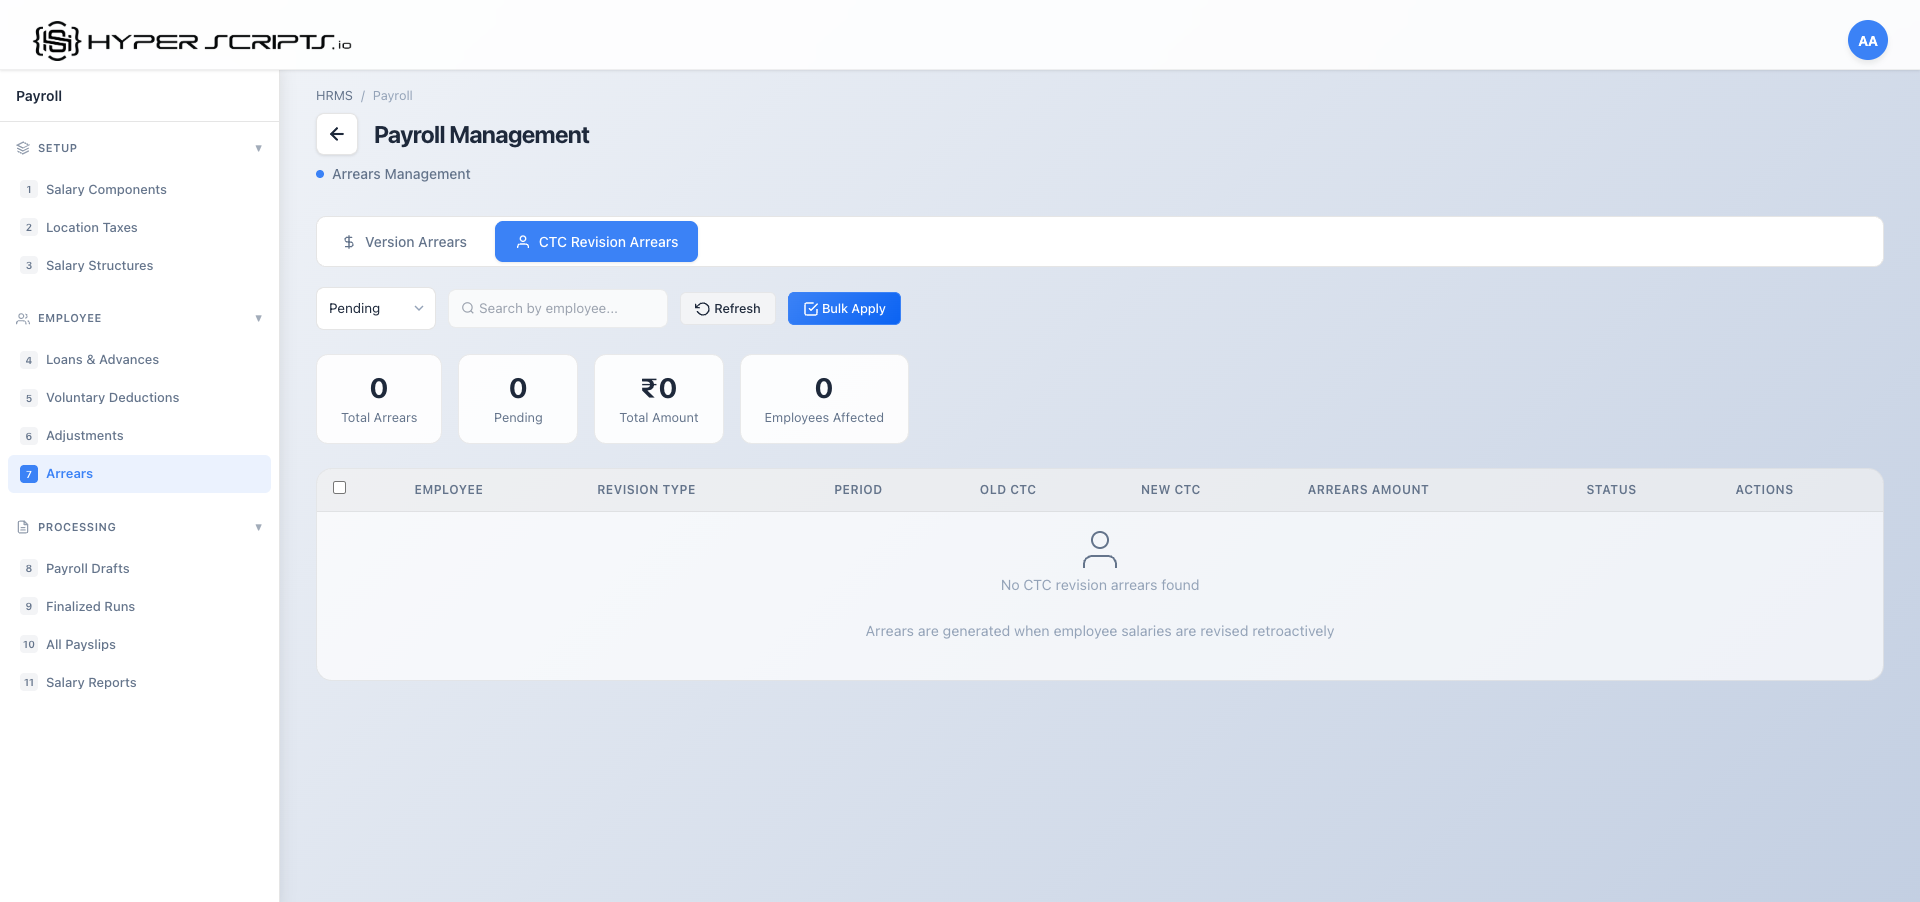
- Trigger: Creating a salary revision with a past effective date
- Scope: Individual employee only
- Example: Promotion announced in December, effective from October
CTC Revision Arrears Details
| Column | Description |
|---|---|
| Employee | Employee name and code |
| Revision Date | When the salary revision was created |
| Effective From | The retroactive date from which the revision applies |
| Old CTC | Previous annual CTC |
| New CTC | Revised annual CTC |
| Months Affected | Number of past months requiring arrears calculation |
| Total Arrears | Sum of arrears for all affected months |
| Status | Pending, Applied, or Cancelled |
- Go to Employee Salaries → Select employee → Click "Revise Salary"
- Enter new CTC and set "Effective From" to a past date
- System automatically calculates arrears for each affected month
- Navigate to Arrears → CTC Revision tab to review
- Apply arrears to include in the next payroll
Step-by-Step: Creating Version-Based Retroactive Arrears
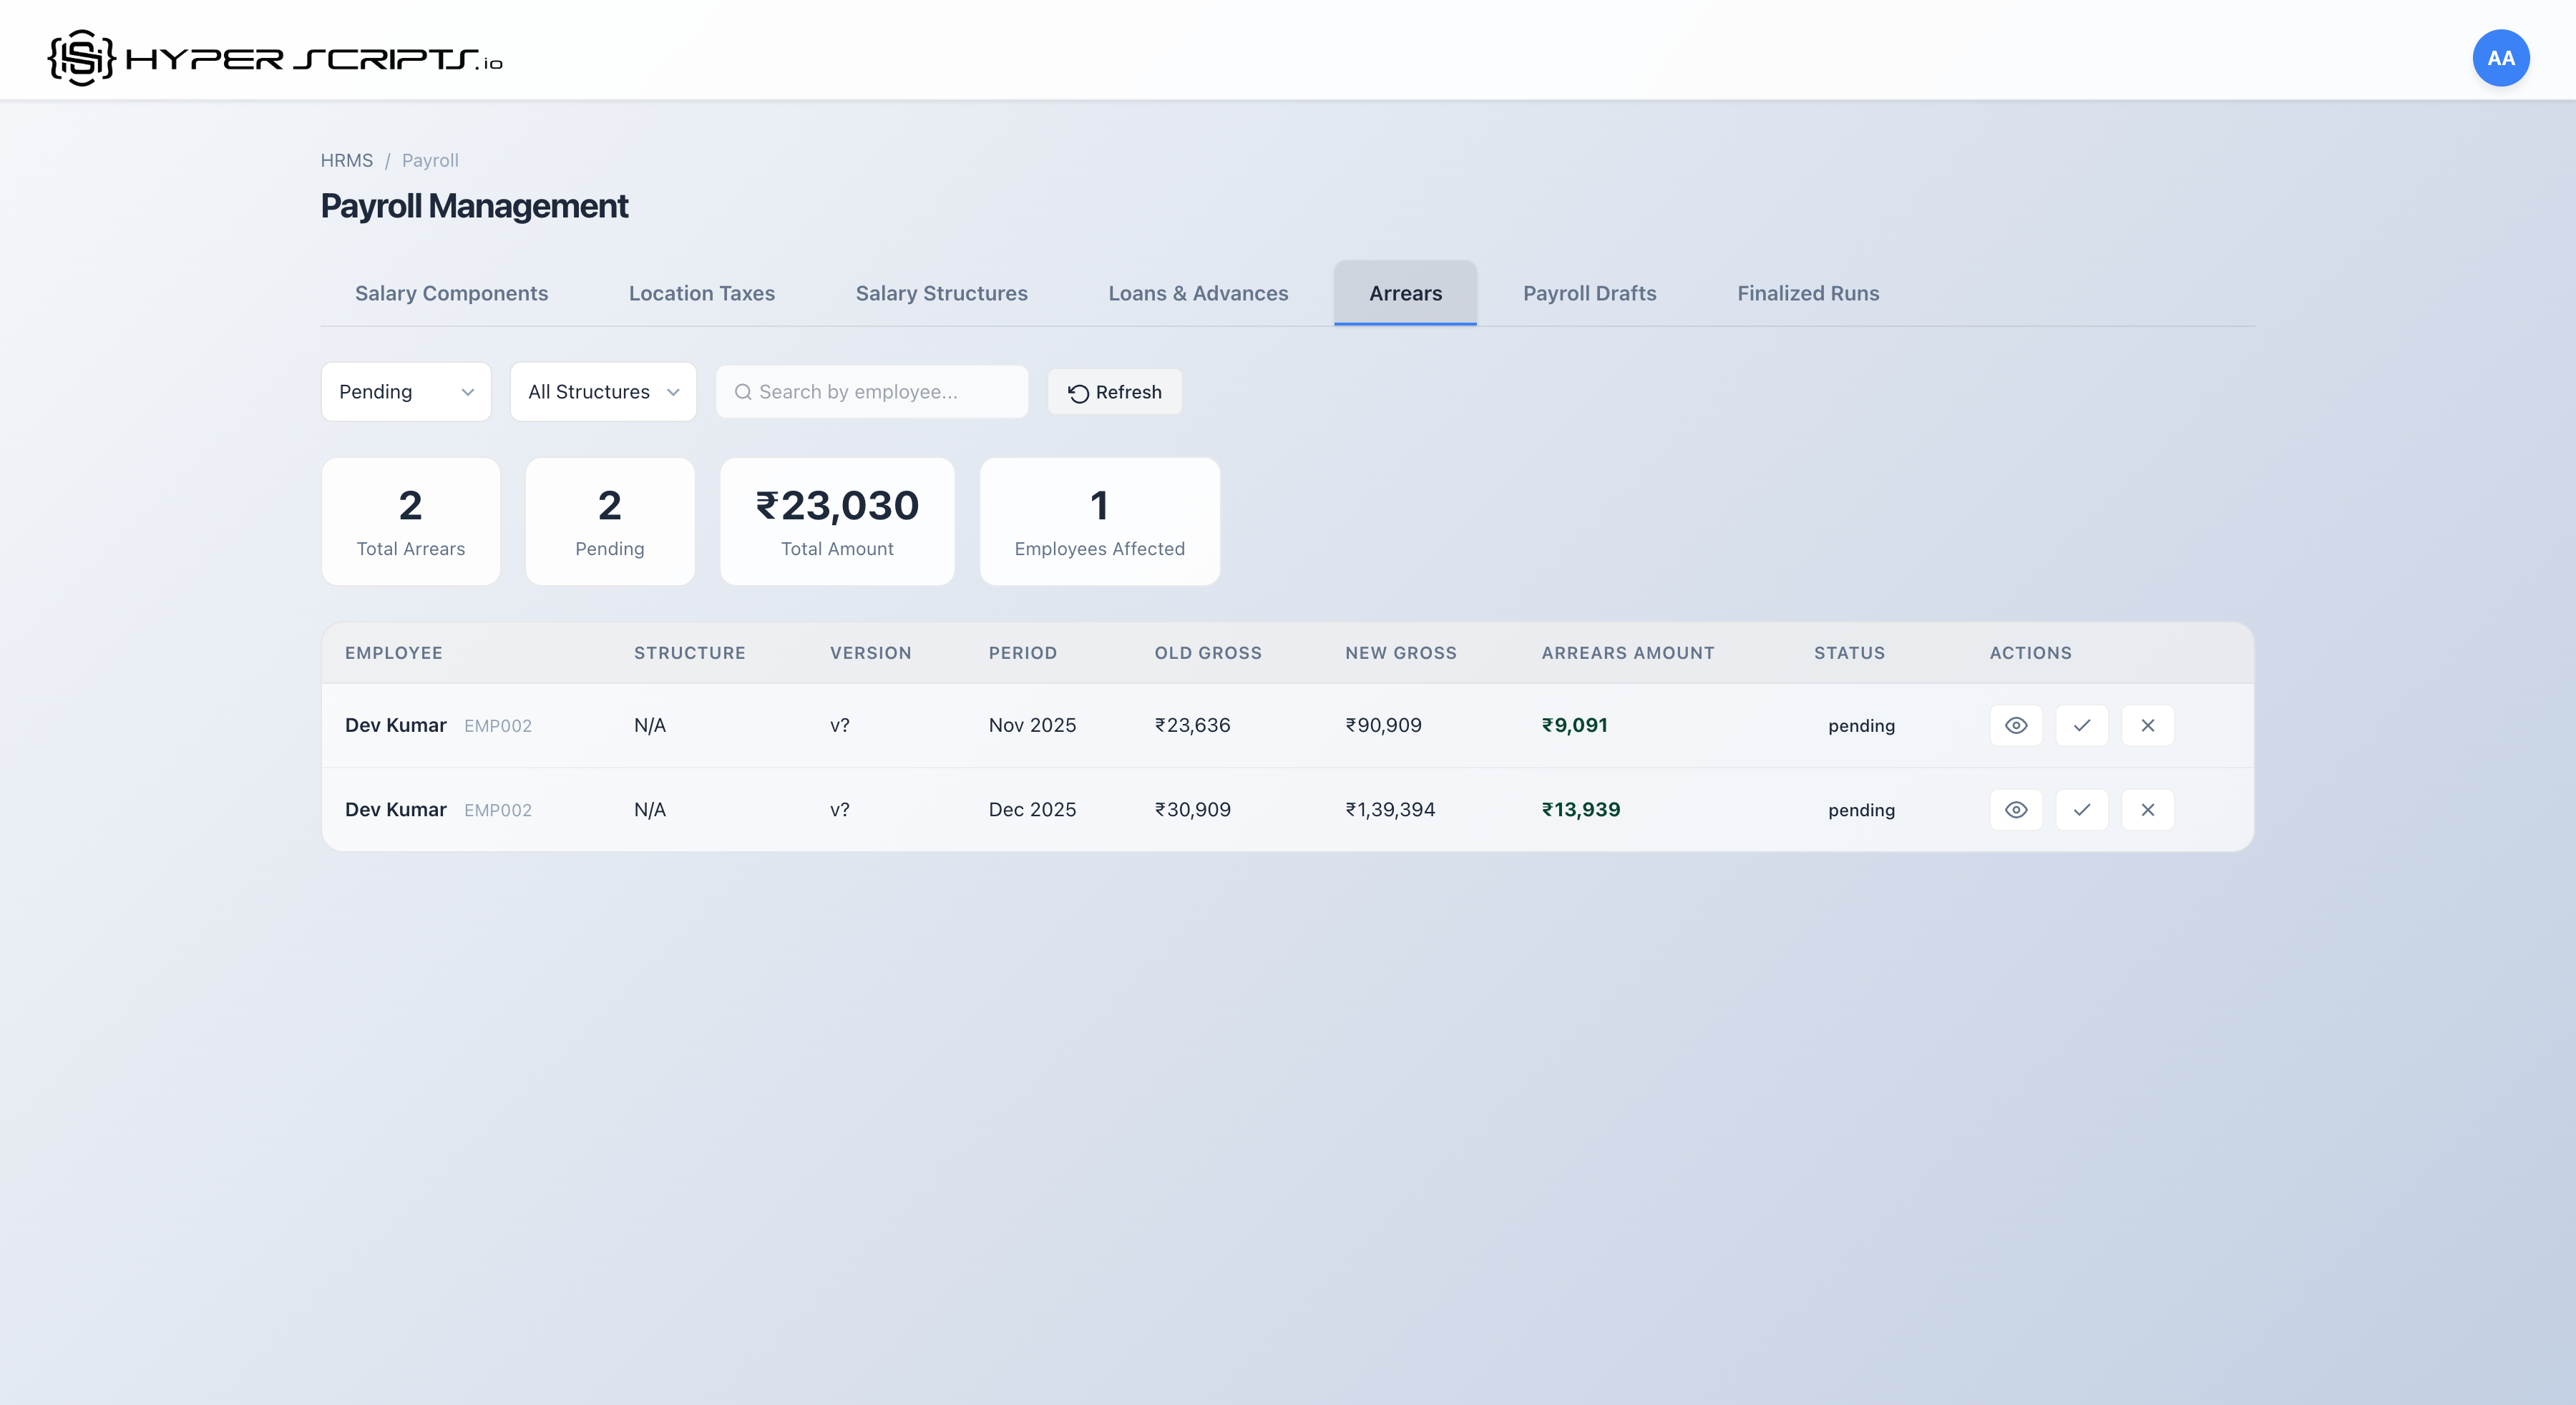
Step 1: View the Arrears Tab
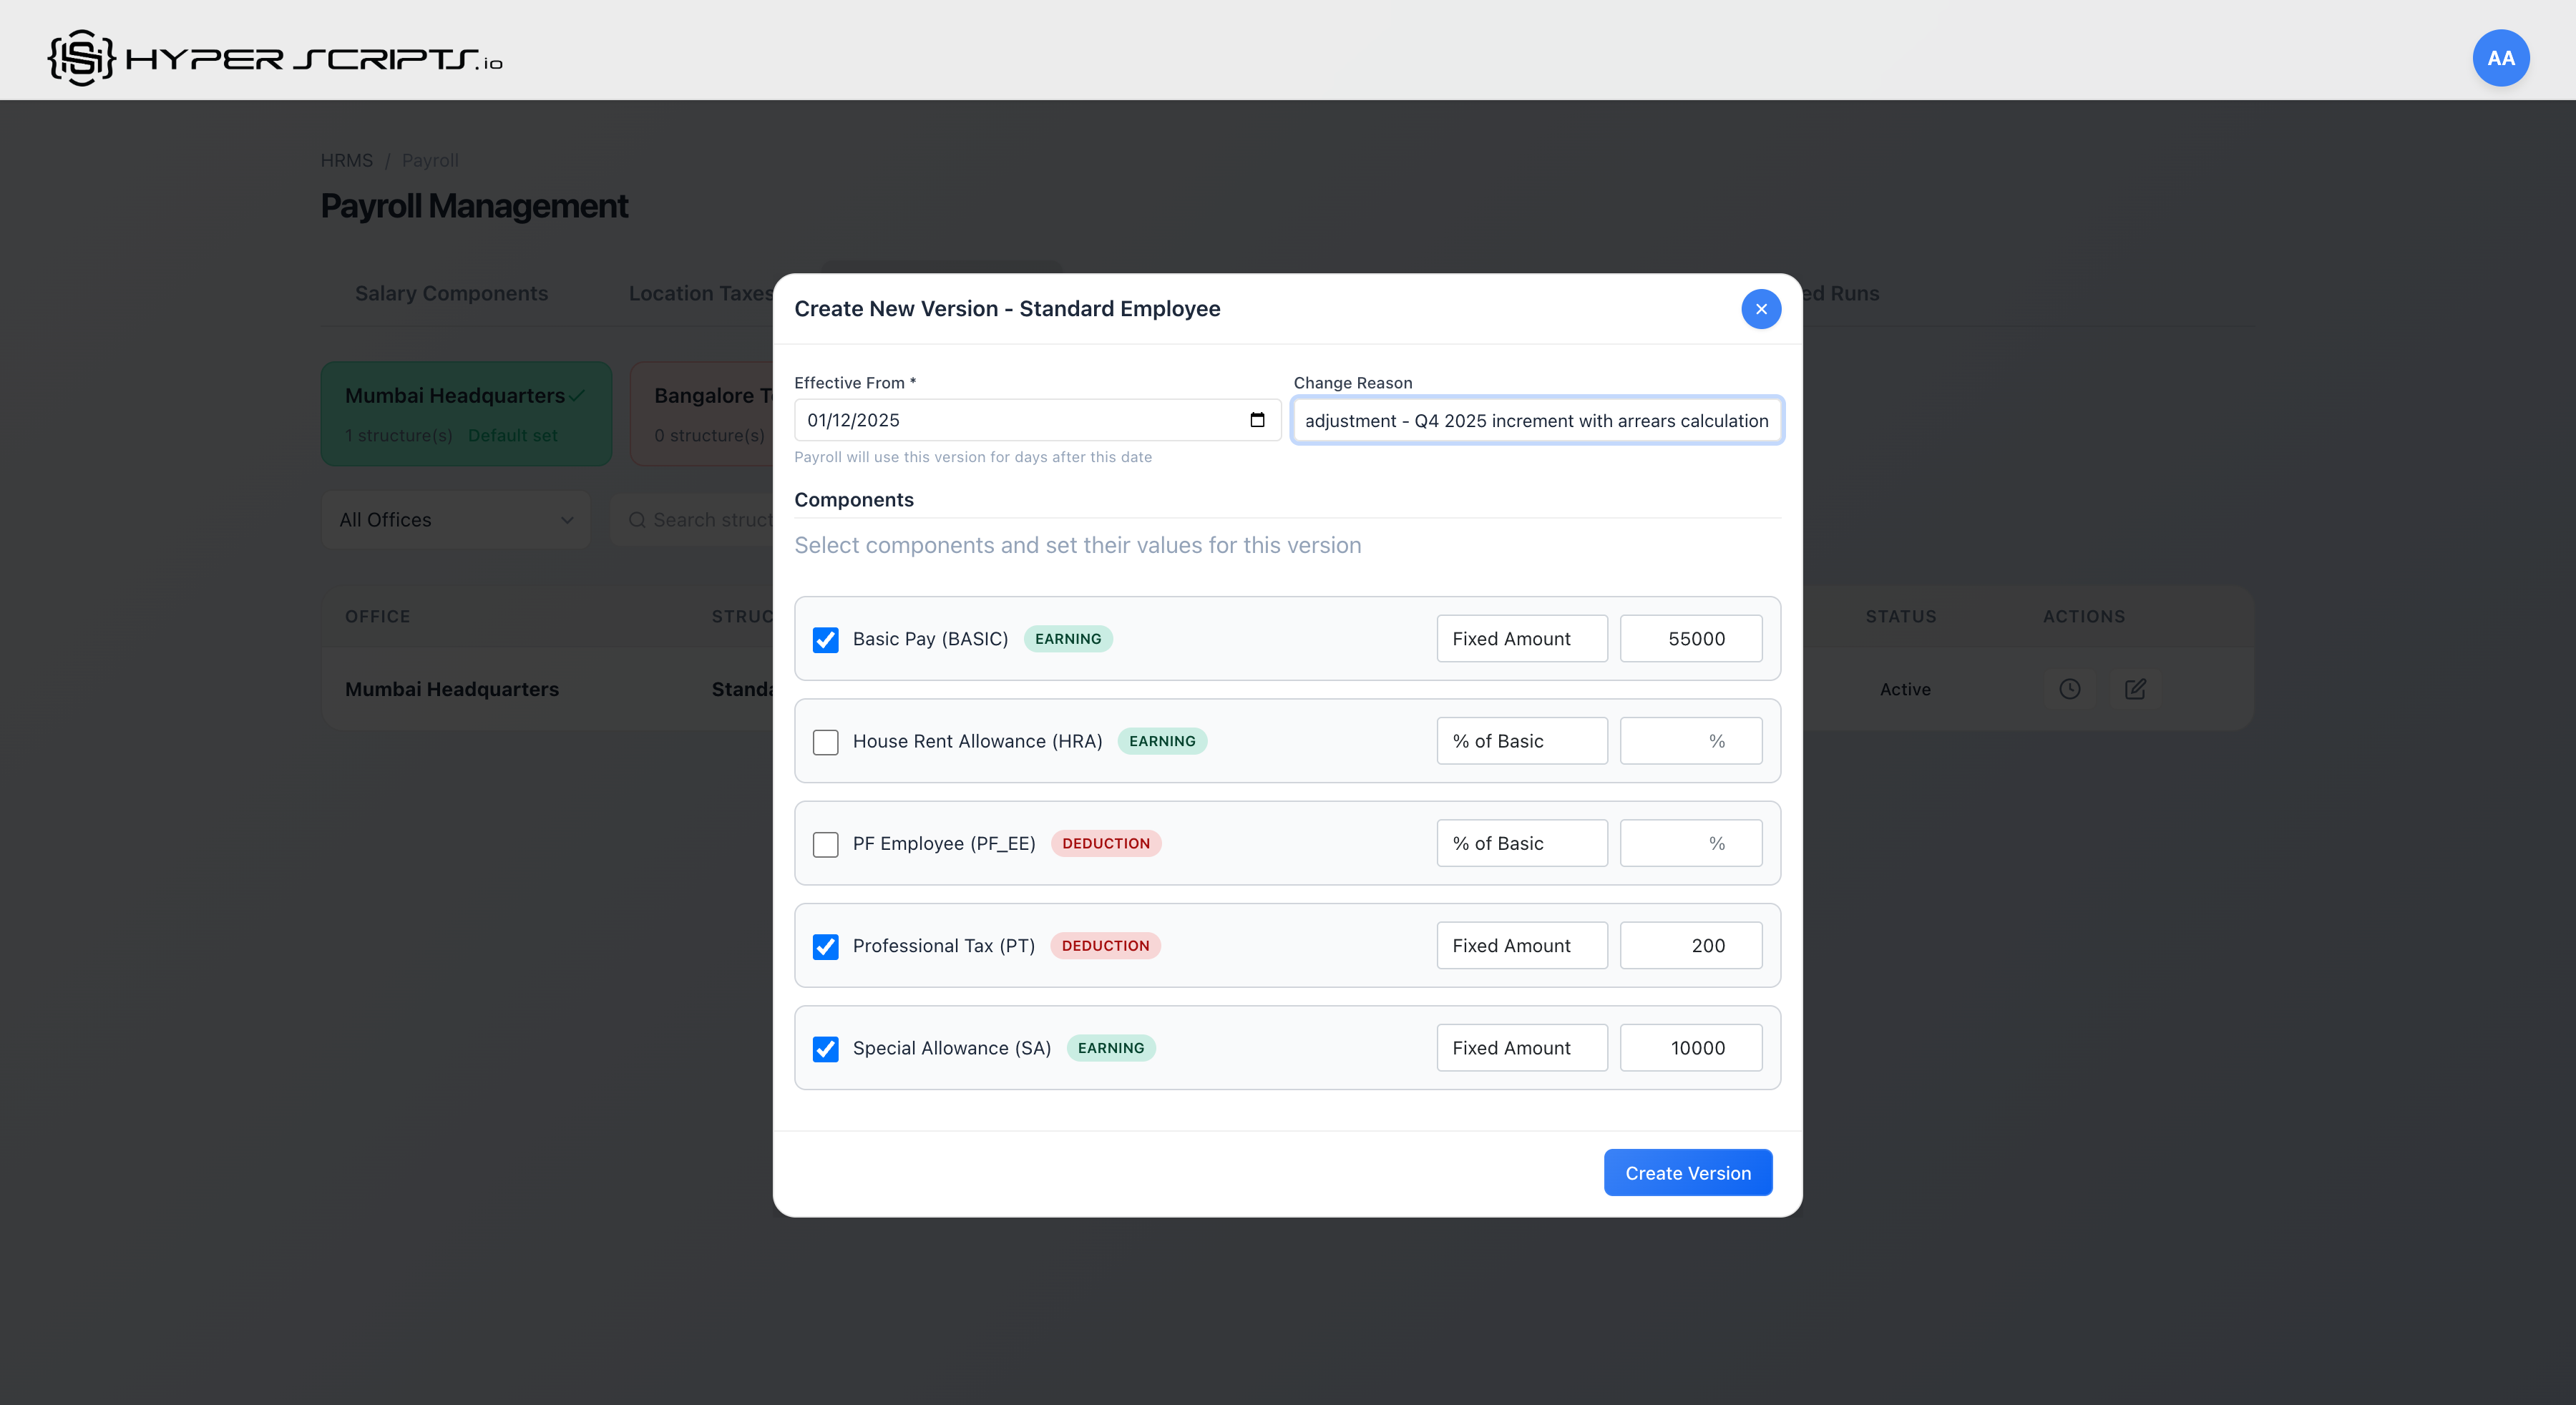
Step 2: Create a Version with Retroactive Date
In Salary Structures, create a new version with a past effective date:

Step 3: Manage Arrears
Click "Manage Arrears" to see calculated arrears for affected employees:
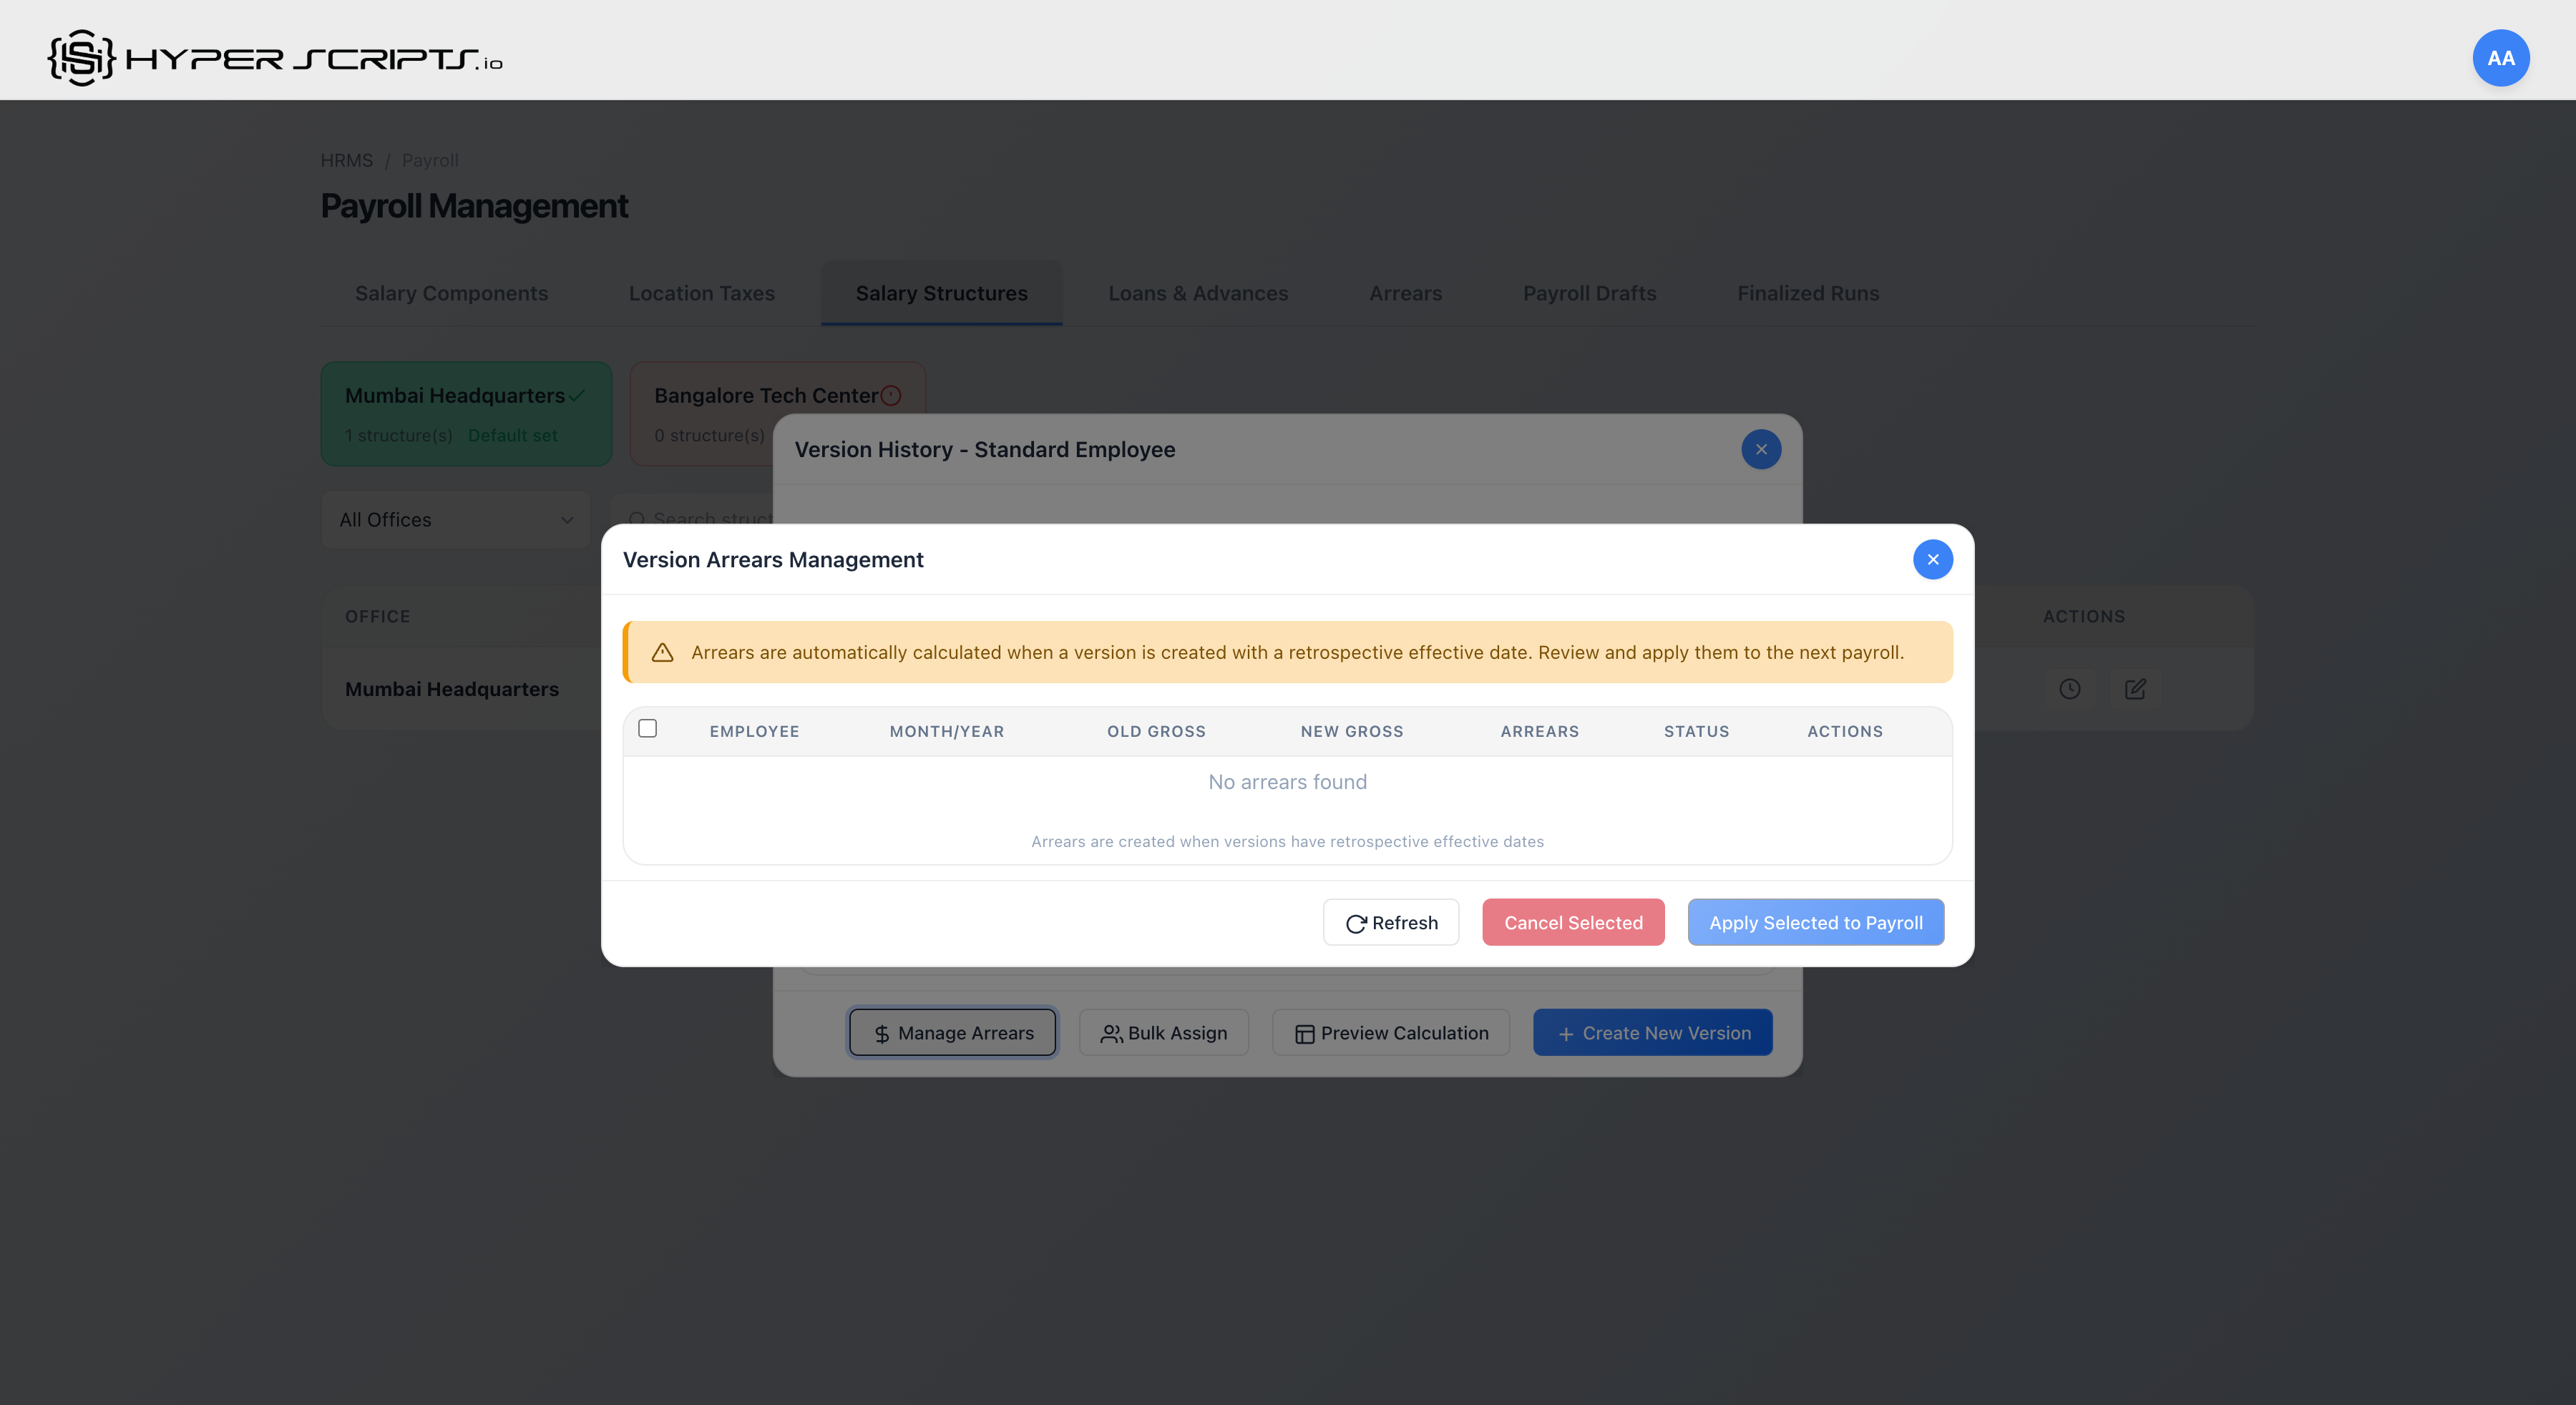
Arrears are only calculated when payslips already exist for the retroactive period. The system compares:
- Old Gross: What was paid in the existing payslip
- New Gross: What should have been paid with the new structure version
Arrears with Pending Status
When payslips exist for the retroactive period, the modal displays pending arrears that can be applied to the next payroll:

- Process payroll for the months you want to affect (e.g., November)
- Create a new structure version with a retroactive effective date (e.g., November 1st)
- Click "Manage Arrears" - the system will show pending arrears comparing old vs new gross
- Select arrears and click "Apply Selected to Payroll" to include in the next payroll run
Arrears Calculation
| Element | Description |
|---|---|
| Old Salary | What was paid based on previous structure version |
| New Salary | What should have been paid with new structure version |
| Difference | Arrear amount = New Salary - Old Salary |
| Affected Months | All months between effective date and current date |
Arrears Actions
| Action | Description |
|---|---|
| Apply | Add arrear amount to next payroll |
| Cancel | Mark arrear as not applicable |
| Bulk Apply | Apply multiple arrears at once |
Viewing and Filtering Arrears
The Arrears tab provides a comprehensive view of all arrears with filtering options:
Status Filter
Use the status dropdown to filter arrears by their current state:
- Pending: Arrears waiting to be applied to payroll
- Applied: Arrears that have been included in a payslip
- Cancelled: Arrears that were marked as not applicable
- All Statuses: View all arrears regardless of status
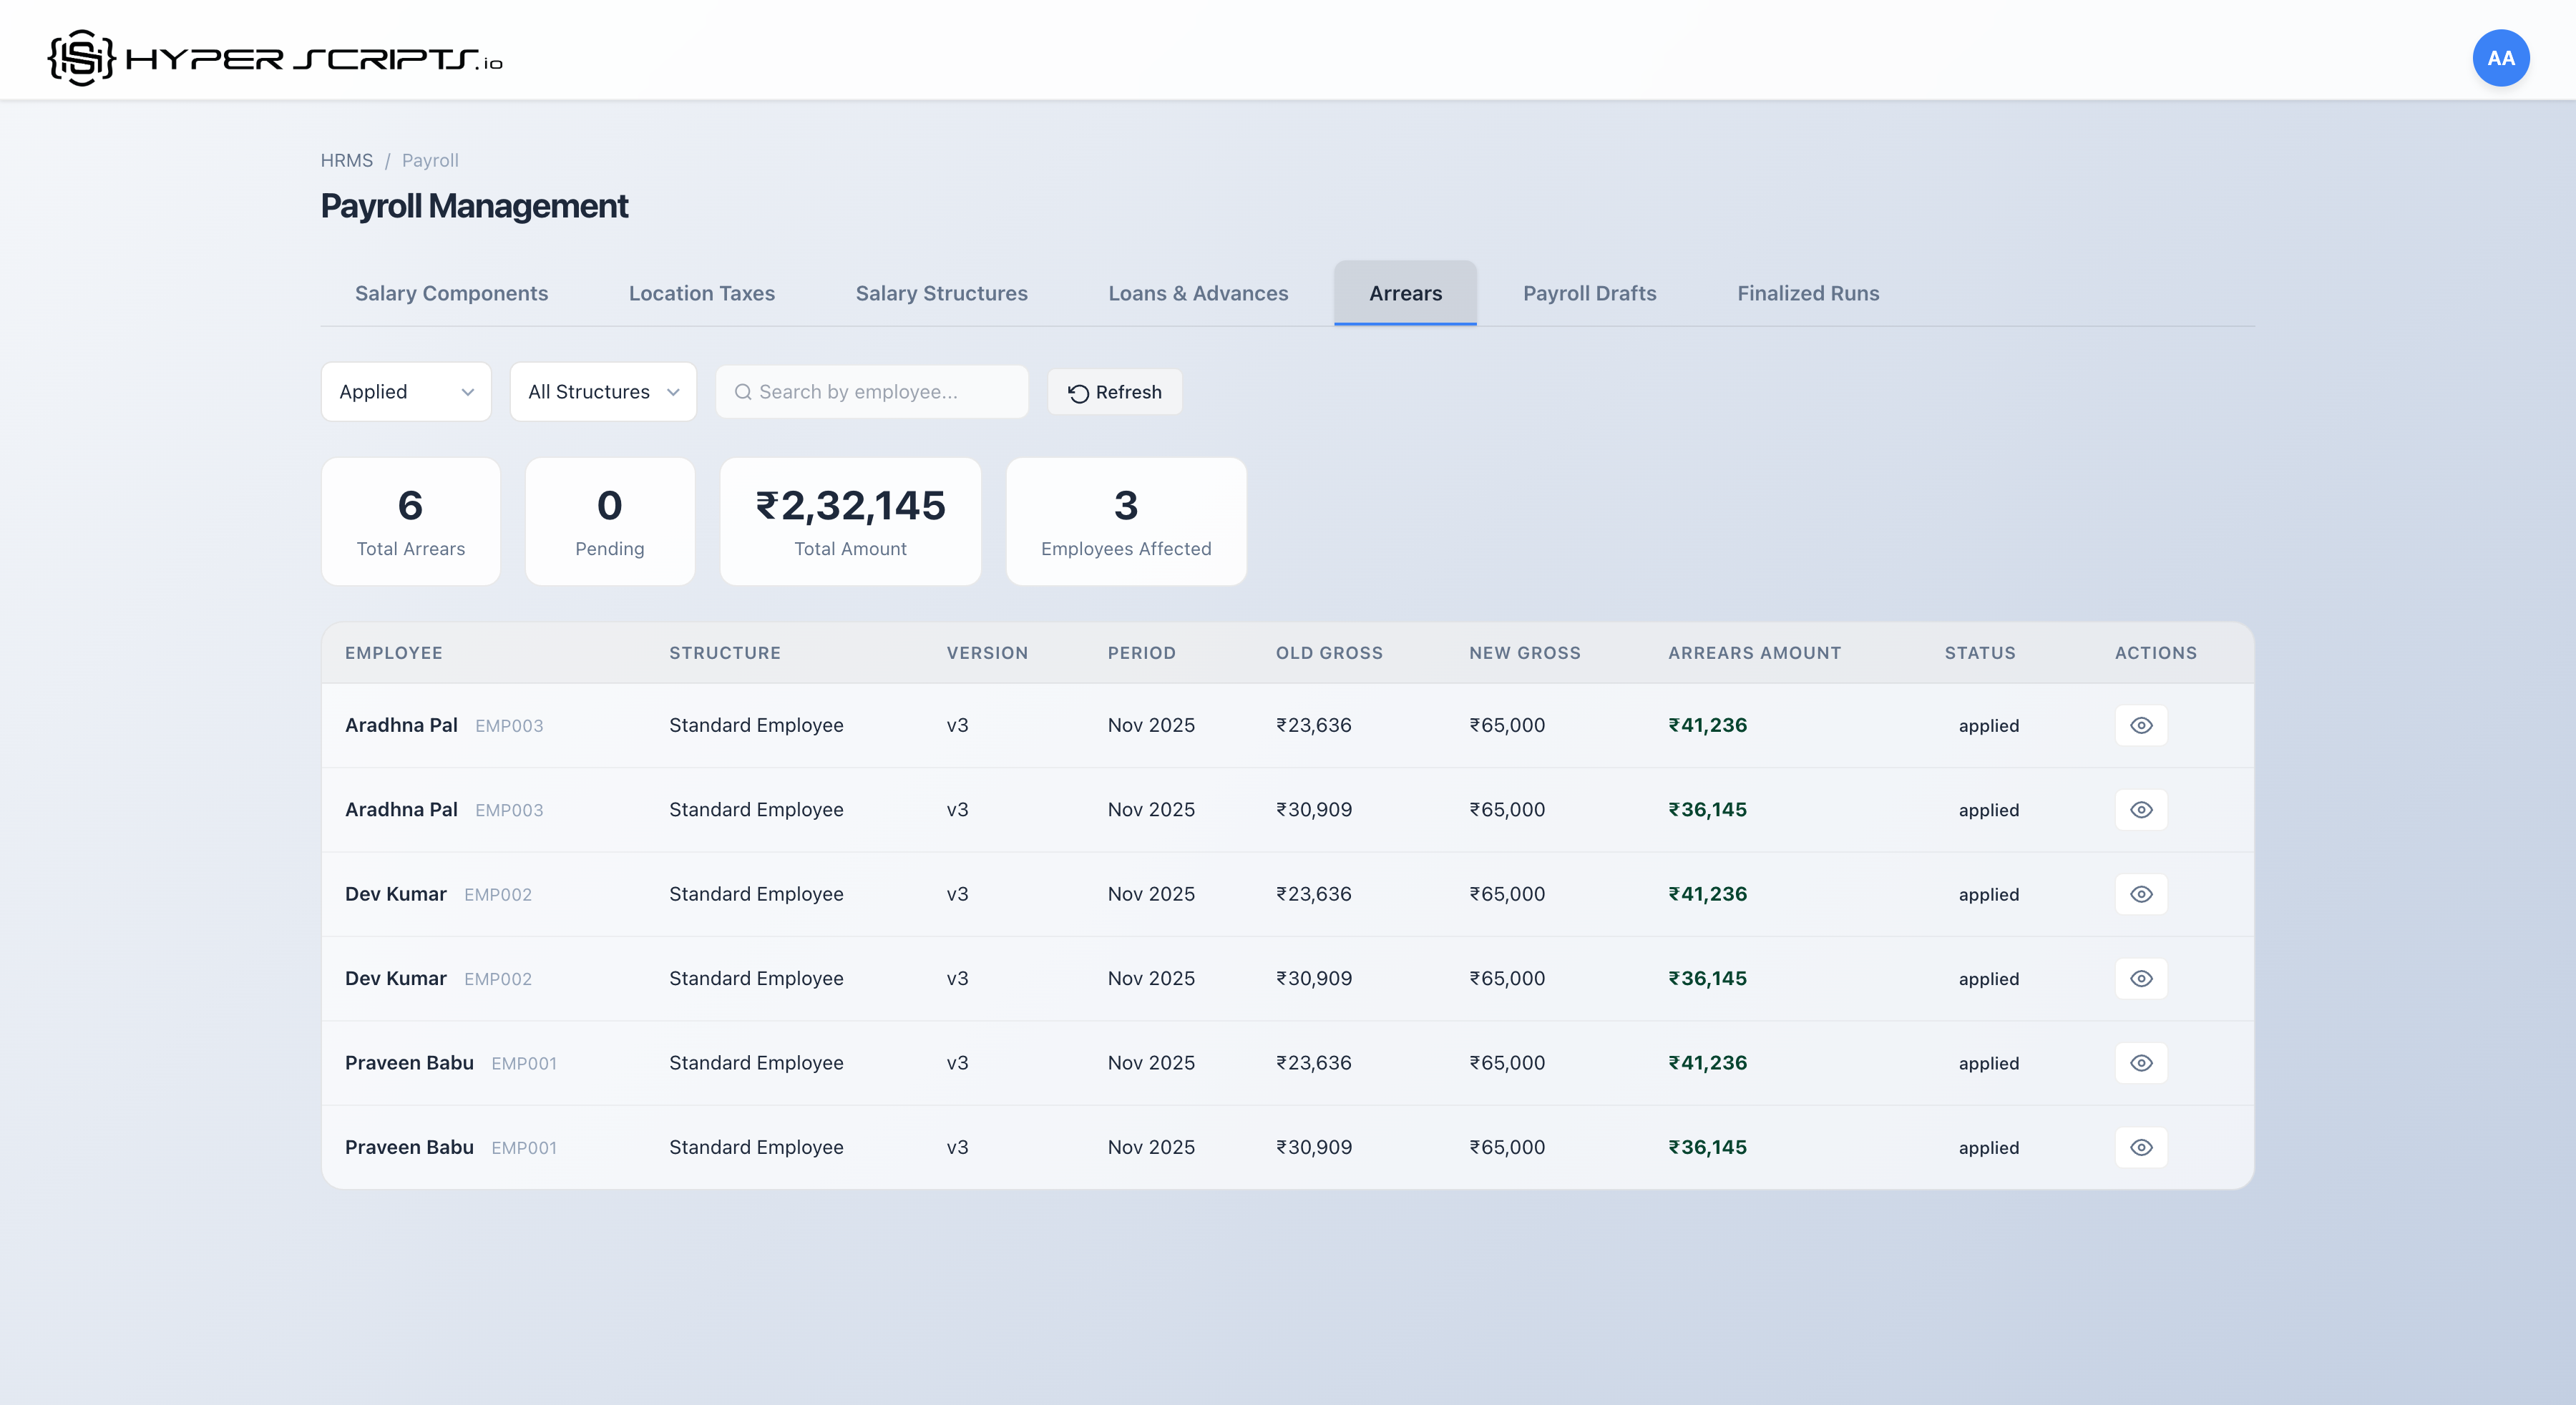
Summary Statistics
| Statistic | Description |
|---|---|
| Total Records | Number of arrears matching the current filter |
| Total Amount | Sum of all arrears amounts in the filtered list |
| Employees Affected | Number of unique employees with arrears |
Arrears in Payslips
When viewing a payslip that includes arrears, the system displays both the total arrears amount and a detailed breakdown by period for audit and compliance purposes.
Combined Totals Section
In the payslip modal, the "Combined Totals" section shows:
- Arrears Total: The total arrears amount added to this payslip
- Arrears by Period (Audit): A detailed table showing the breakdown
Period Breakdown Table
| Column | Description |
|---|---|
| Period | The month and year the arrear applies to (e.g., "November 2025") |
| Old Gross | What was originally calculated/paid for that period |
| New Gross | What should have been paid with the new structure |
| Arrears | The difference amount (New - Old) for that specific period |
CTC Revision Arrears (Individual Salary Changes)
In addition to structure version arrears (which affect multiple employees), the system also calculates arrears when an individual employee's CTC is revised with a backdated effective date.
How CTC Revision Arrears Work
- Navigate to Employee Salary: Go to Employees → Select Employee → Salary Tab
- Revise Salary: Click "Revise Salary" and enter new CTC with a backdated effective date
- Automatic Calculation: System automatically identifies affected payslips and calculates arrears
- Review Arrears: View pending arrears in Payroll → Arrears tab
Viewing CTC Revision Arrears
After revising salary with a backdated effective date, the arrears appear in the Arrears tab:
Arrears Details View
Click "View Details" on any arrears row to see the complete calculation breakdown:
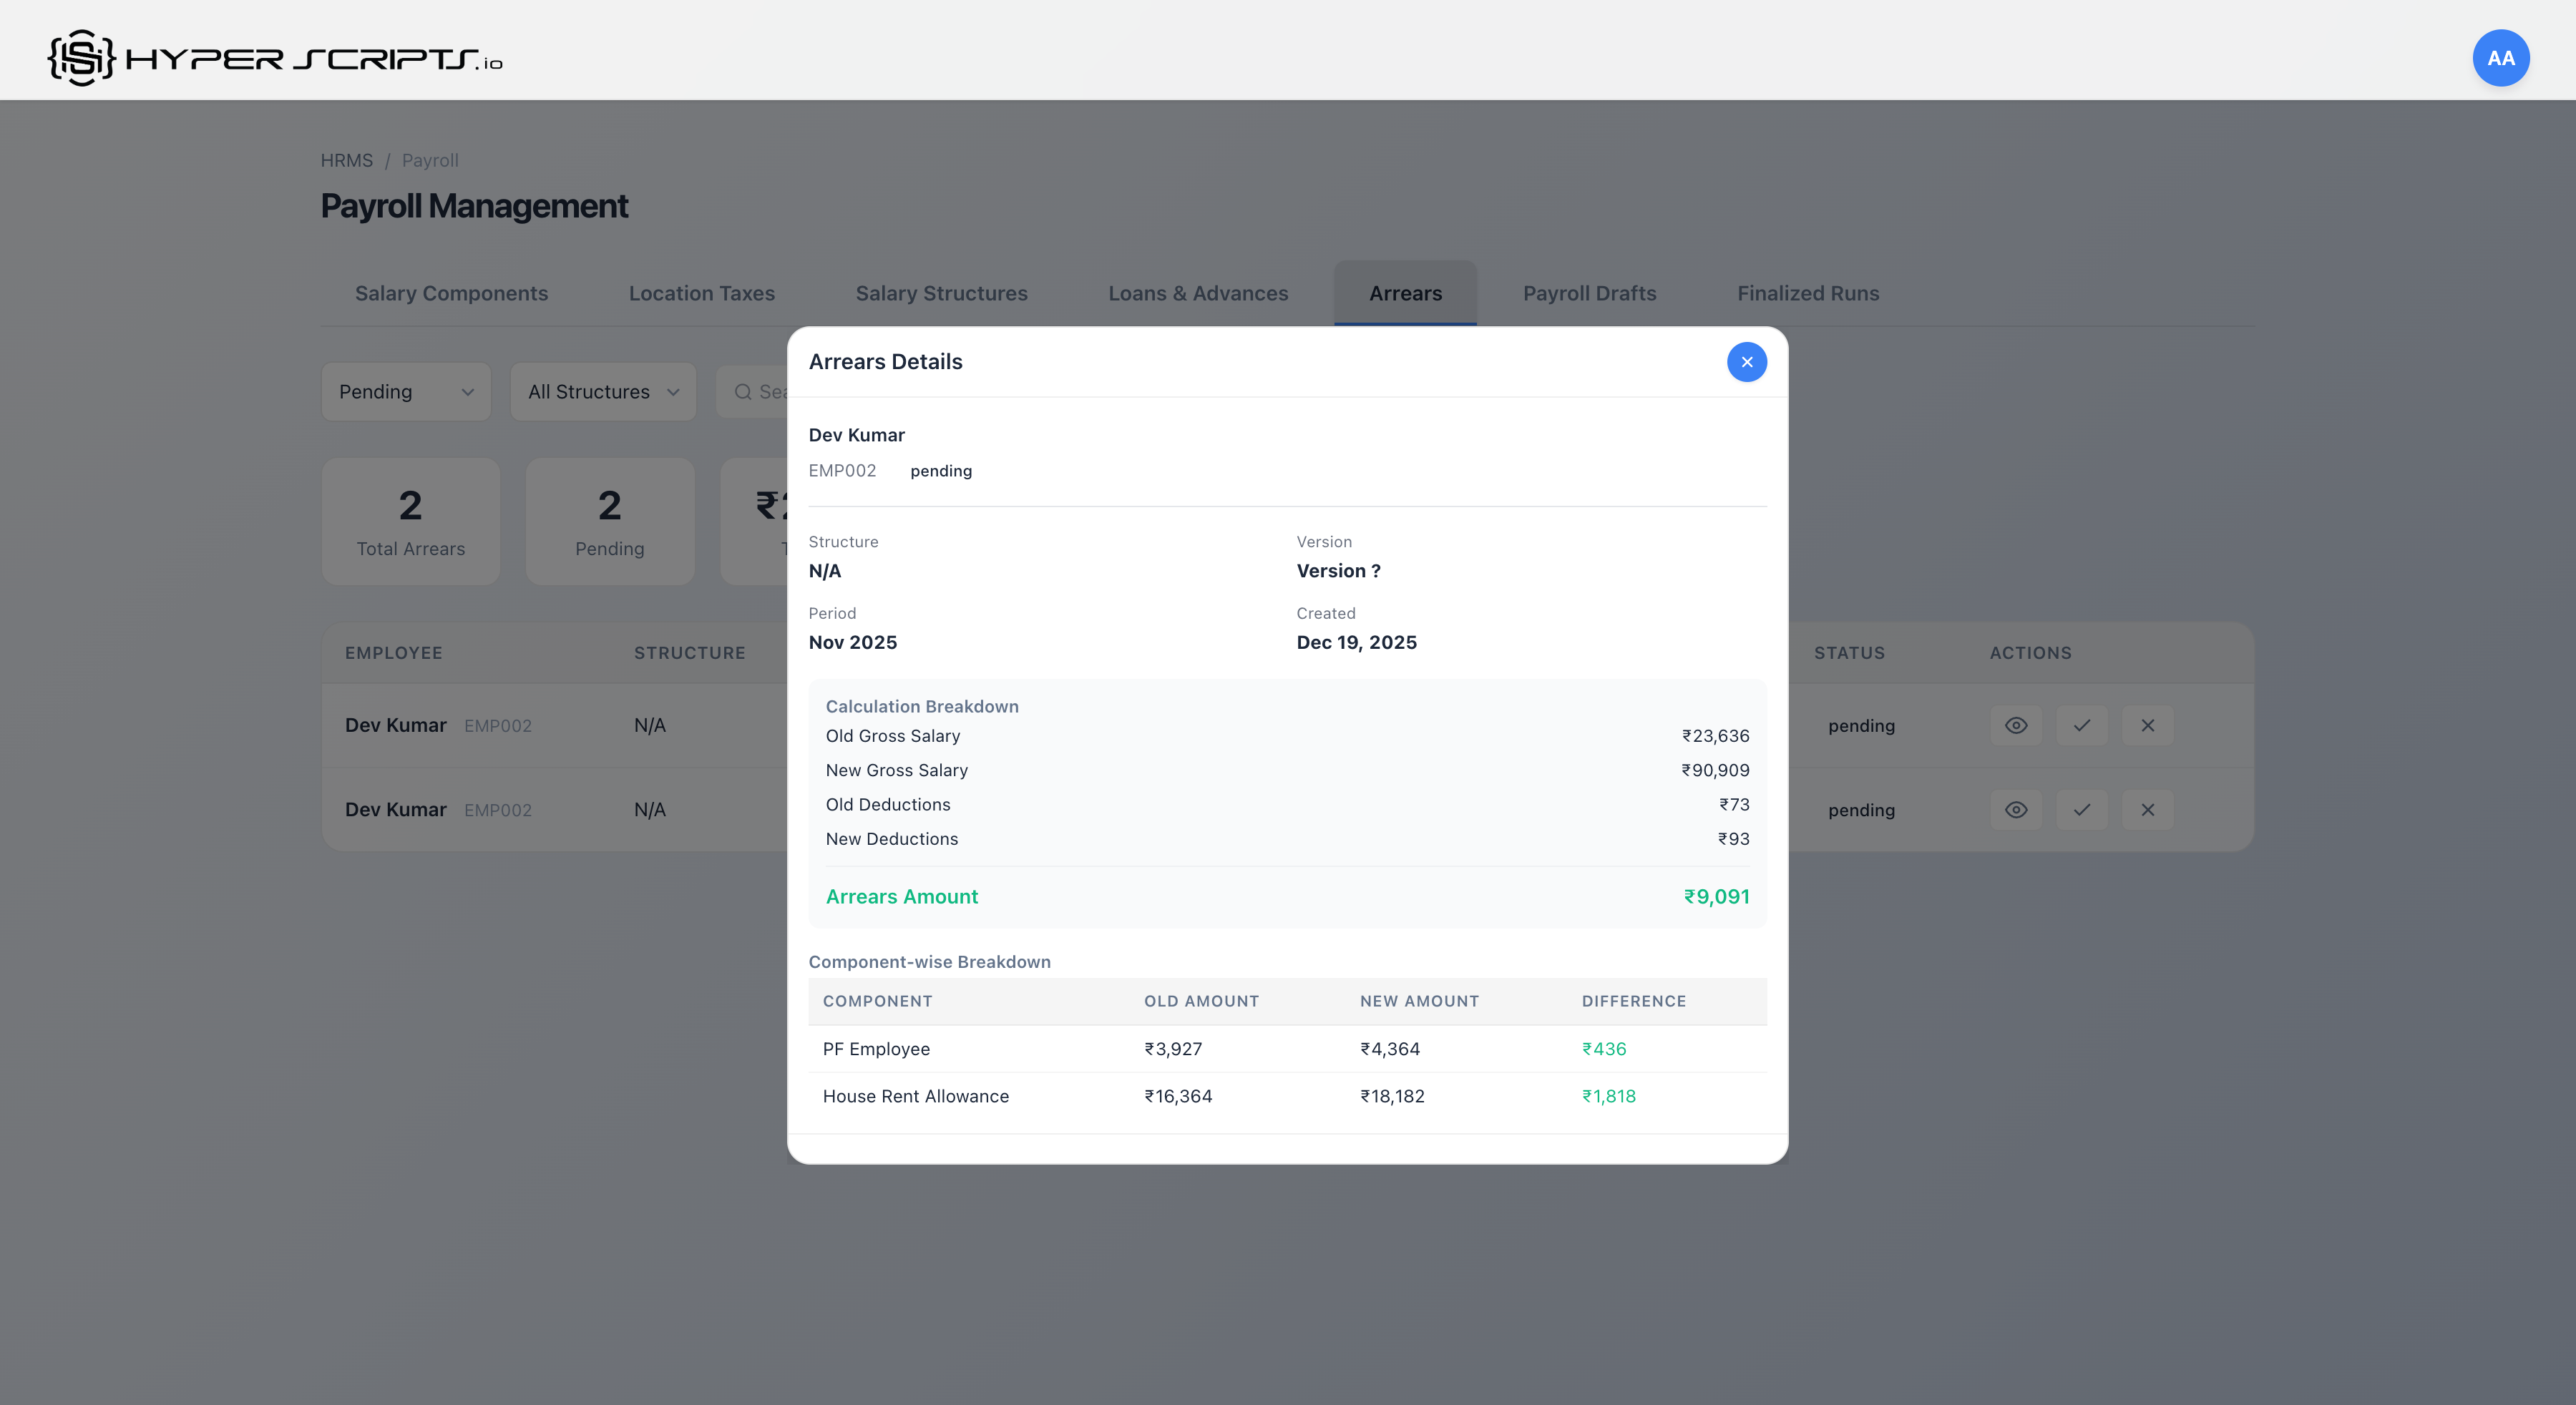
CTC Revision Arrears Calculation
The system uses payslip-confirmed attendance (actual days worked from processed payslips) for accurate arrears calculation:
| Month | Days Worked | Old Gross | New Gross | Arrears |
|---|---|---|---|---|
| November 2025 | 15 days | ₹23,636 | ₹90,909 | +₹9,091 |
| December 2025 | 23 days | ₹30,909 | ₹1,39,394 | +₹13,939 |
| Total CTC Revision Arrears | +₹23,030 | |||
days_worked field from already-processed payslips, NOT calendar working days. This ensures arrears are accurate even when employees had partial attendance (LOP, leaves, etc.).
Arrears Source Types
The system tracks different types of arrears for audit purposes:
| Source Type | Trigger | Scope |
|---|---|---|
structure_version |
Salary structure version change | Multiple employees on structure |
ctc_revision |
Individual CTC revision | Single employee |
transfer |
Office transfer affecting salary | Single employee |
10 Payroll Adjustments
Payroll Adjustments allow HR administrators to add one-time or recurring additions and deductions to employee salaries. This covers reimbursements, bonuses, incentives, recovery deductions, and other ad-hoc adjustments that need to be reflected in payslips.
- Adjustment Types - Different categories: Reimbursement, Bonus, Incentive, Arrears, Deduction, Recovery
- Effect Types - Whether the adjustment adds to salary (earning) or subtracts (deduction)
- Recurring Adjustments - Adjustments that repeat for multiple months automatically
- Approval Workflow - All adjustments require HR Admin approval before being applied
10.1 Understanding Adjustment Types
The system supports six different types of adjustments, each serving a specific purpose:
| Type | Effect | Description | Common Use Cases |
|---|---|---|---|
reimbursement |
+ Earning | Expense reimbursements for approved claims | Travel expenses, medical bills, equipment purchases |
bonus |
+ Earning | One-time bonus payments | Performance bonus, festive bonus, referral bonus |
incentive |
+ Earning | Performance-based incentives (often recurring) | Sales incentive, quarterly targets, project completion bonus |
arrears |
+ Earning | Backdated salary differences | Salary revision arrears, promotion arrears |
deduction |
− Deduction | General deductions from salary | Damage charges, policy violations, advance recovery |
recovery |
− Deduction | Recovery of overpayments or advances | Salary overpayment recovery, unauthorized expense recovery |
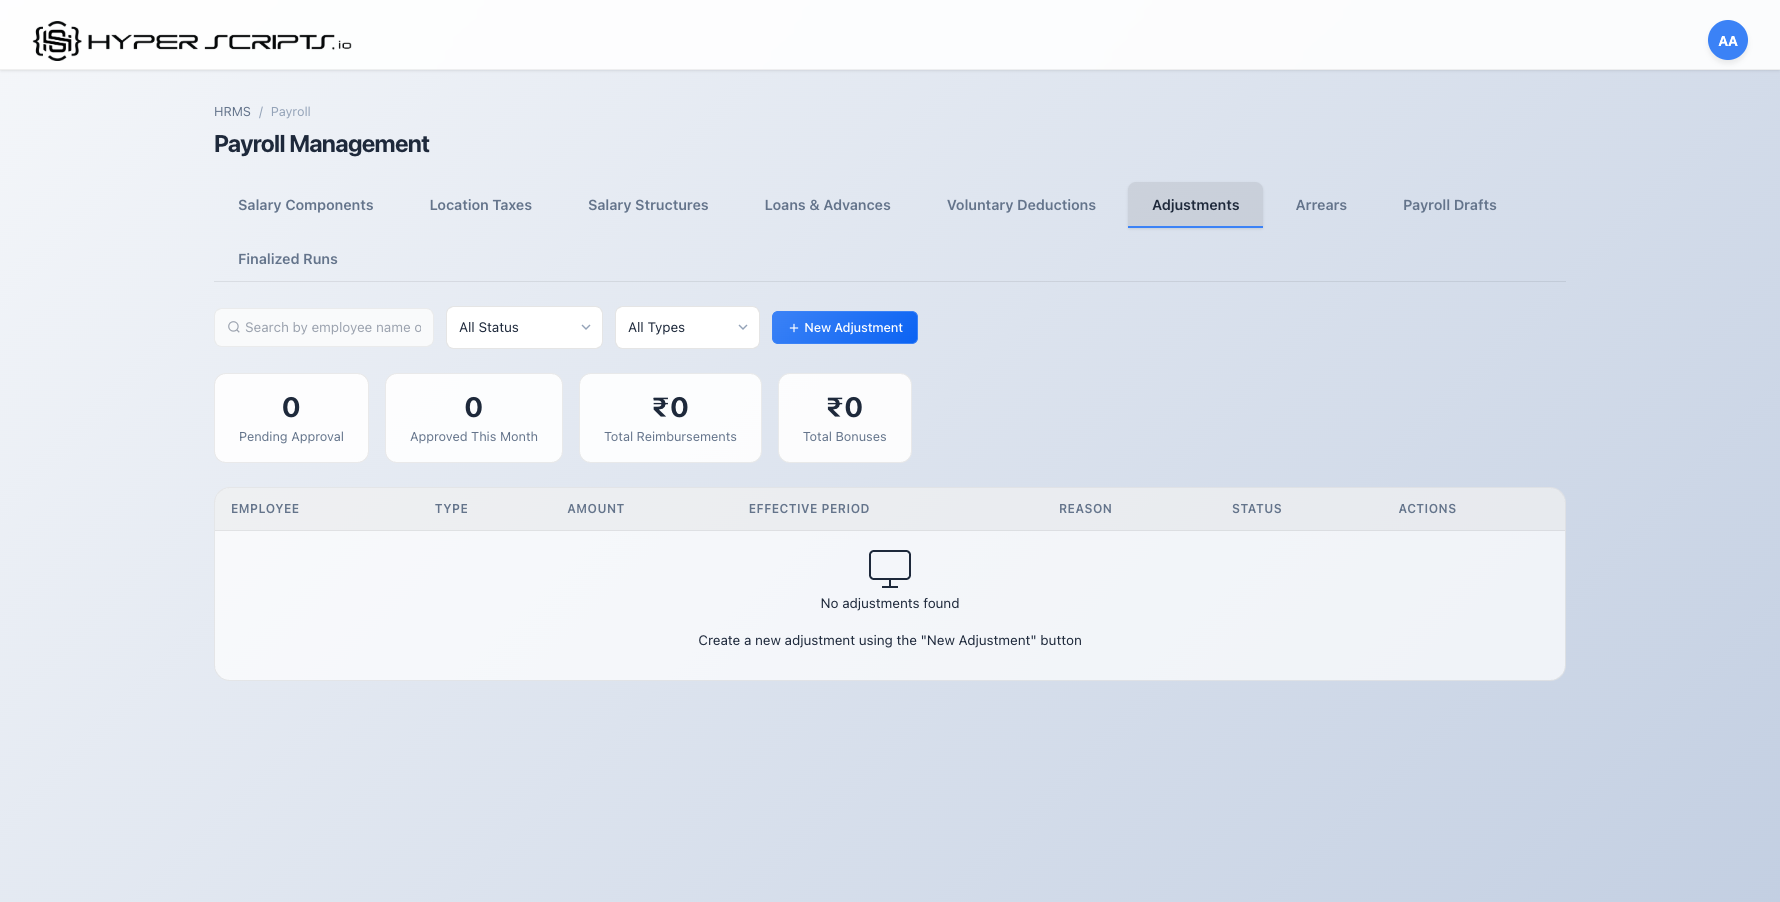
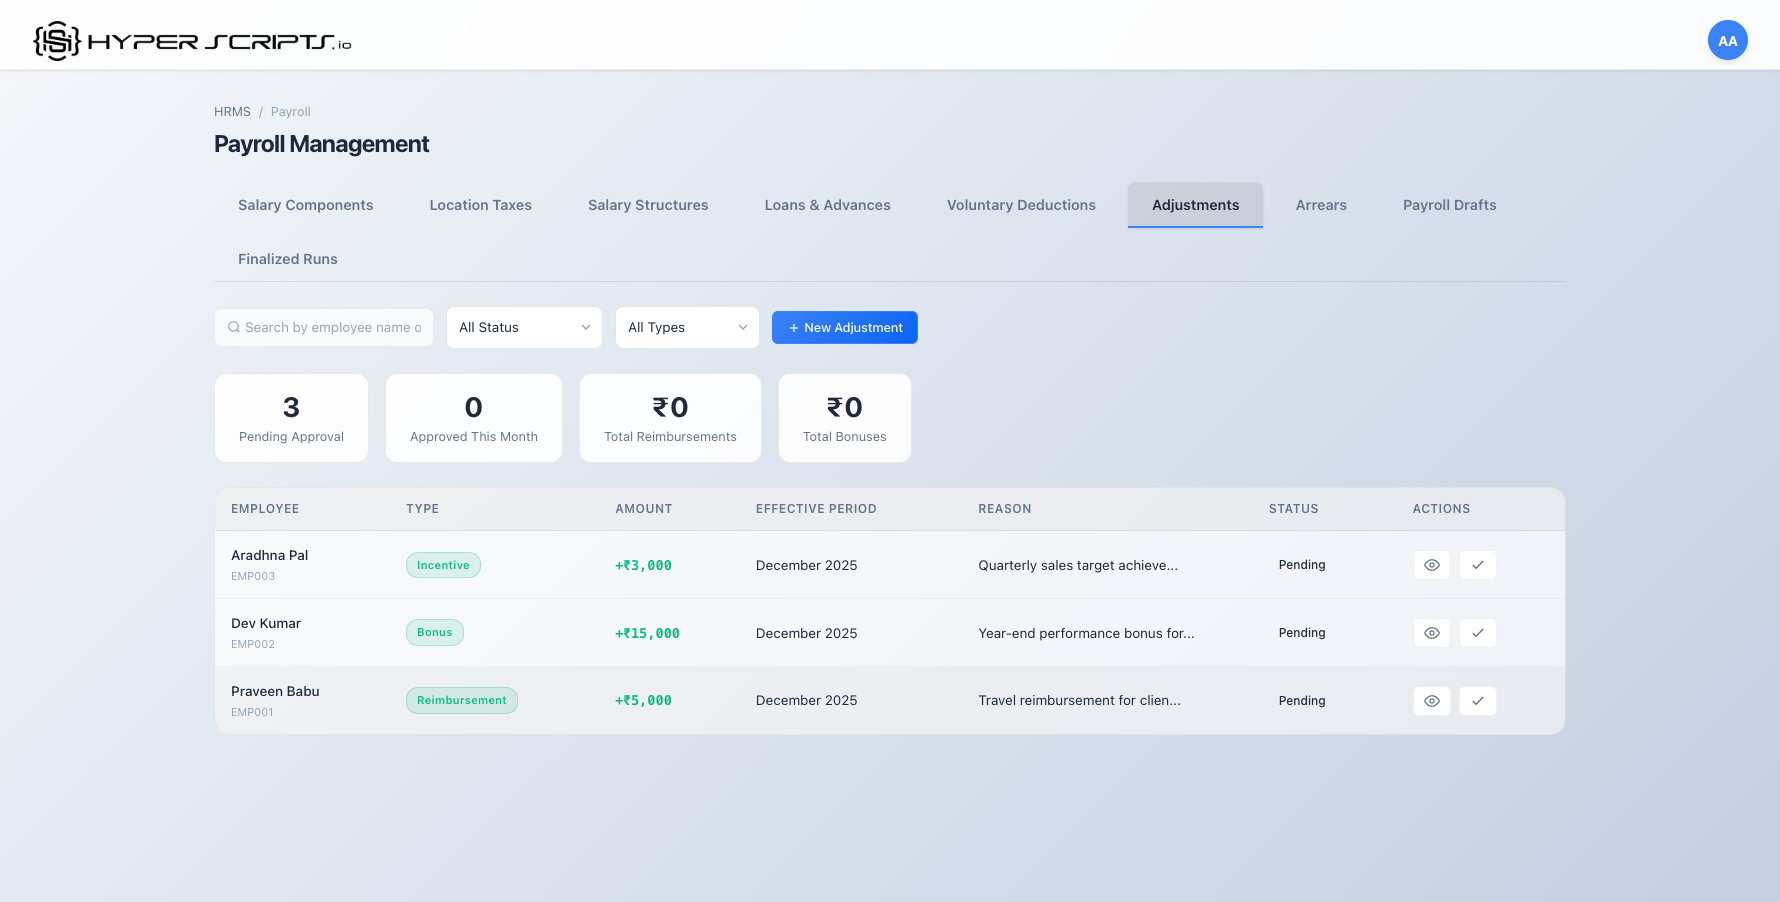
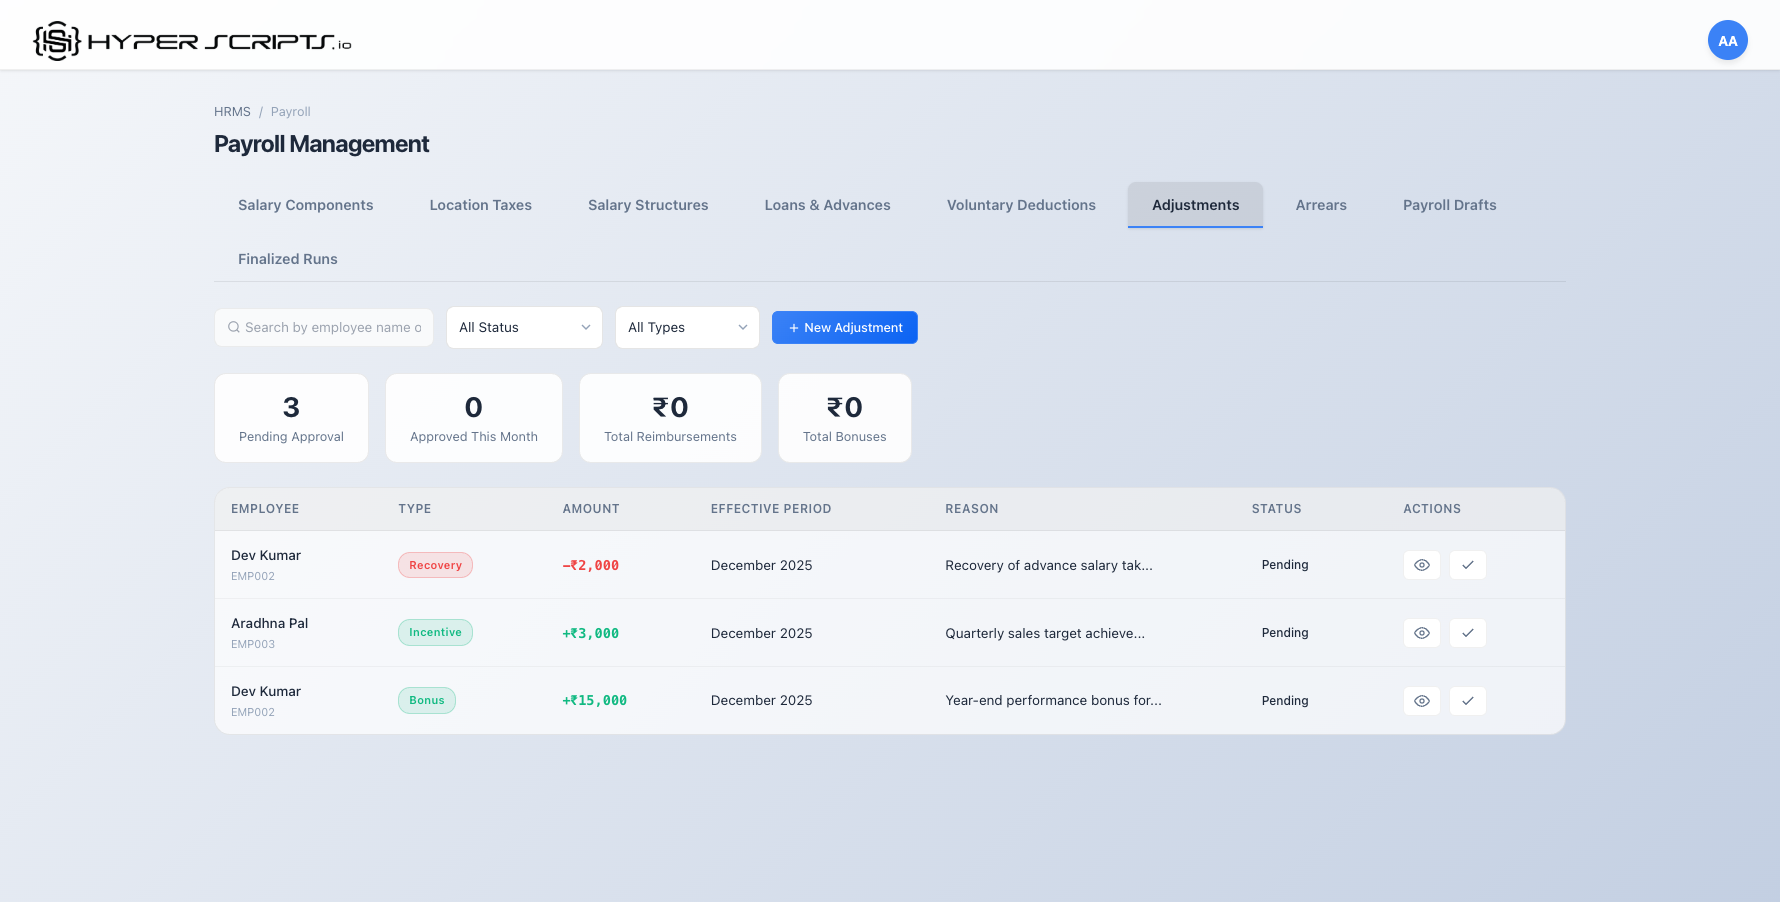
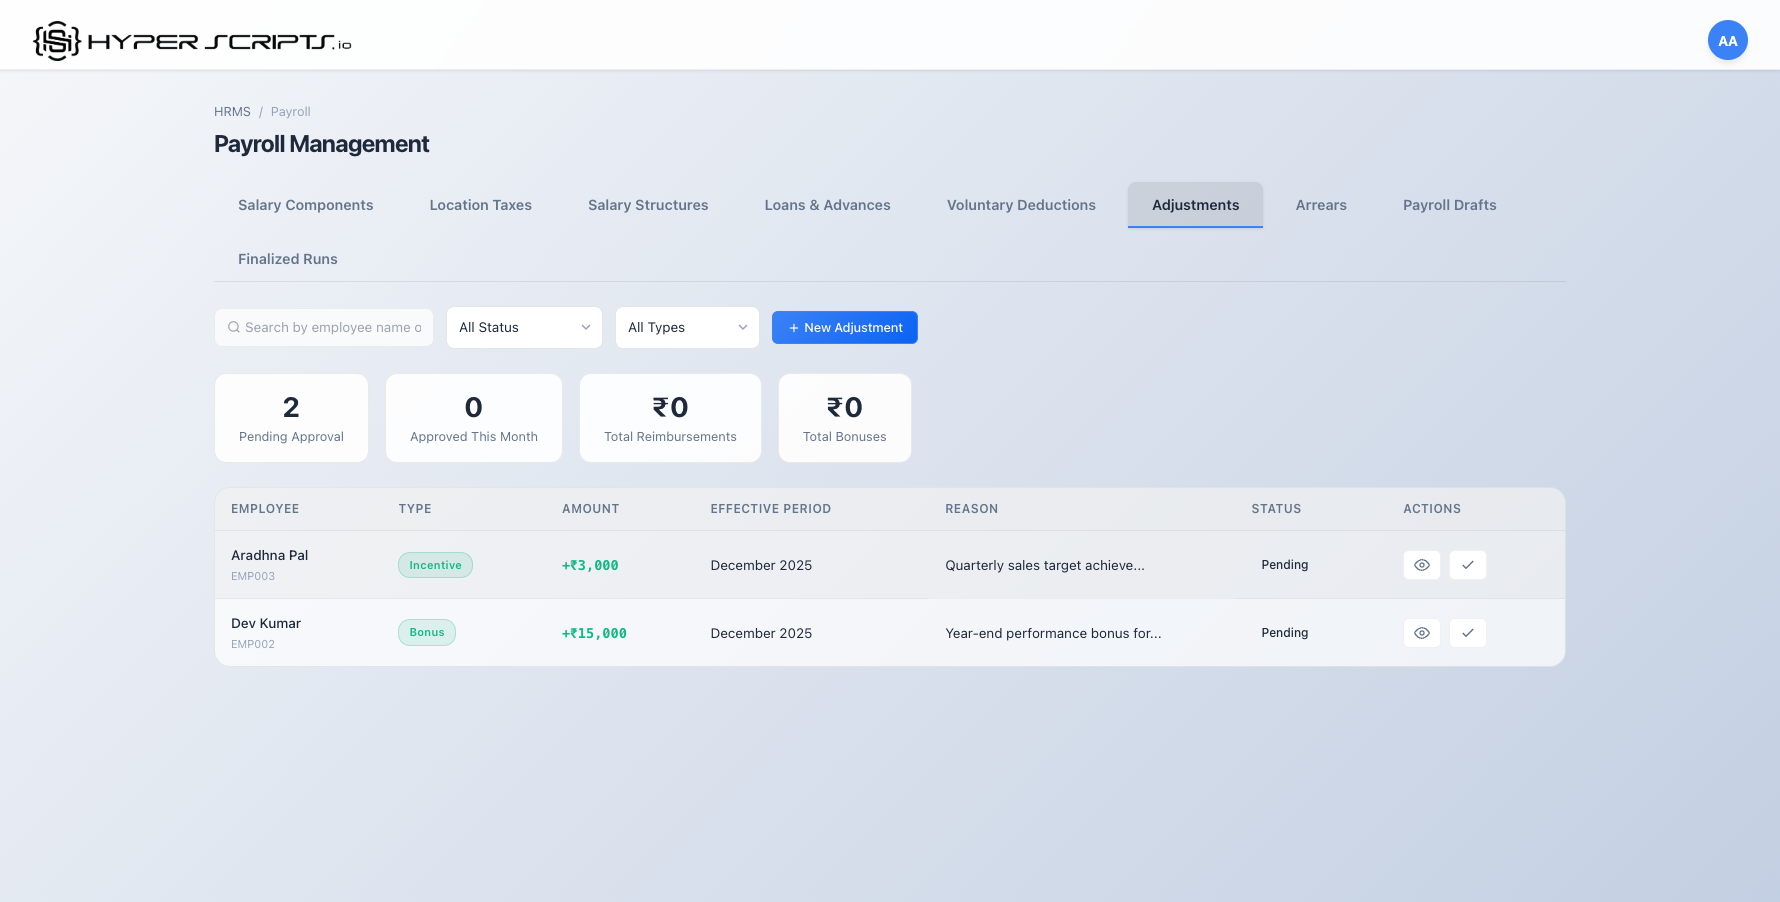
10.2 Navigating to Adjustments Tab
The Adjustments tab is accessible from the Payroll Management page. Navigate to HRMS → Payroll → Adjustments tab.
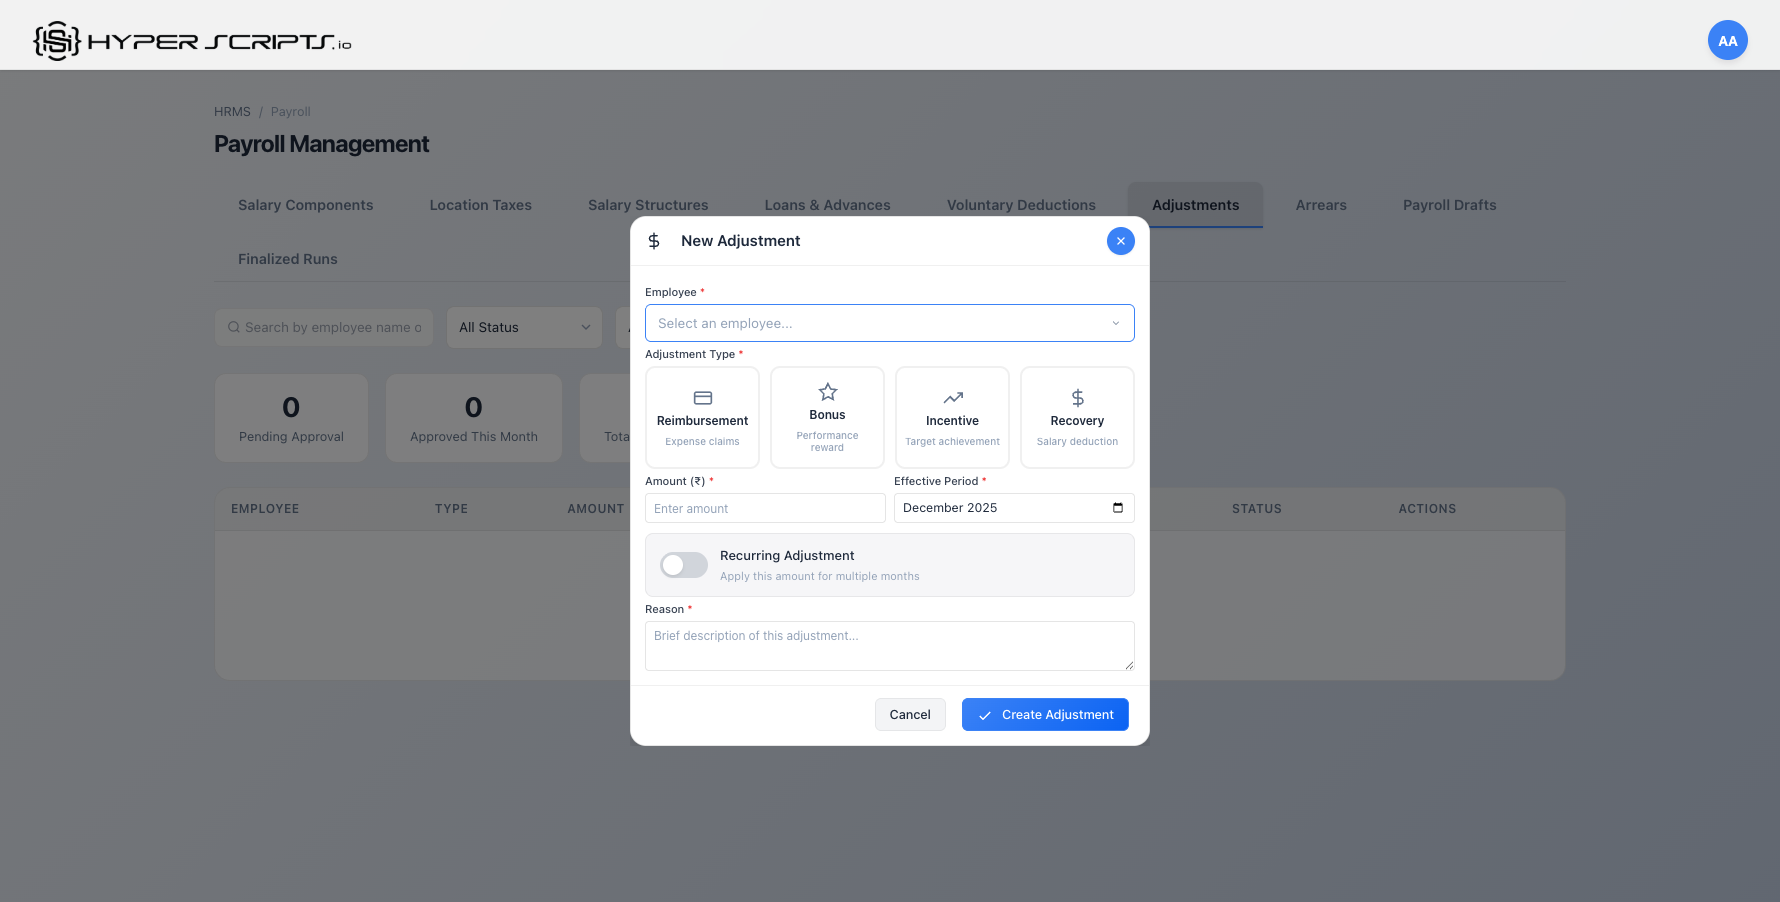
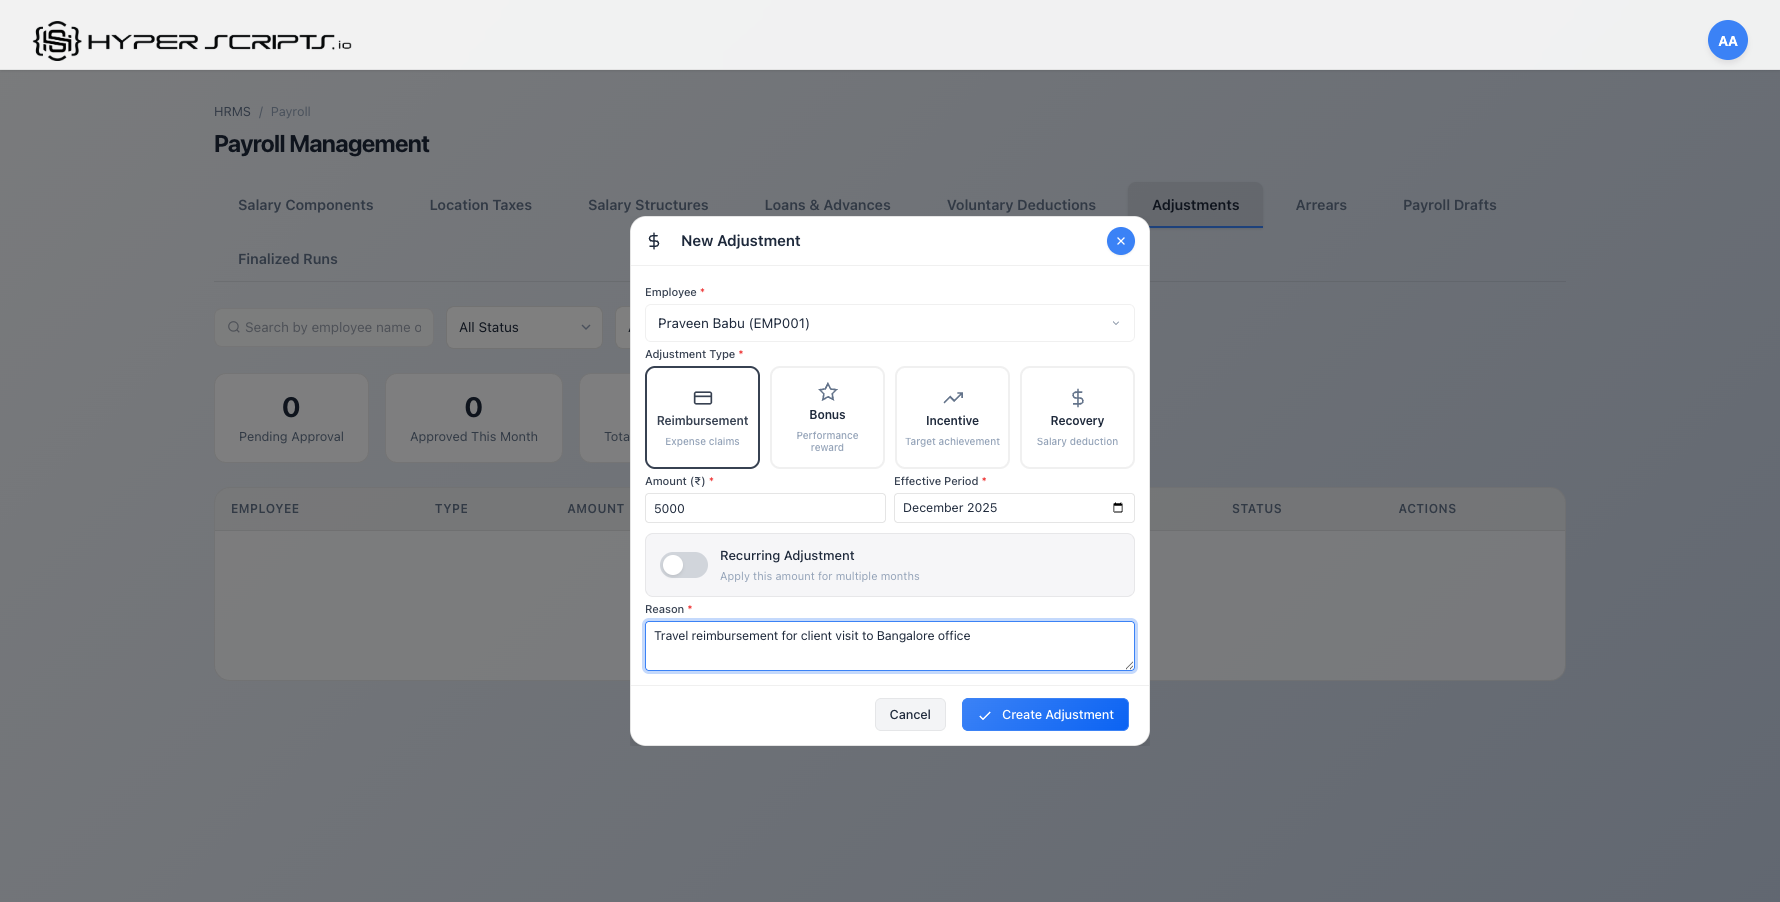
10.3 Creating a Reimbursement Adjustment
Reimbursements are used to reimburse employees for approved expense claims. Follow these steps to create a reimbursement:
- Click the "New Adjustment" button in the Adjustments tab
- Select the employee from the dropdown
- Choose "Reimbursement" as the adjustment type
- Enter the reimbursement amount
- Select the month and year for when this should be applied
- Add a description explaining the reimbursement
- Click "Create Adjustment"

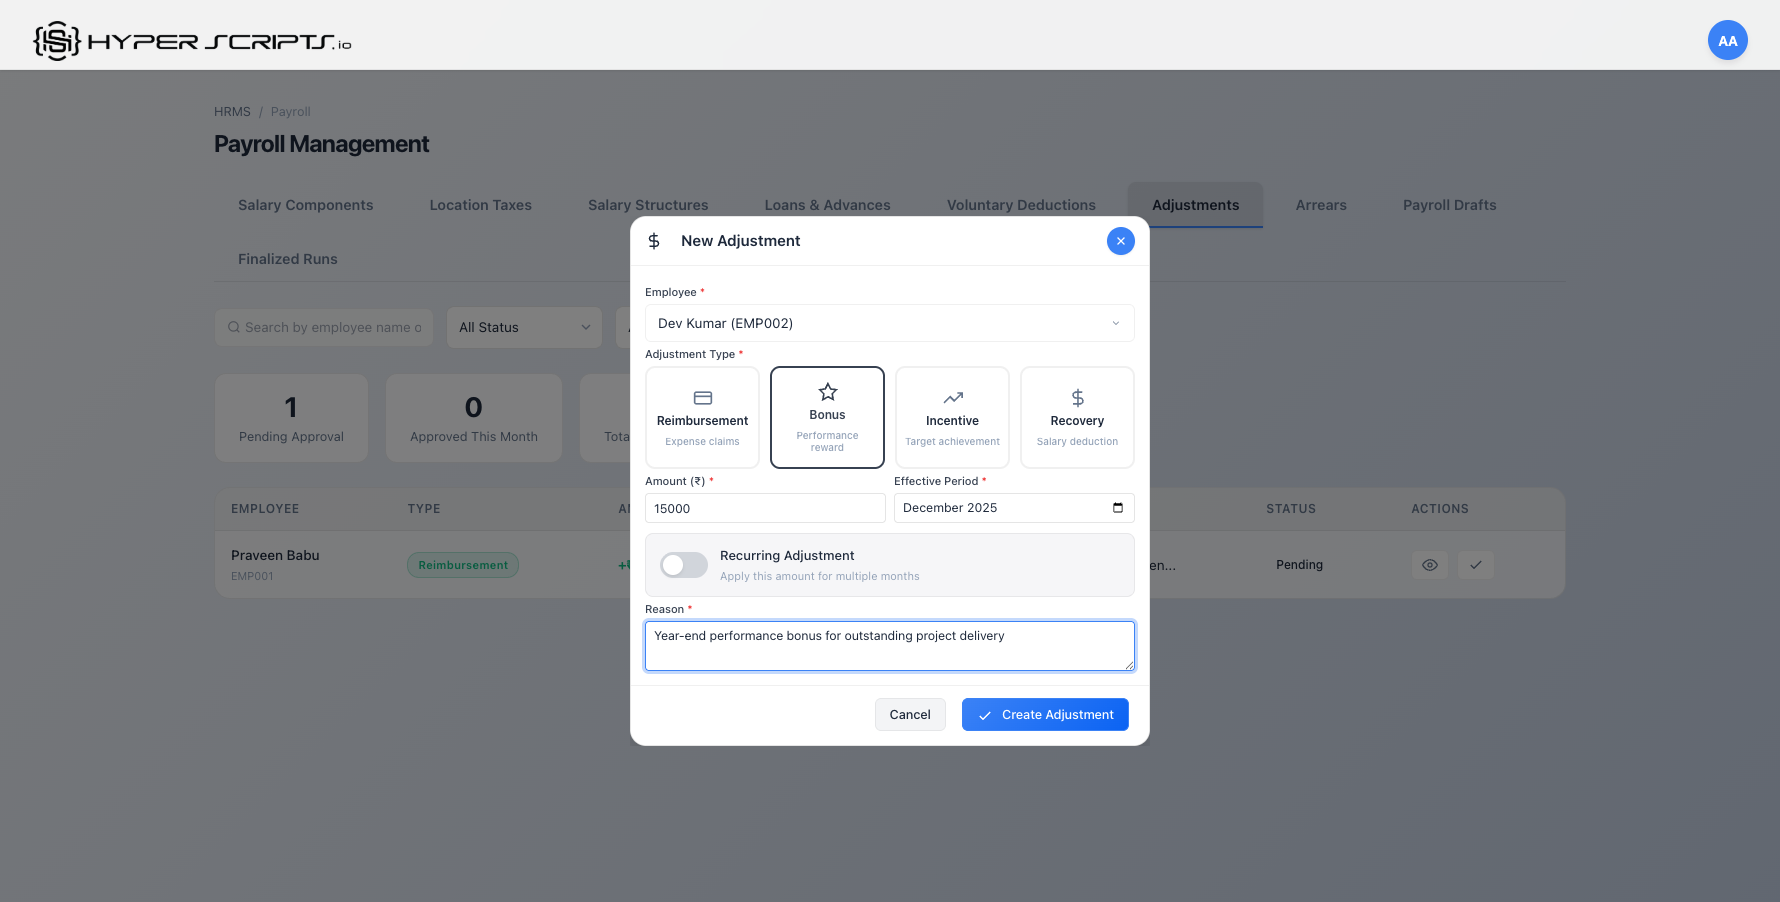
10.4 Creating a Bonus Adjustment
Bonus adjustments are one-time payments for exceptional performance, referrals, or other achievements.
10.5 Creating a Recurring Incentive
Incentives can be set as recurring to automatically repeat for multiple months. This is useful for quarterly incentive programs or ongoing performance bonuses.
When you set the "Recurring Months" field to a value greater than 0, the system will automatically apply this adjustment for the specified number of consecutive months starting from the selected month/year.

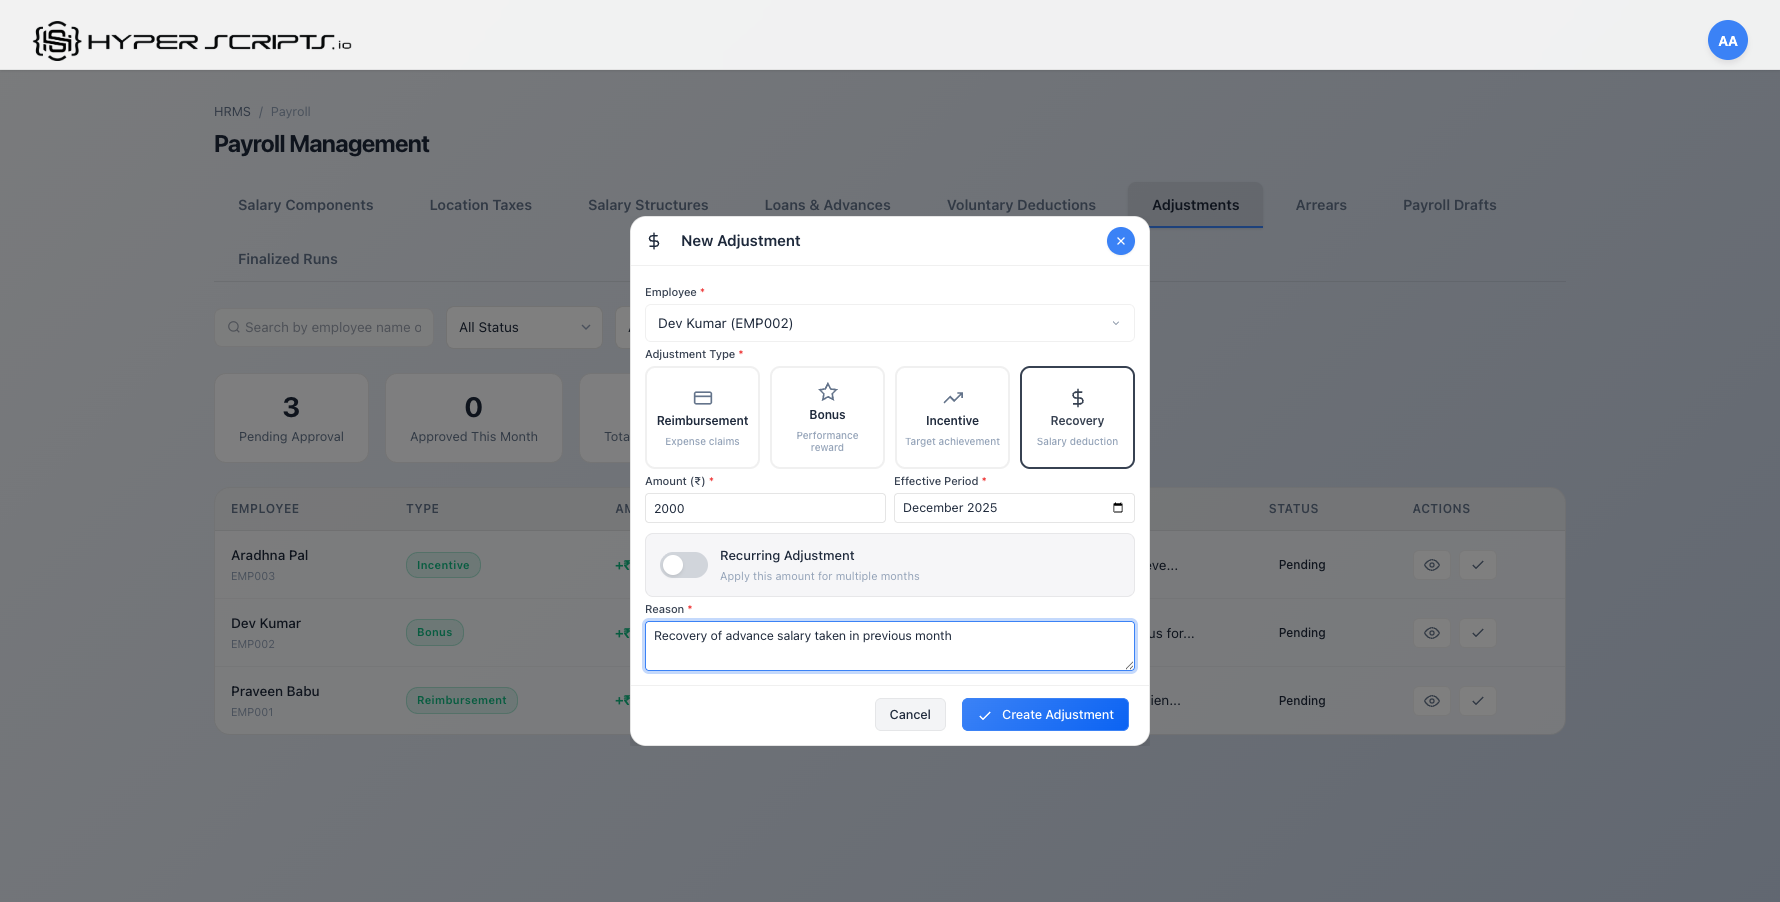
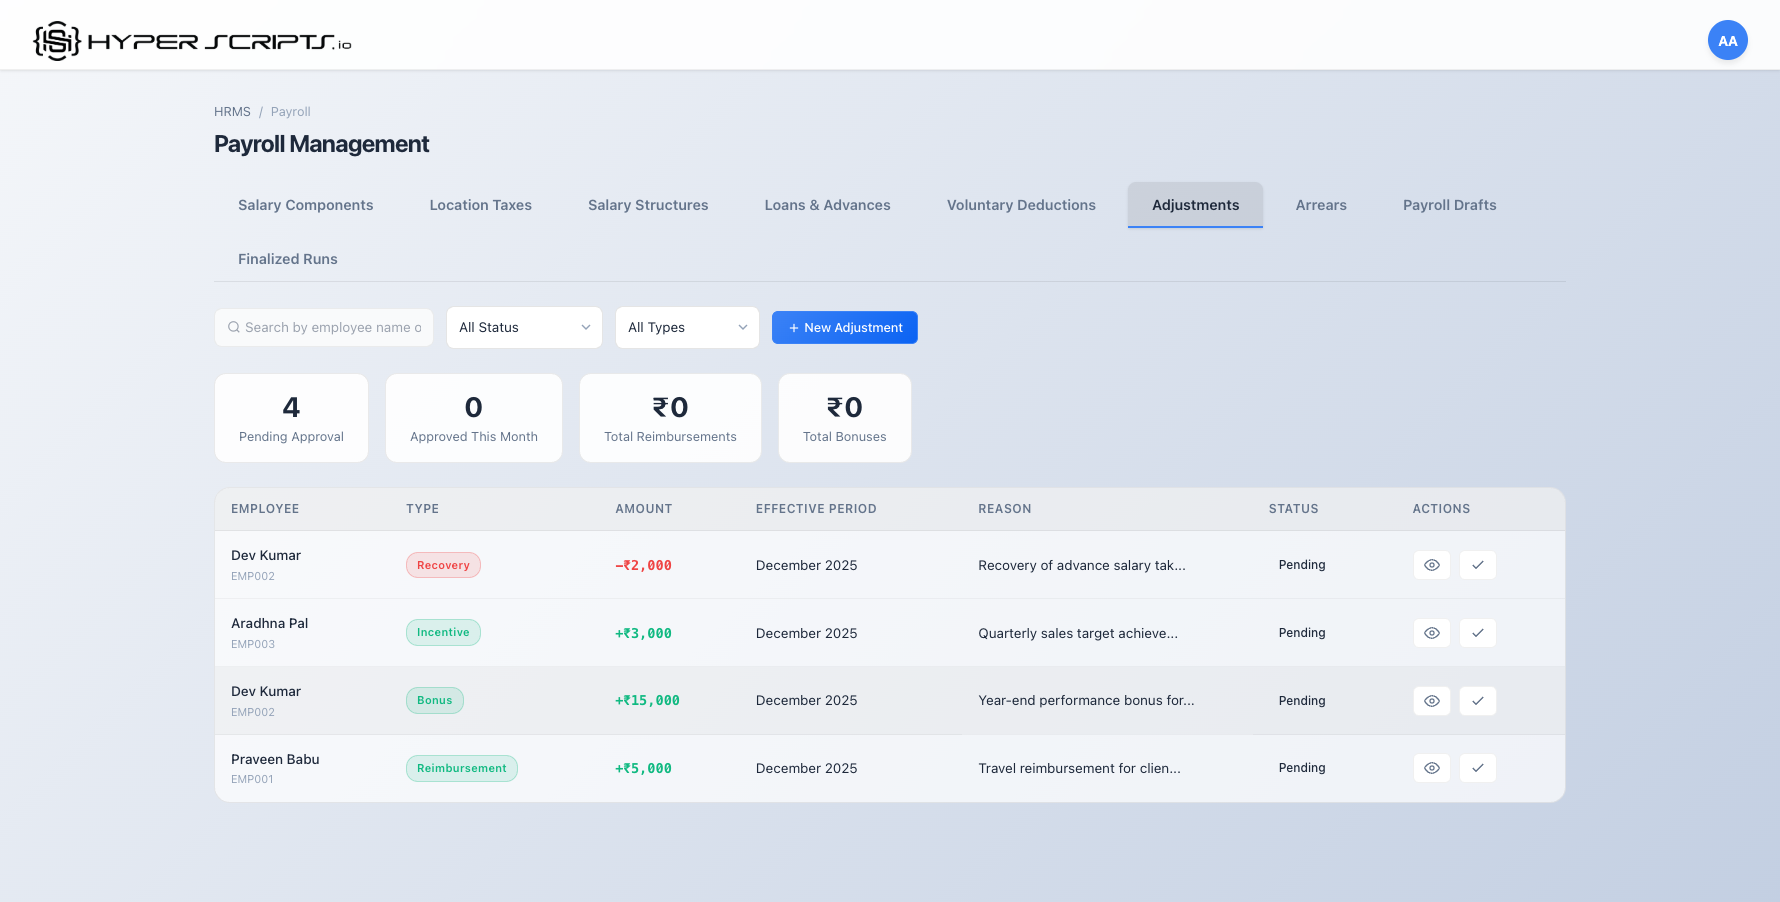
10.6 Creating a Recovery Deduction
Recovery adjustments are used to deduct amounts from employee salaries, typically for recovering overpayments, advances, or damages.
Both "Deduction" and "Recovery" types subtract from the employee's salary. Use "Recovery" specifically when recovering previously paid amounts, and "Deduction" for penalties or other charges.
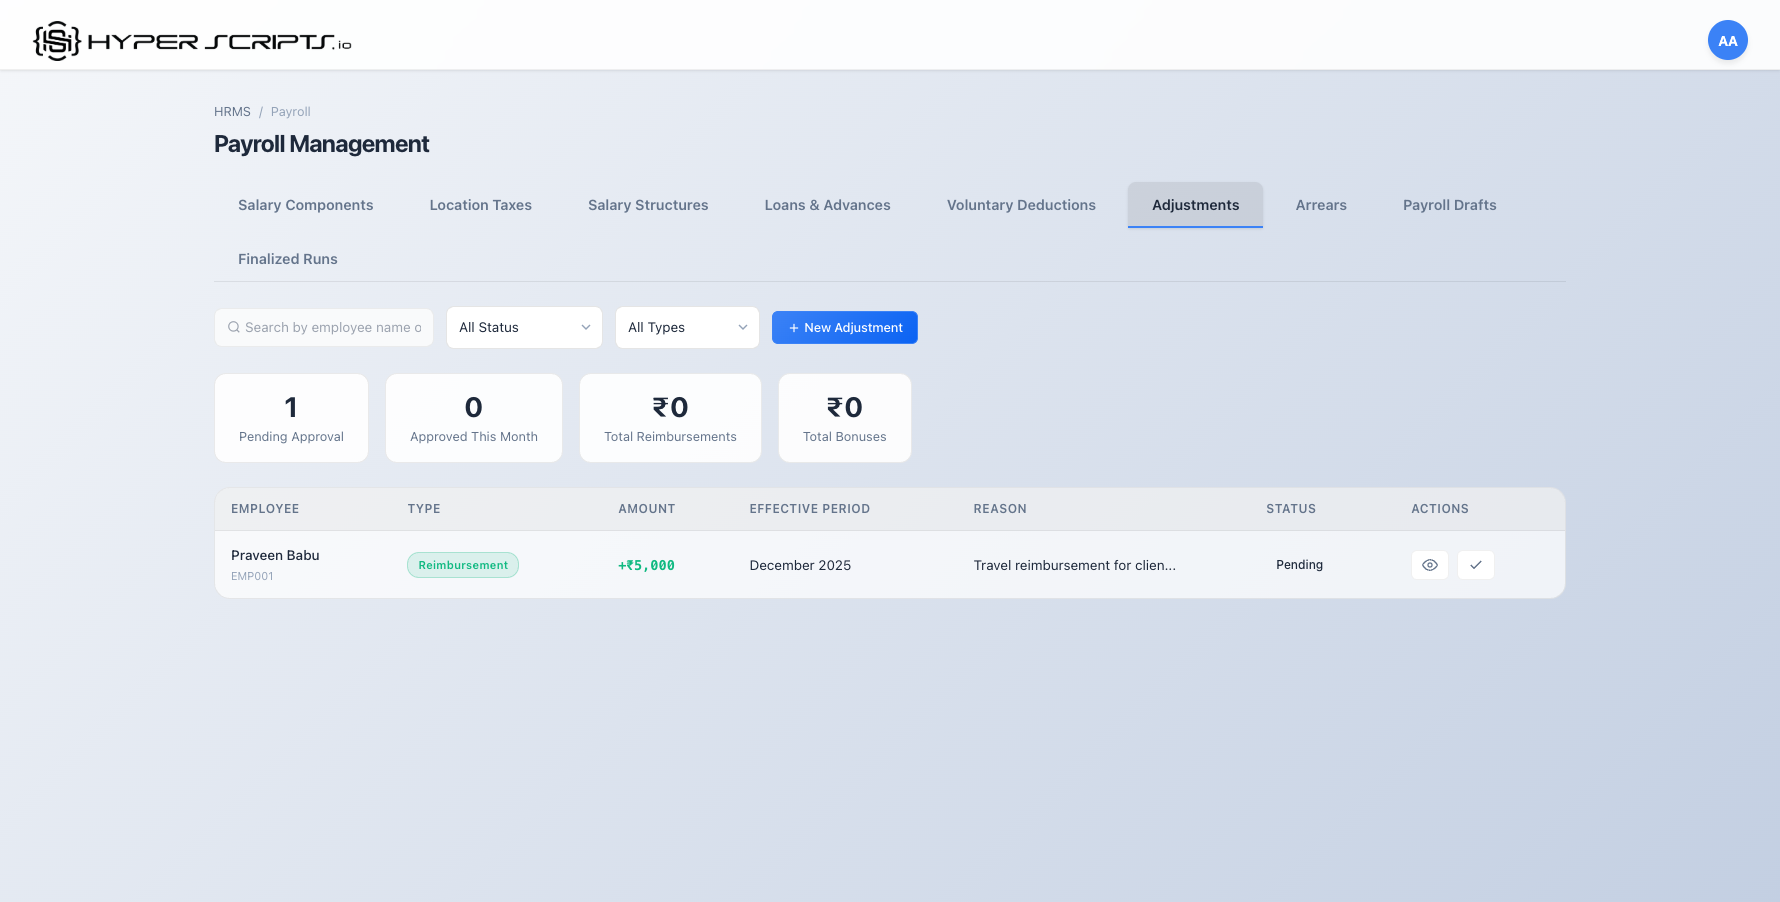
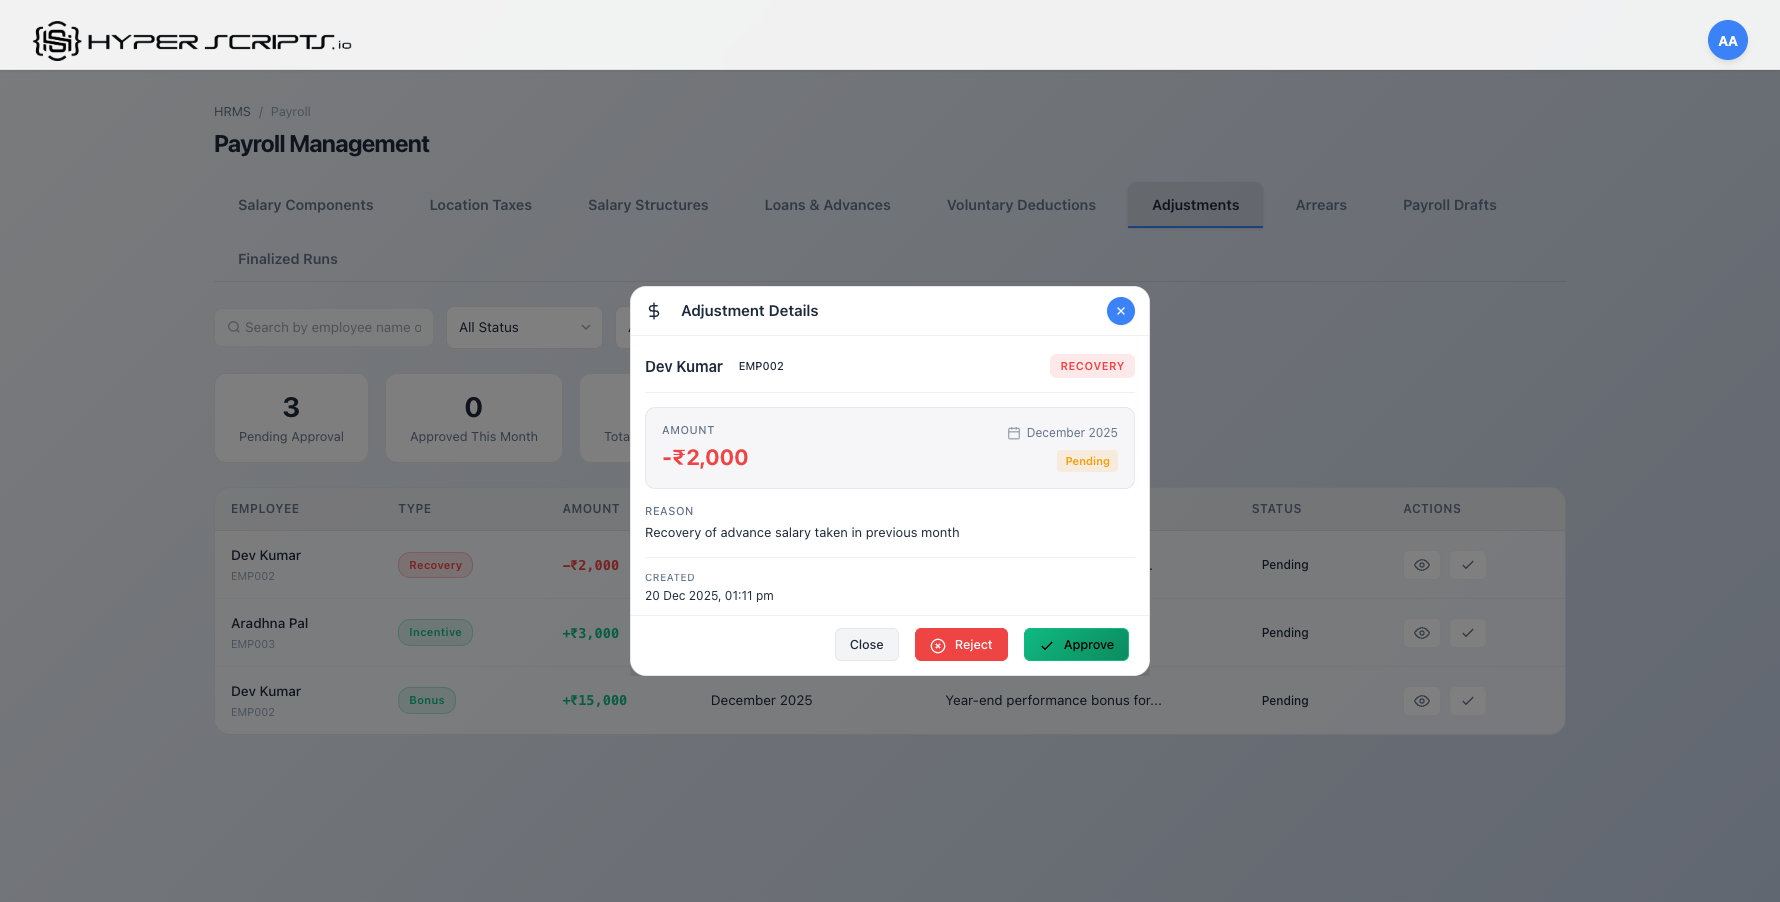
10.7 Viewing Adjustment Details
Click the View Details button (eye icon) on any adjustment to see complete information including who created it and when.
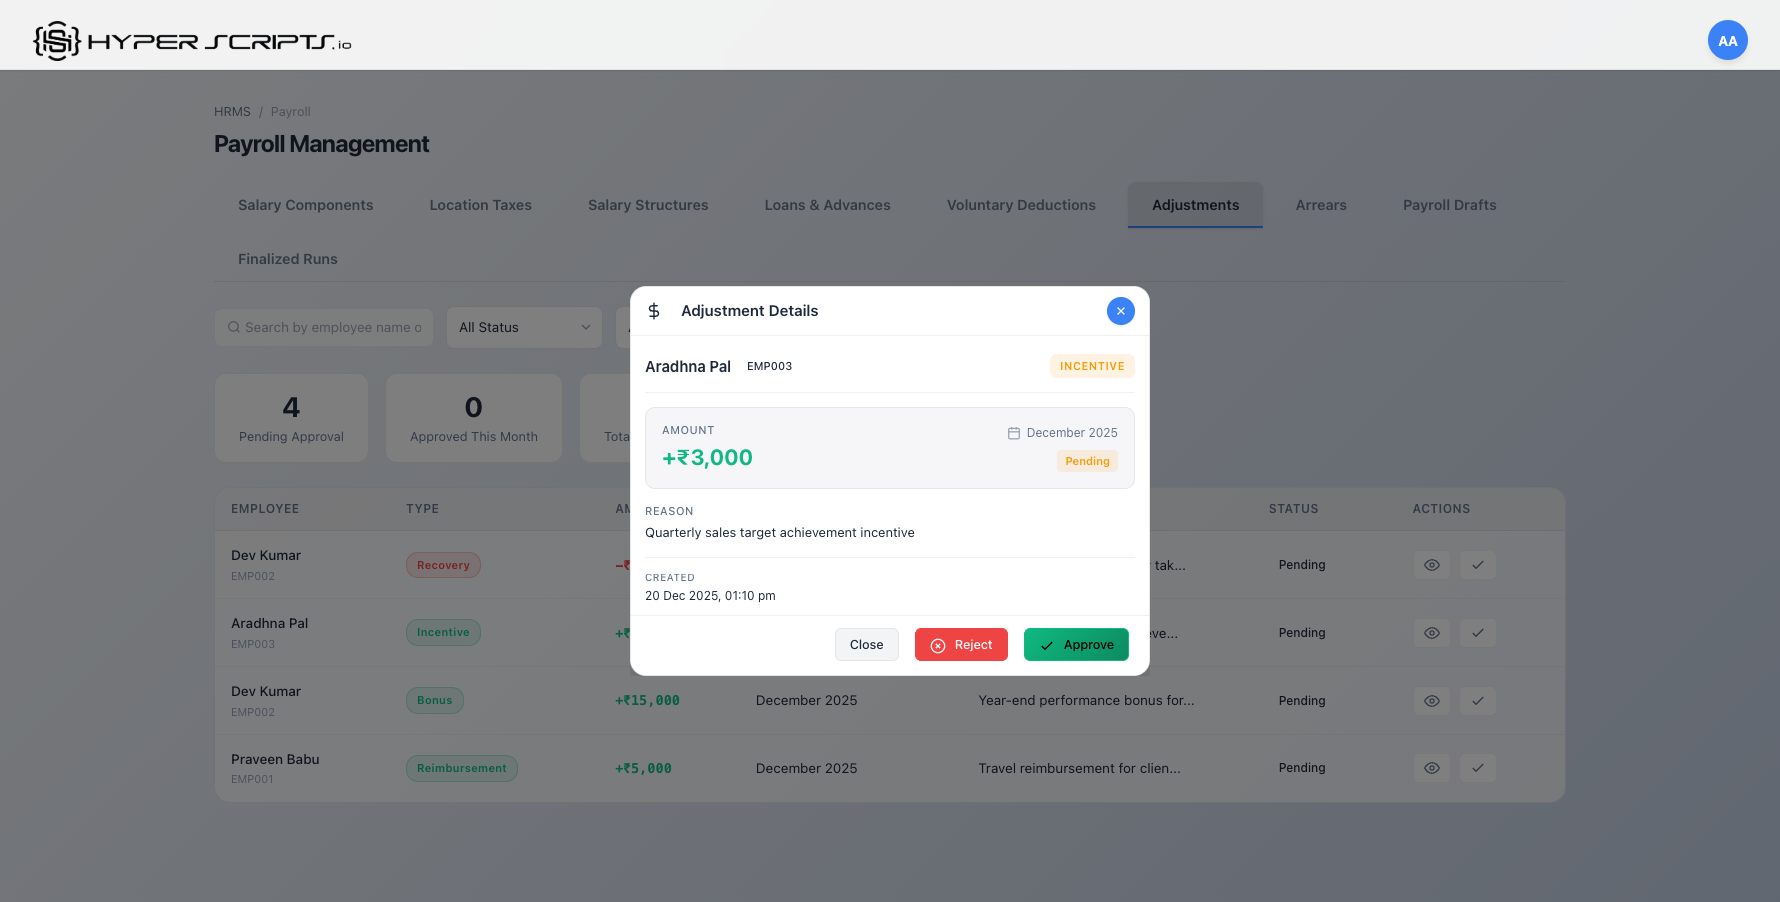
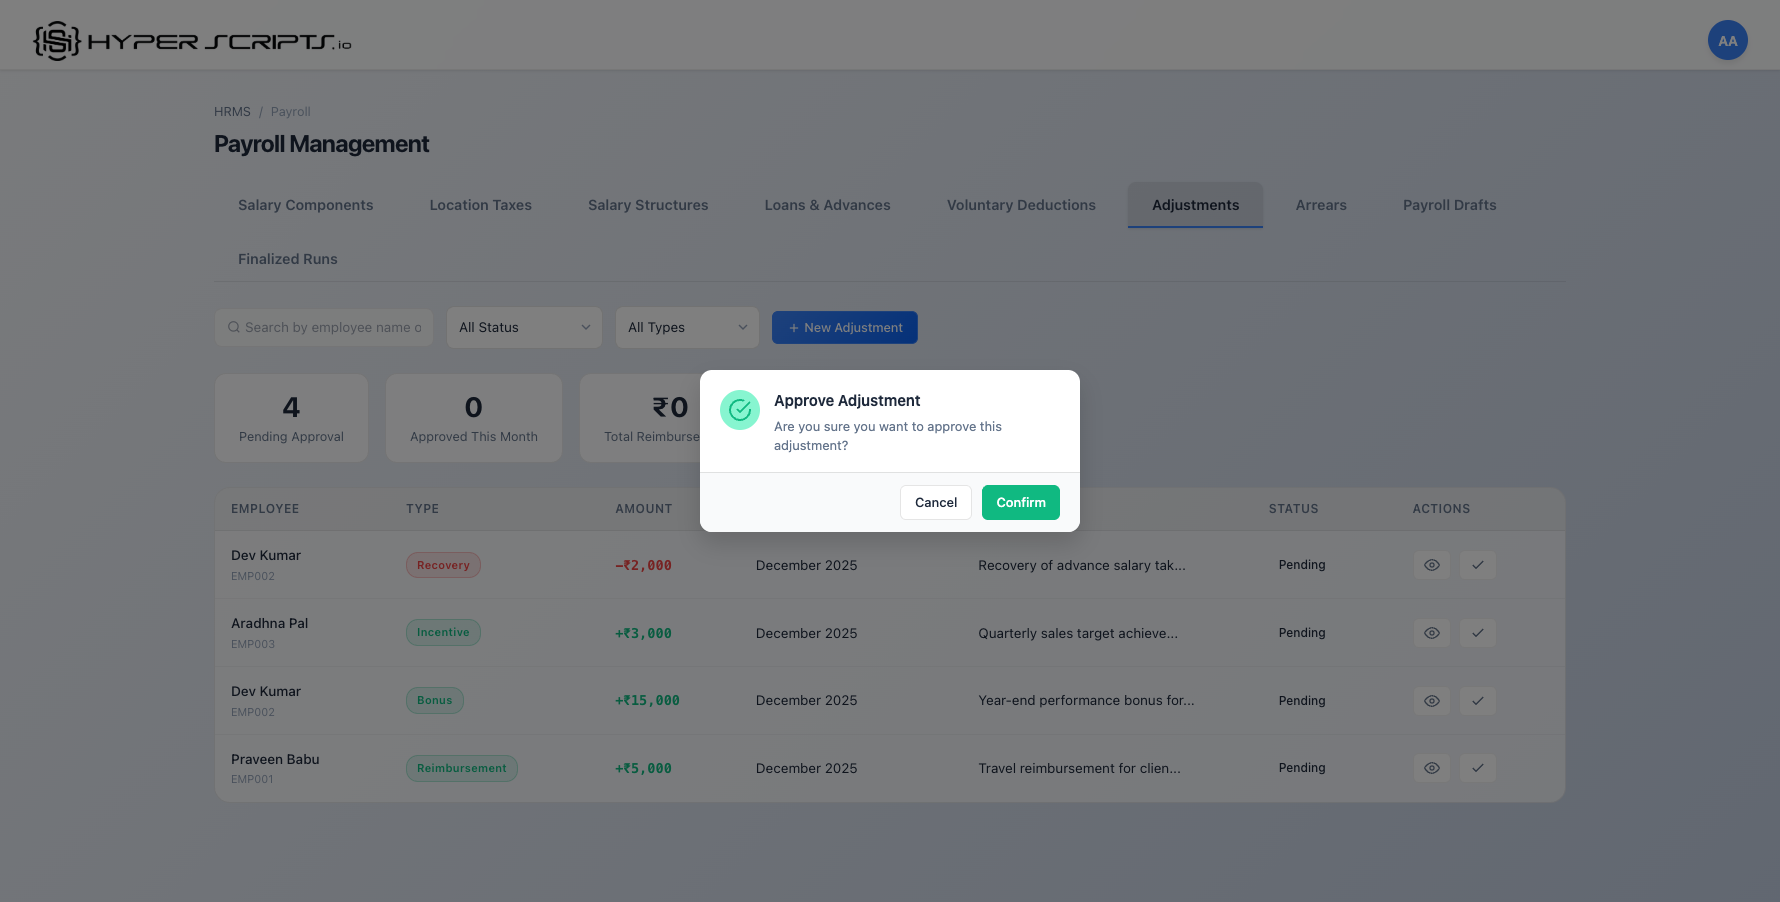
10.8 Approving Adjustments
All adjustments require HR Admin approval before they are applied to payslips. Only users with HRMS_HR_ADMIN or SUPERADMIN role can approve adjustments.
- Click the View Details button on a pending adjustment
- Review the adjustment details carefully
- Click the "Approve" button to approve
- Confirm the approval in the dialog
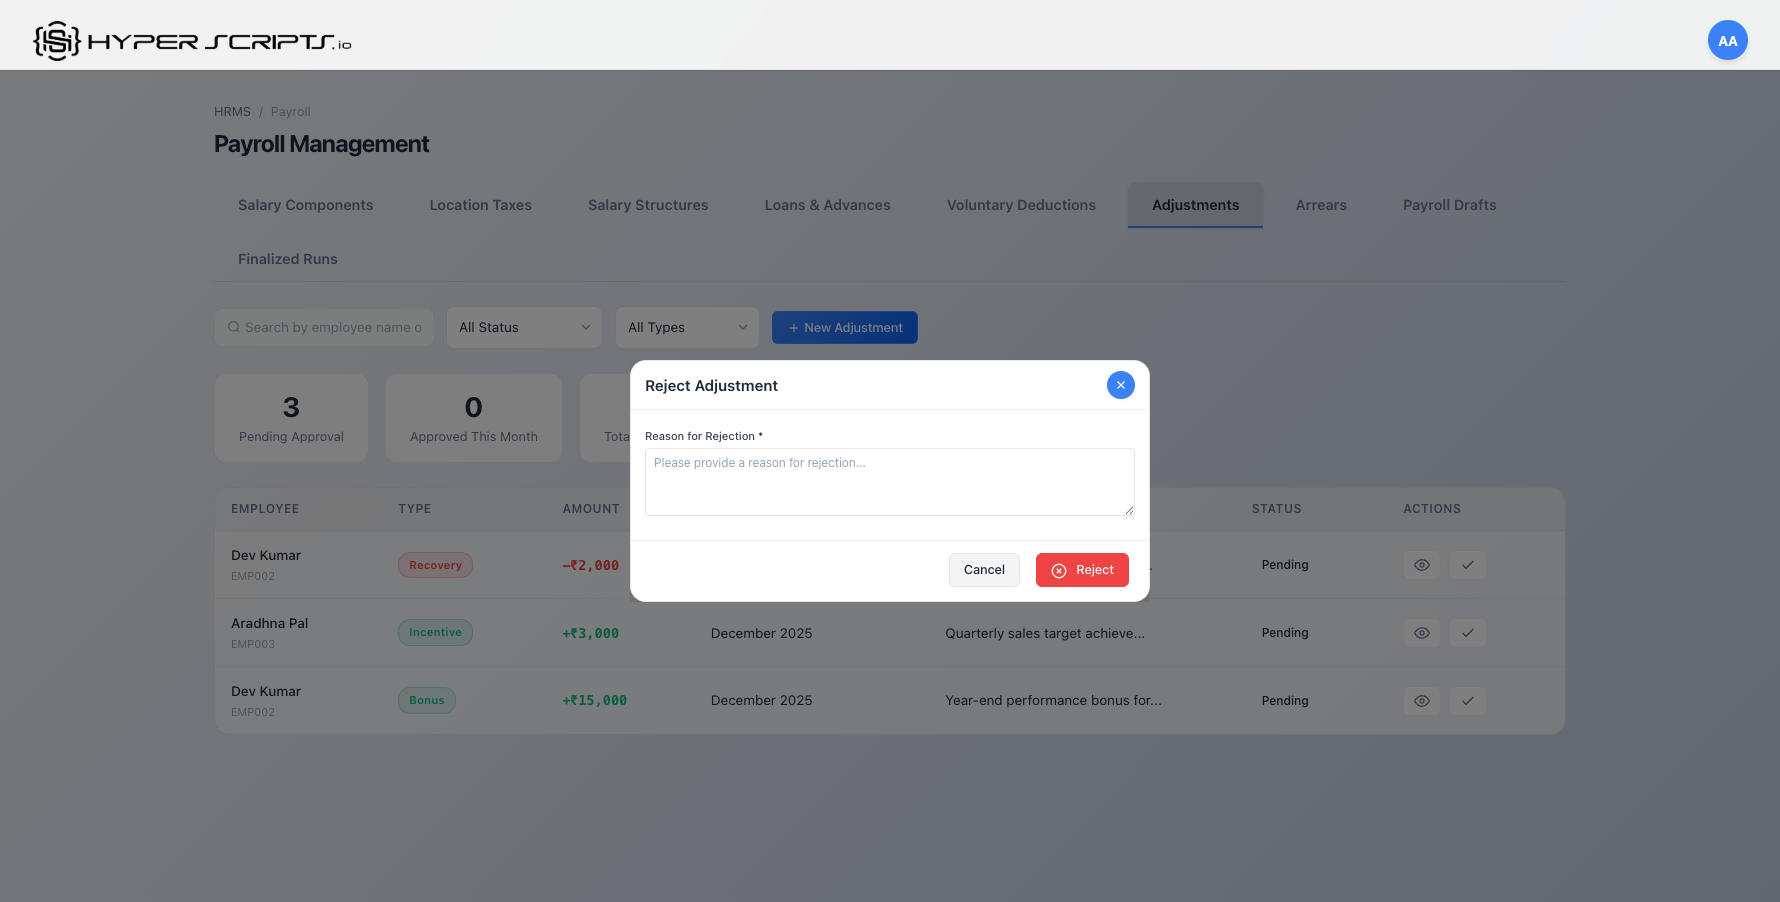
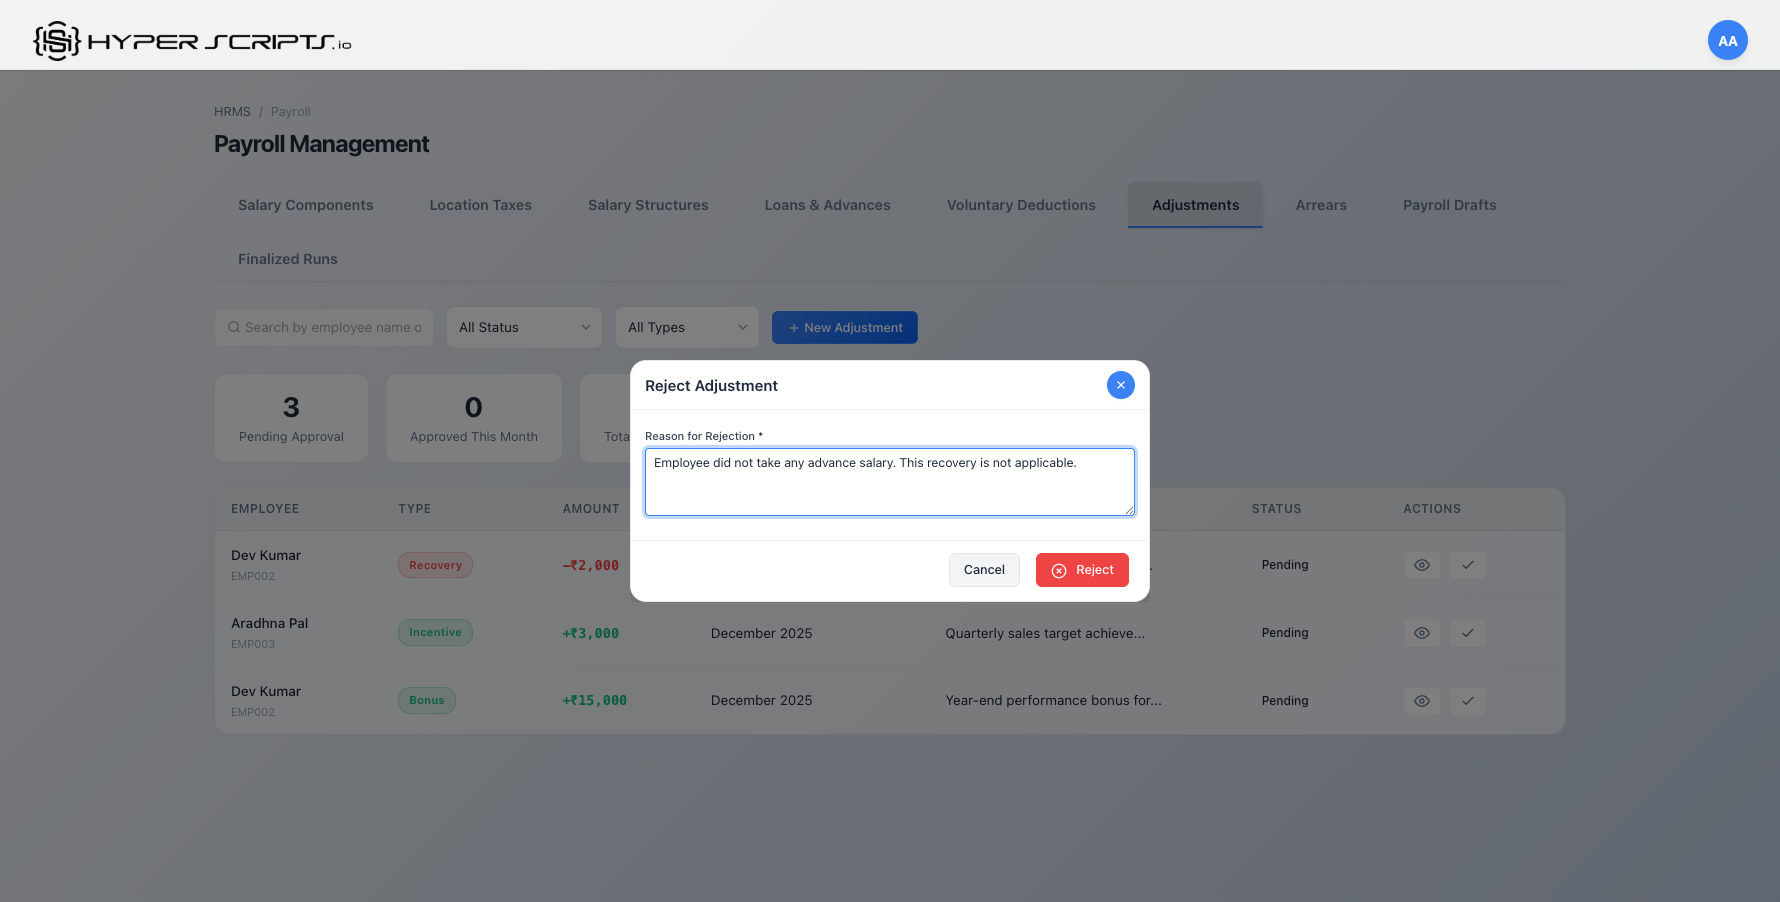
10.9 Rejecting Adjustments
If an adjustment request is incorrect or not approved, you can reject it with a reason.
- Click the View Details button on a pending adjustment
- Click the "Reject" button
- Enter a rejection reason (required)
- Click "Reject" to confirm

10.10 Adjustments in Payroll Processing
Approved adjustments are automatically included when processing payroll drafts. Here's how adjustments appear in the payroll workflow:
Step 1: Create and Process Payroll Draft
Step 2: View Adjustments in Payslips
After processing the draft, open any payslip to see how adjustments are reflected. Adjustments appear in a dedicated "Adjustments & Additions" section.
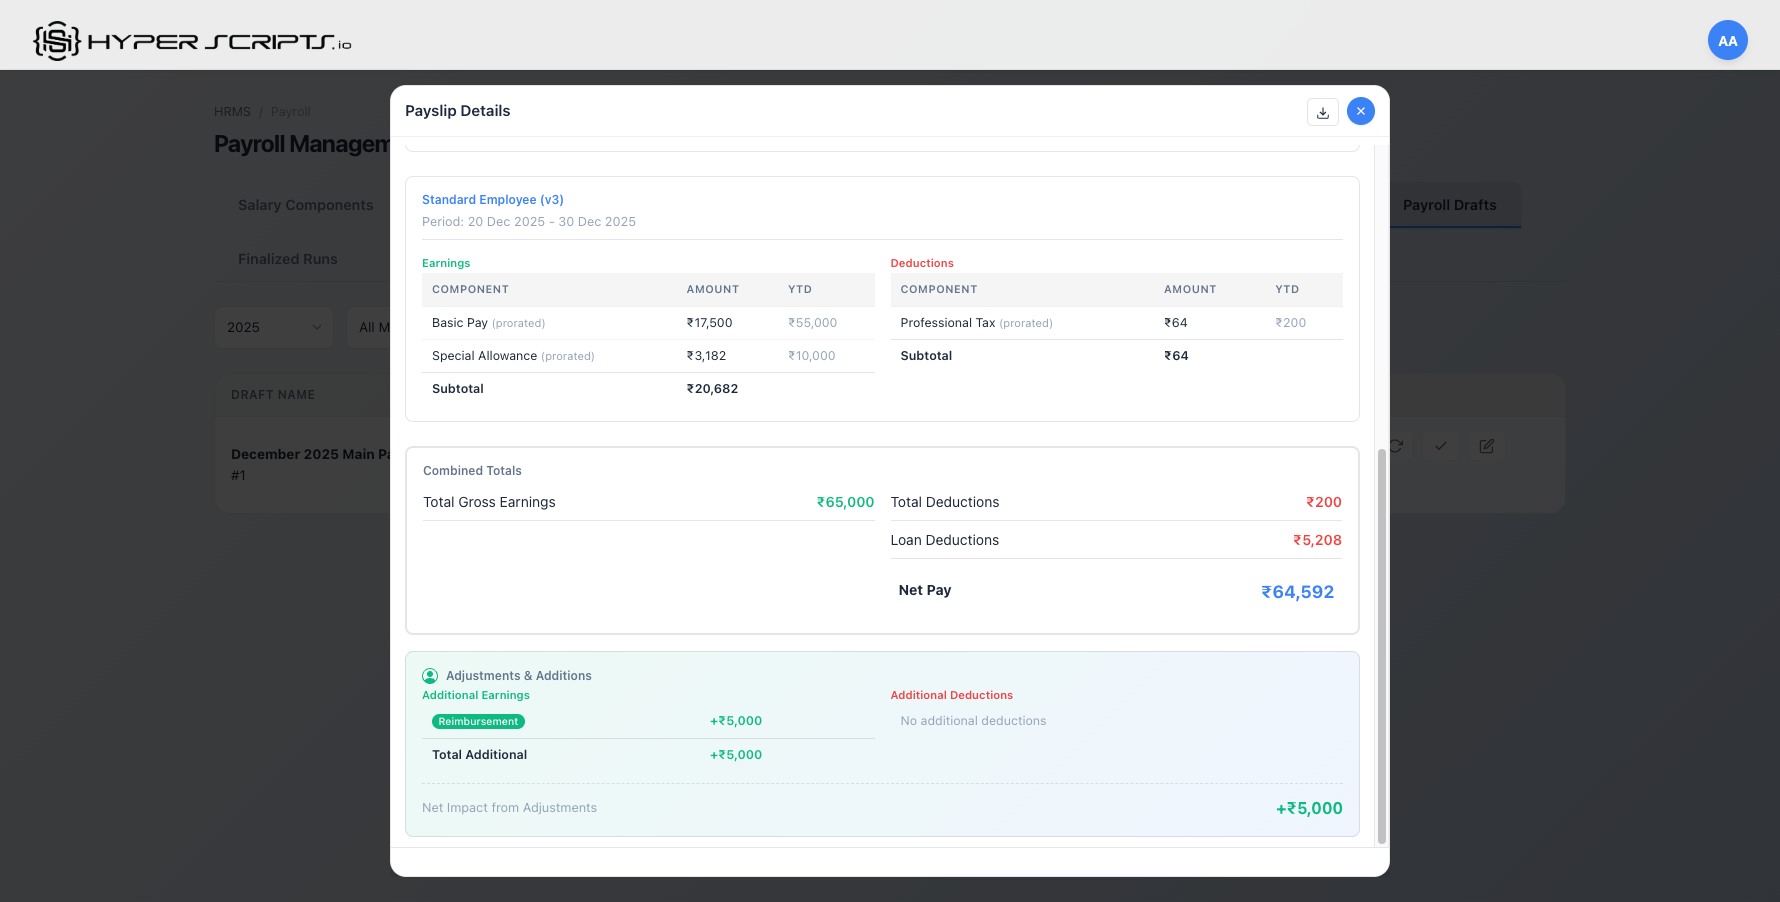
Understanding the Payslip Adjustments Section
The "Adjustments & Additions" section in payslips shows:
- Additional Earnings - Reimbursements, Bonuses, Incentives, and Arrears that add to salary
- Additional Deductions - Recovery and Deduction amounts that subtract from salary
- Net Impact - The total effect of all adjustments on the employee's net pay
| Adjustment Type | Display Name in Payslip | Color Badge |
|---|---|---|
| Reimbursement | Reimbursement | Green |
| Bonus / Incentive | Bonus/Incentive | Purple |
| Arrears | Arrears | Orange |
| Deduction / Recovery | Recovery | Red |
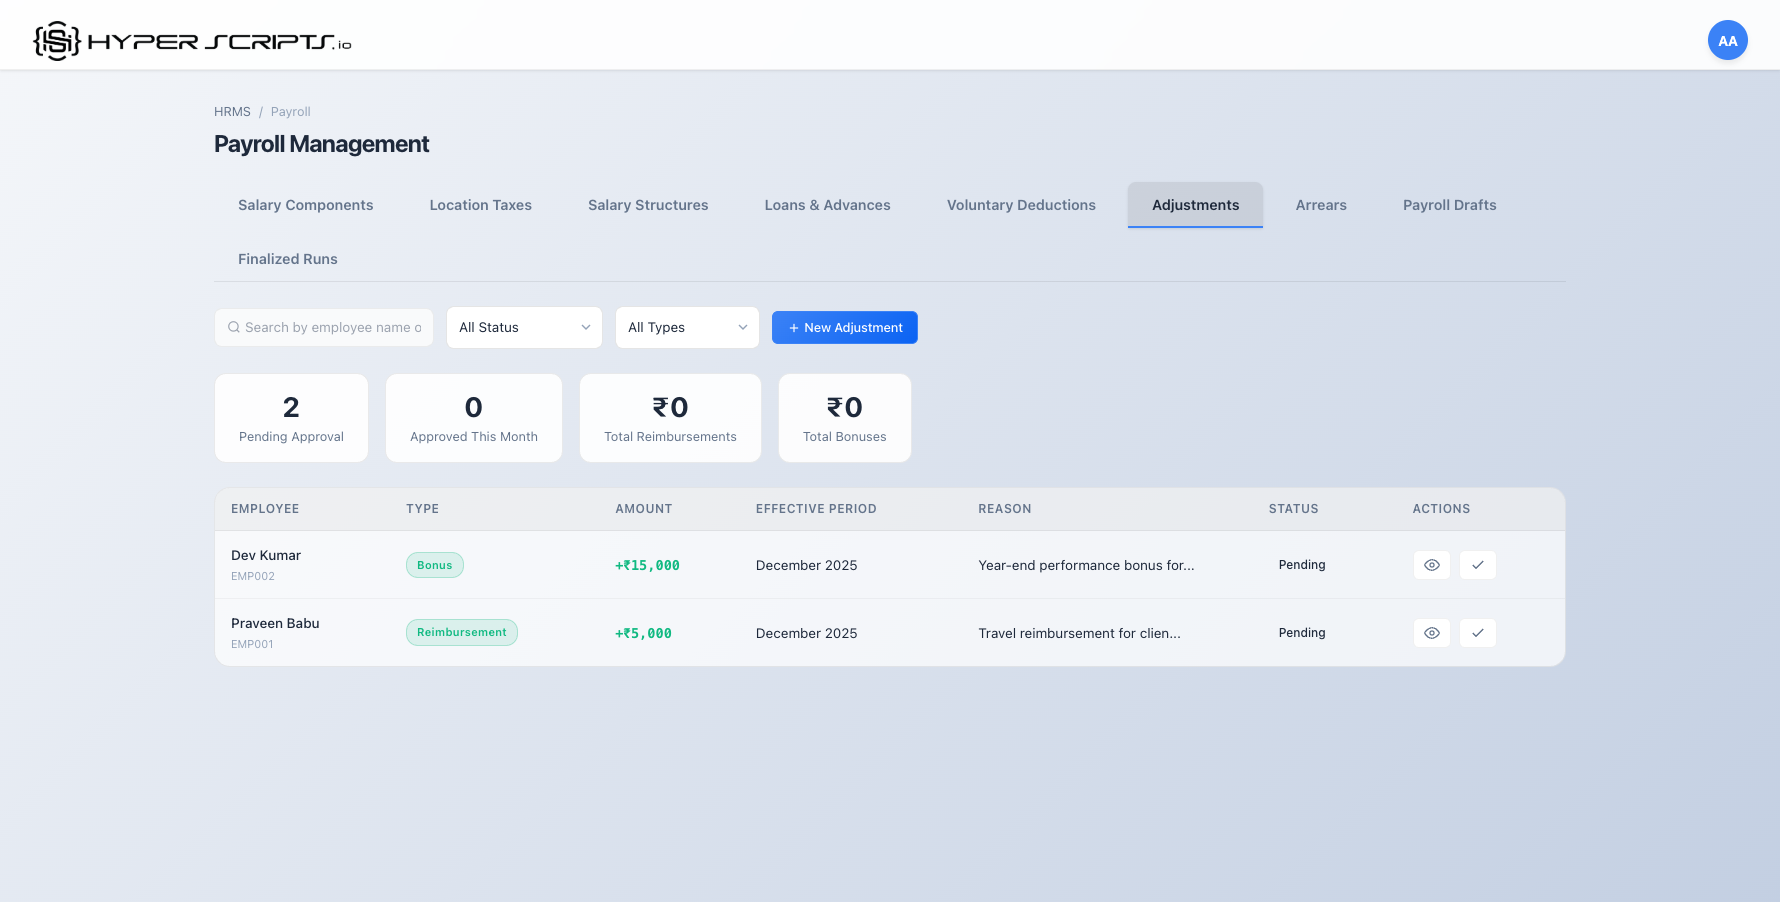
10.11 Adjustment Status Workflow
Every adjustment goes through a defined workflow:
| Status | Description | Actions Available |
|---|---|---|
| Pending | Adjustment created, awaiting HR Admin approval | View, Approve, Reject |
| Approved | Approved by HR Admin, will be included in payroll | View only |
| Rejected | Rejected by HR Admin, will not be applied | View only (with rejection reason) |
| Applied | Successfully applied in a finalized payroll run | View only |
10.12 Best Practices
- Always add descriptions - Include detailed reasons for adjustments for audit purposes
- Review before approval - Verify the amount, employee, and month before approving
- Use recurring for regular incentives - Set recurring months for quarterly bonuses or ongoing incentives
- Process adjustments before payroll - Ensure all pending adjustments are approved/rejected before processing payroll drafts
- Check payslips after processing - Verify adjustments appear correctly in the payslip preview
- Wrong month selection - Ensure the month/year matches when the adjustment should apply
- Duplicate adjustments - Check if a similar adjustment already exists before creating
- Missing approvals - Unapproved adjustments won't appear in payroll
- Wrong adjustment type - Using "Deduction" instead of "Recovery" affects reporting
11 Voluntary Deductions
Voluntary Deductions (VD) allow employees to opt into recurring deductions from their salary for benefits like additional insurance, charity donations, or other voluntary contributions. This section covers how to set up VD types, manage enrollments, and track deductions in payslips.
Voluntary Deductions Lifecycle Summary
Before diving into details, here's how voluntary deductions work from enrollment to deduction:
| Status | What It Means | What You Can Do |
|---|---|---|
| Pending Approval | Enrollment submitted, awaiting HR review | HR: Approve or Reject |
| Approved | HR approved but not yet active (future start date) | Will activate on effective date |
| Active | Deducted from payroll each month | Employee: Opt Out; HR: Modify amount |
| Opted Out | Employee stopped the deduction | Employee: Re-enroll if needed |
| Rejected | HR rejected the enrollment | Employee: Re-apply with corrections |
- VD Types - Define the categories of voluntary deductions available (e.g., Medical Insurance, Charity)
- Enrollments - Track which employees are enrolled in which VD types
- Status Workflow - Pending Approval → Approved → Active → Opted Out
11.1 VD Types Tab
The VD Types tab allows HR administrators to create and manage the types of voluntary deductions available to employees.
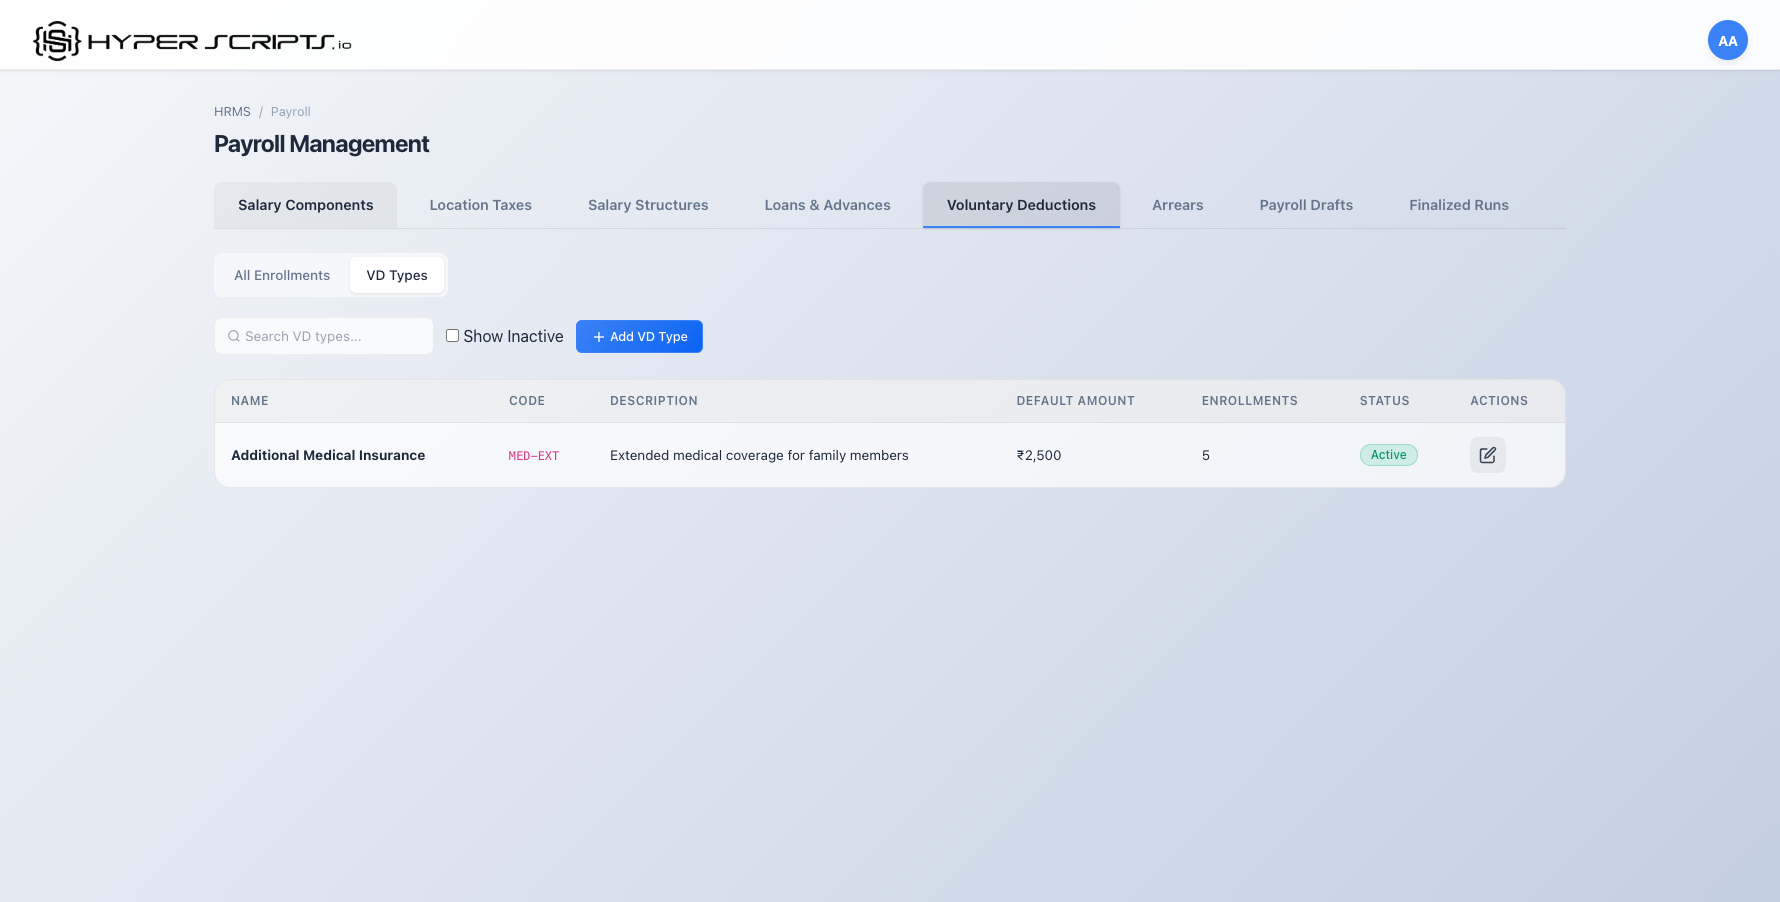
Creating a VD Type
- Navigate to Payroll → Voluntary Deductions → VD Types tab
- Click the "Create VD Type" button
- Fill in the VD type details
- Click "Create" to save
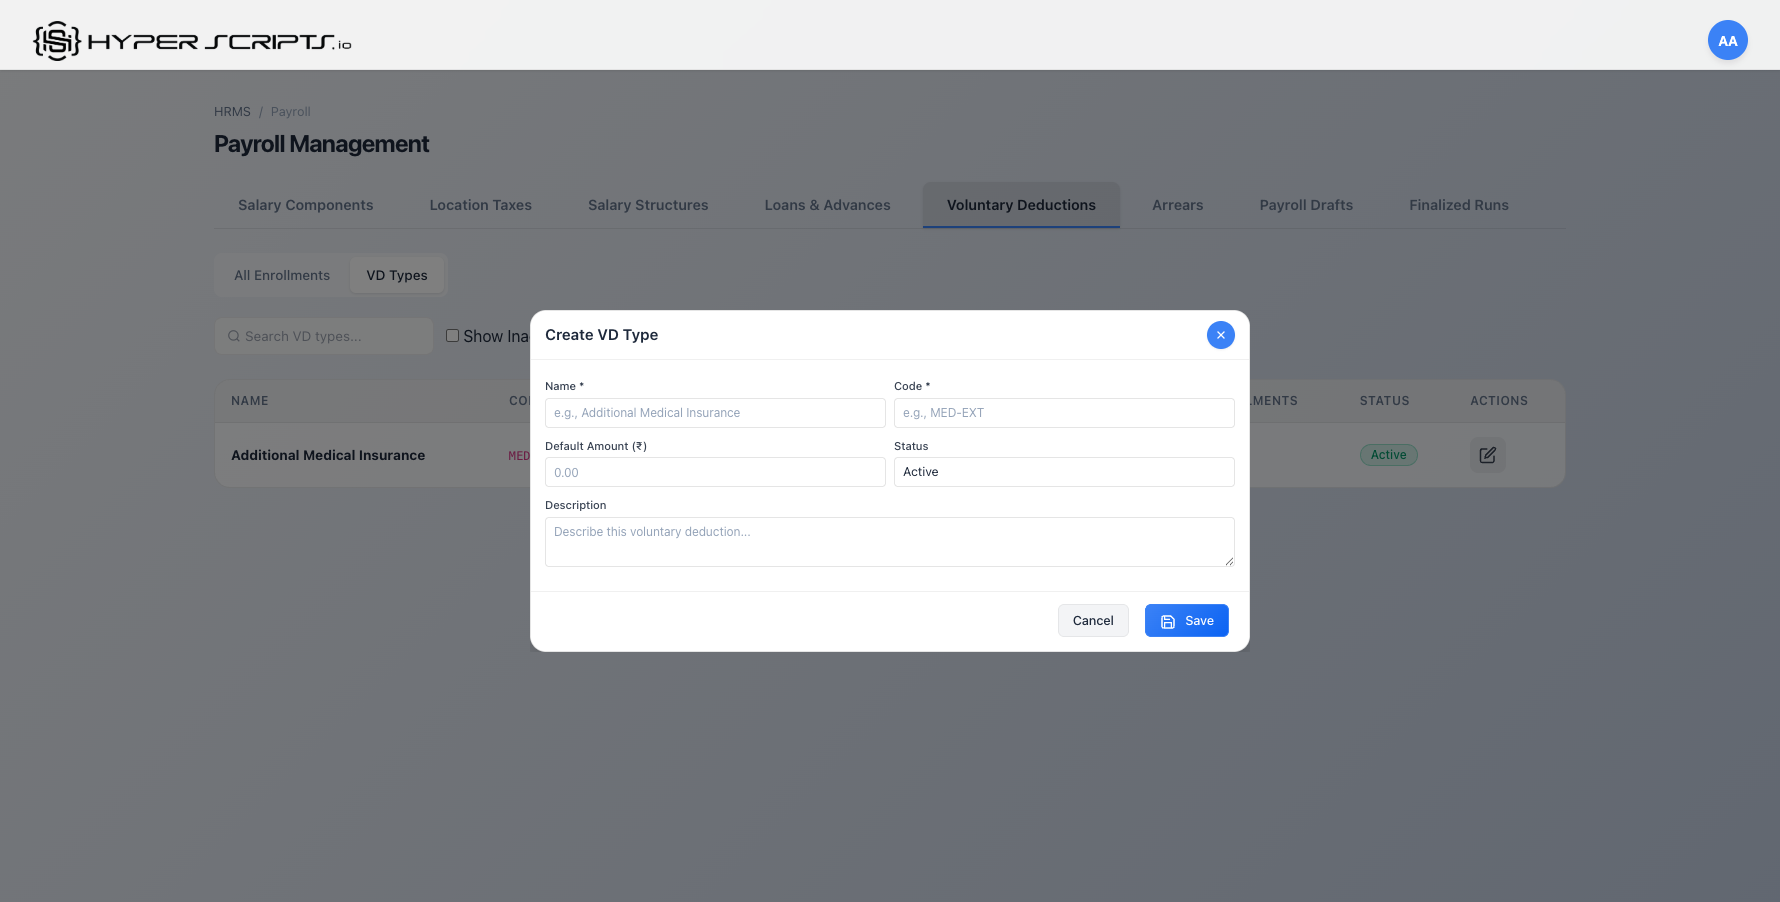
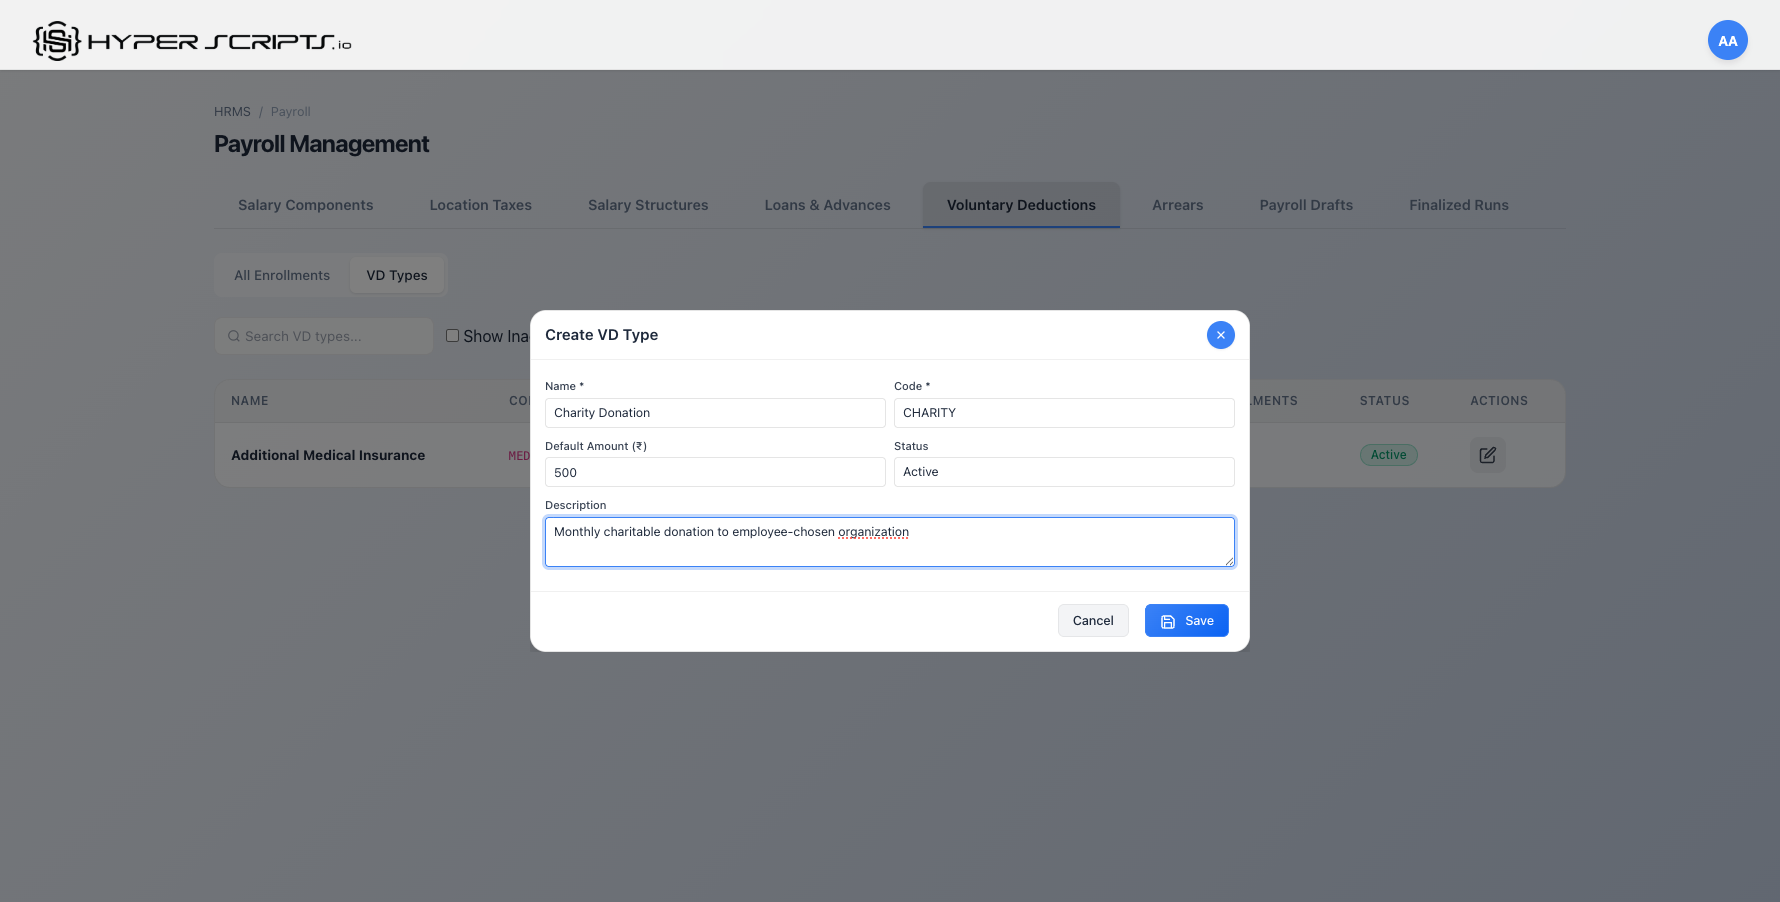
| Field | Required | Description |
|---|---|---|
Deduction Name |
Required | A descriptive name for the VD type (e.g., "Additional Medical Insurance") |
Default Amount |
Required | The default monthly deduction amount. Can be overridden per enrollment. |
Description |
Optional | Additional details about the deduction for employee reference |
Editing a VD Type
Click the Edit button next to any VD type to modify its details.
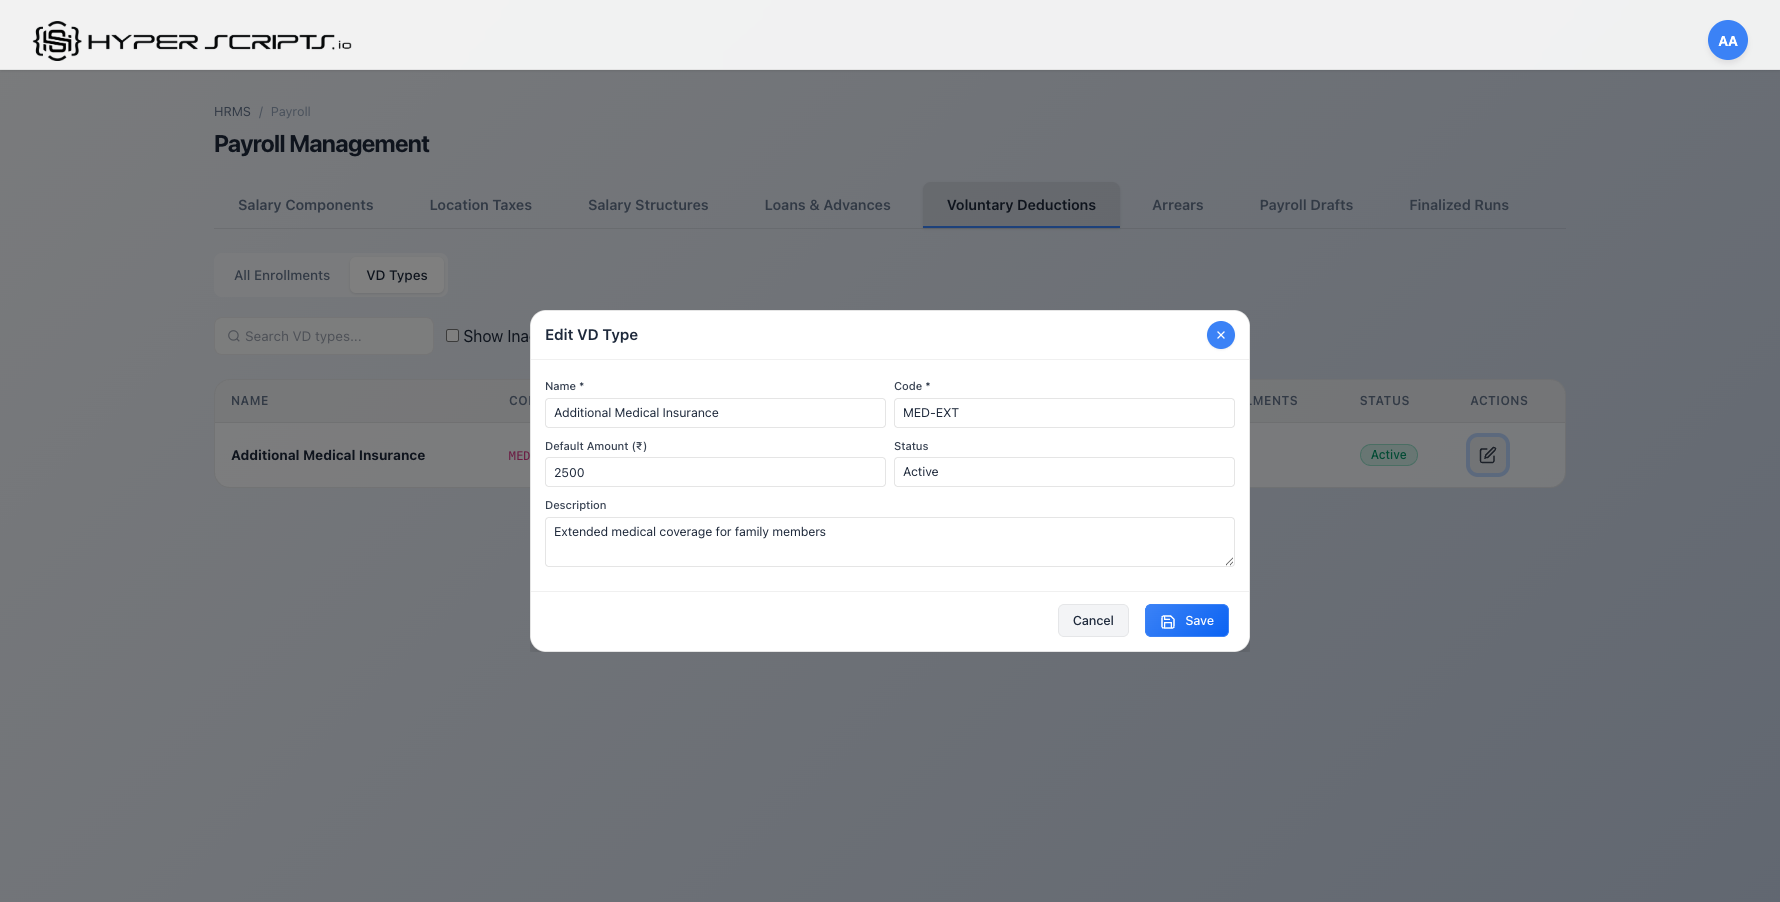
Changing the default amount on a VD type does NOT affect existing enrollments. Only new enrollments will use the updated default.
11.2 All Enrollments Tab
The All Enrollments tab shows all VD enrollments across employees with their current status and allows HR to manage them.
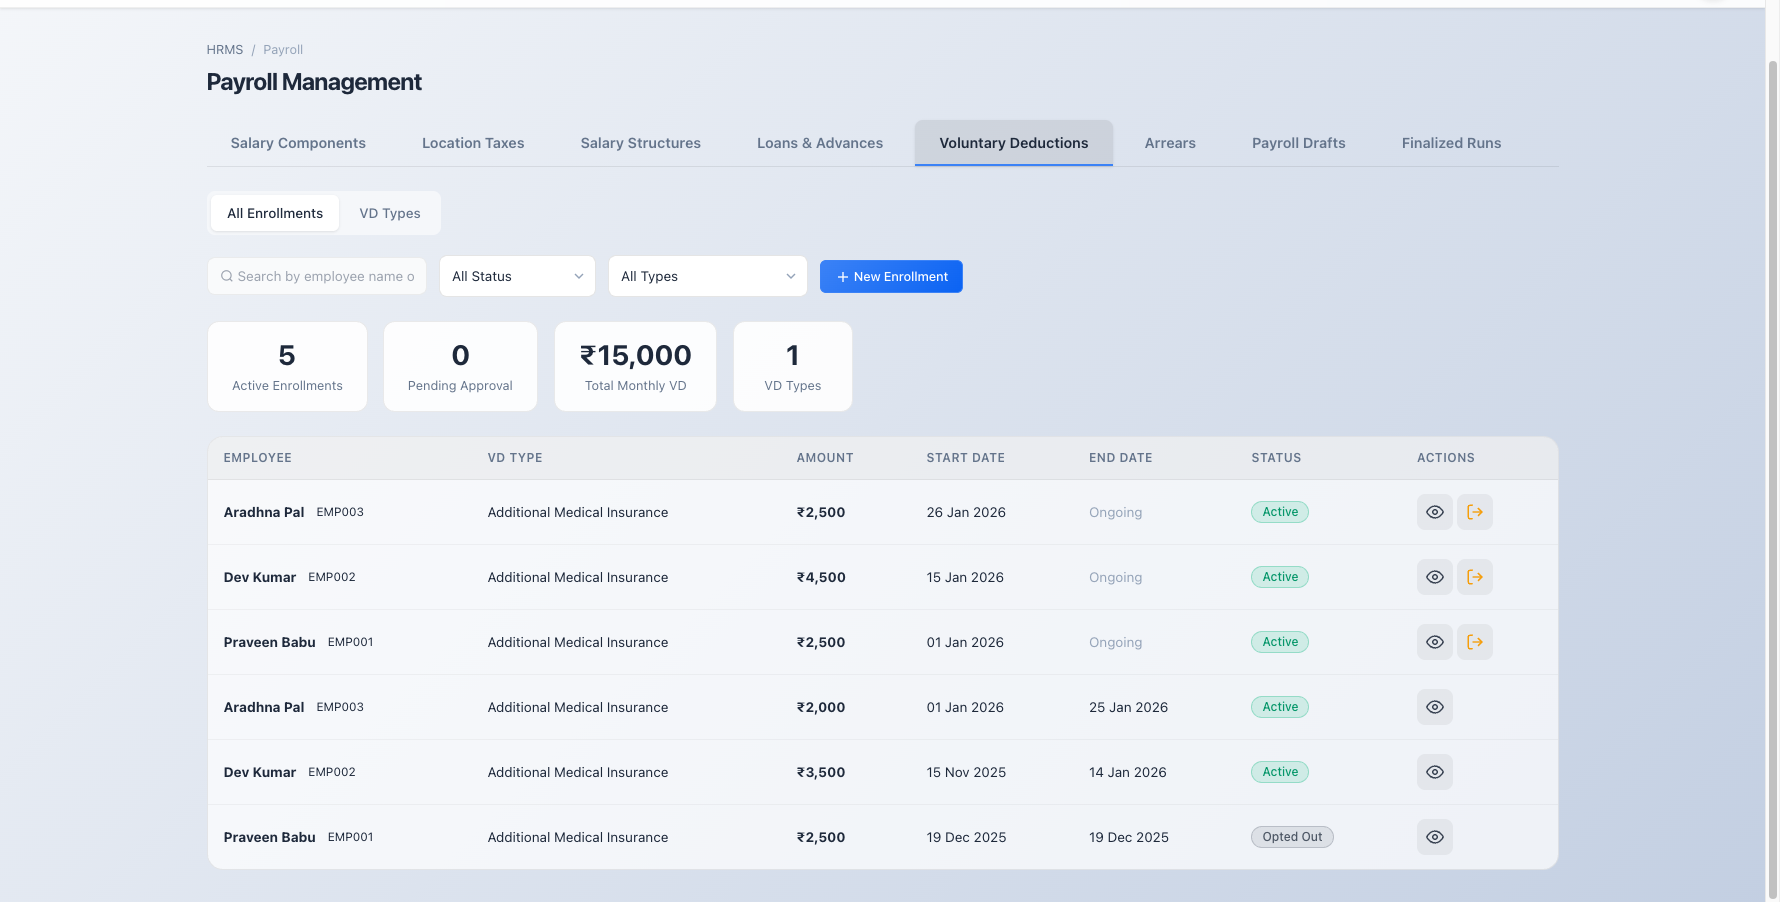
Understanding Status Badges
| Status | Color | Description |
|---|---|---|
| Pending Approval | Yellow | Employee has applied; awaiting HR approval |
| Approved | Blue | HR has approved; will become active on start date |
| Active | Green | Currently being deducted from payroll |
| Opted Out | Gray | Employee has opted out; no longer active |
| Rejected | Red | HR rejected the enrollment request |
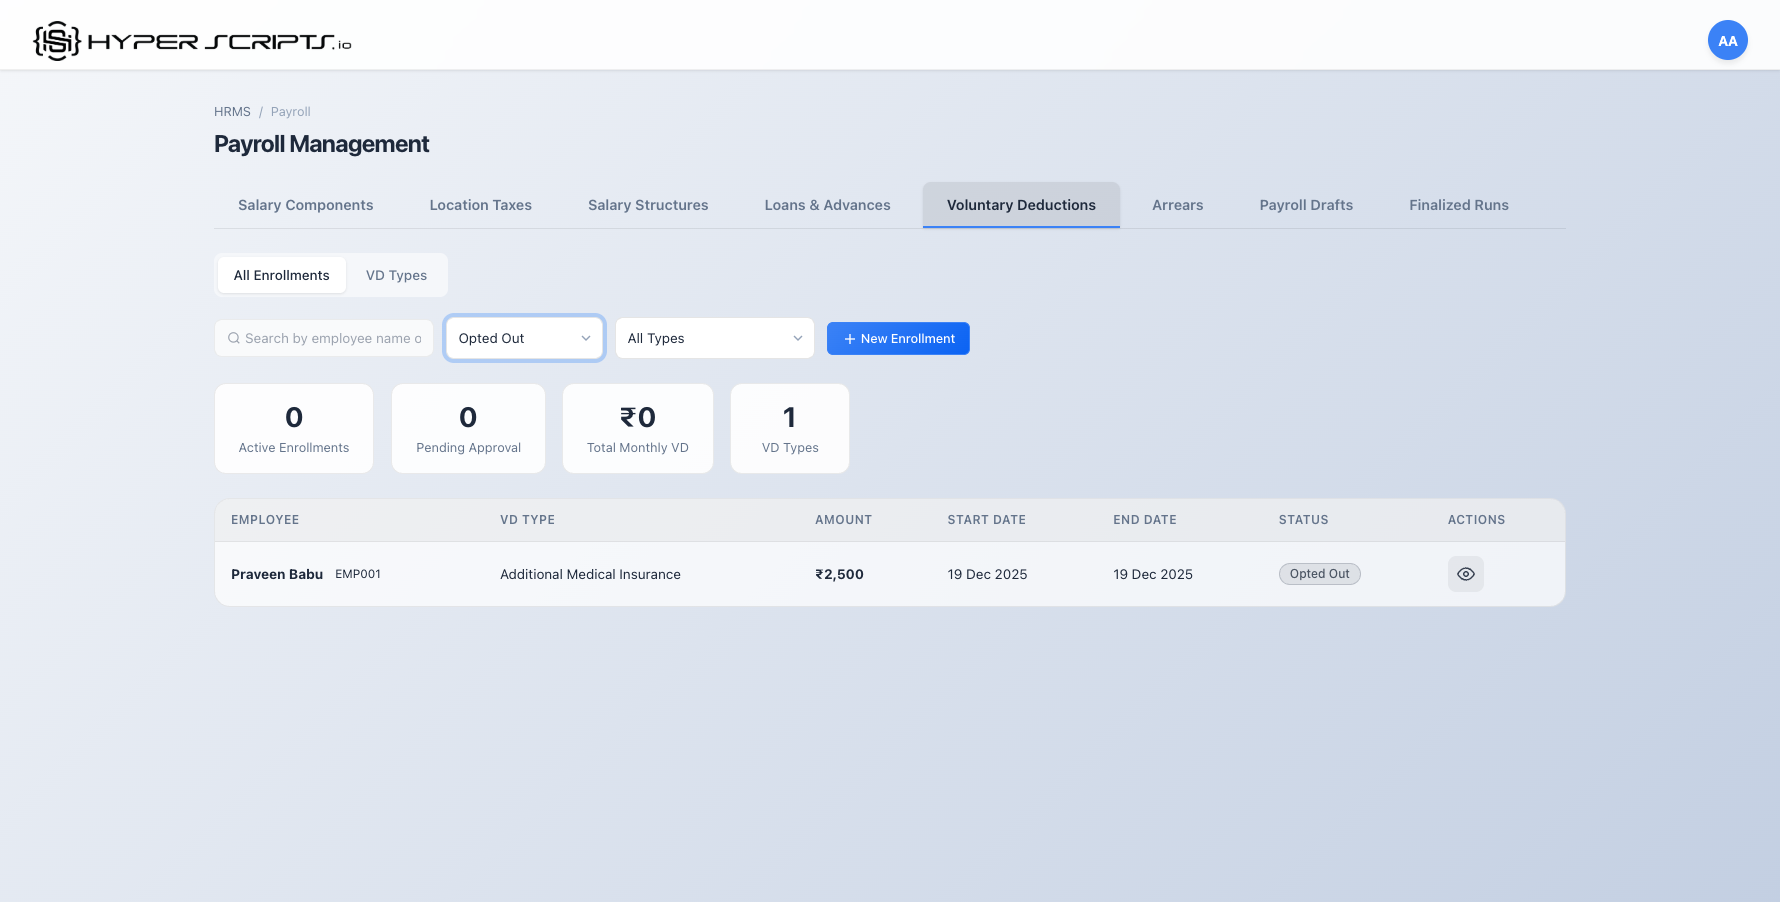
Filtering Enrollments
Use the dropdown filters to narrow down the enrollment list:

11.3 Creating a New Enrollment (HR Admin)
HR administrators can create enrollments on behalf of employees. When created by HR, enrollments go directly to Active status.
- Navigate to Payroll → Voluntary Deductions → All Enrollments tab
- Click the "New Enrollment" button
- Select the employee from the dropdown
- Select the VD type (amount auto-fills with default)
- Adjust the monthly amount if needed
- Set the start date (and optionally an end date)
- Click "Submit for Approval"
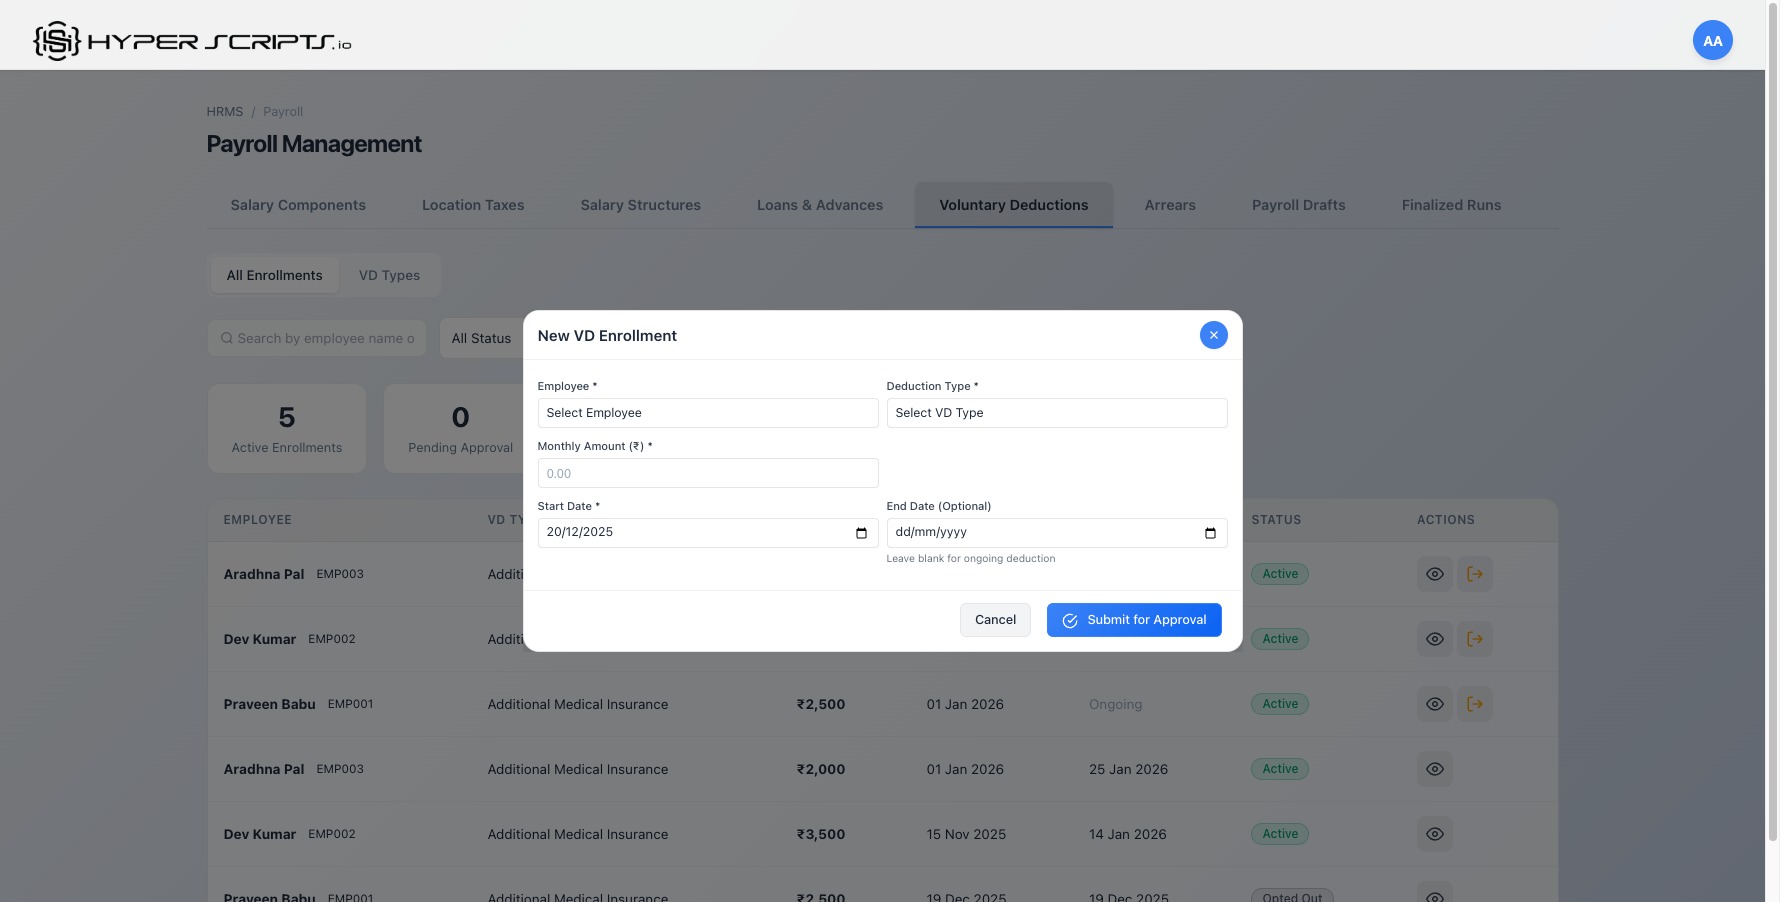
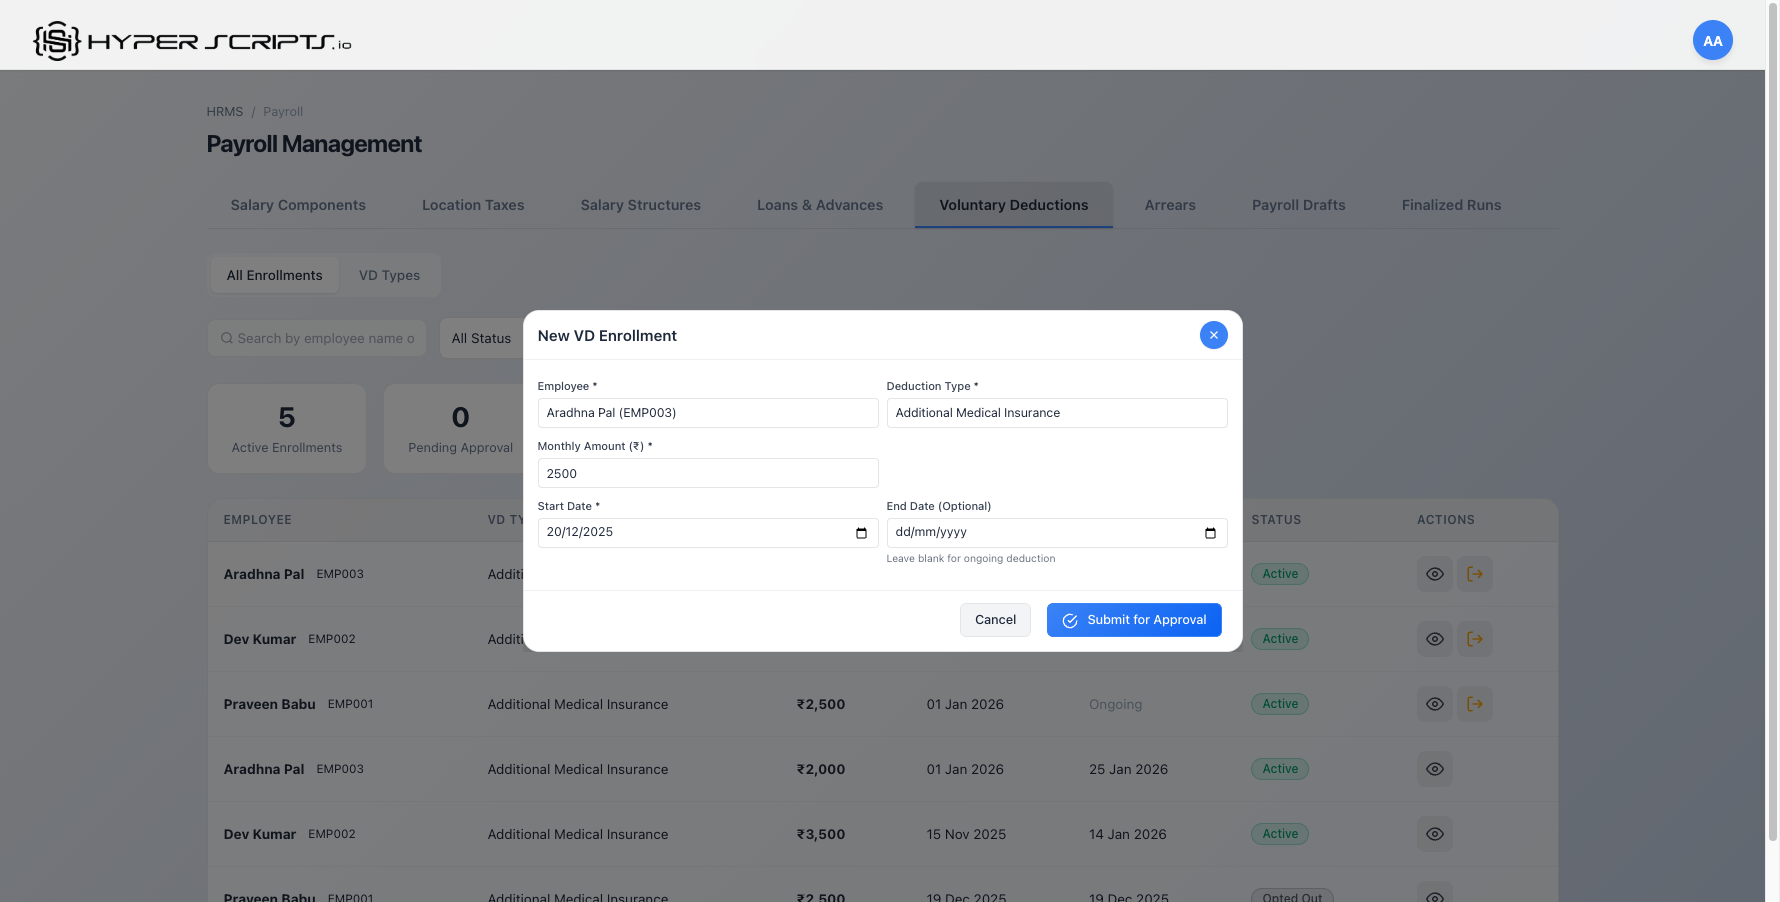
| Field | Required | Description |
|---|---|---|
Employee |
Required | Select the employee to enroll in the VD |
Deduction Type |
Required | Select the VD type - default amount auto-fills |
Monthly Amount |
Required | The amount to deduct monthly (can differ from default) |
Start Date |
Required | When deductions should begin |
End Date |
Optional | Leave blank for ongoing deductions; set for fixed-term |
- HR-created enrollments go directly to Active status
- Employee self-enrollments go to Pending Approval status first
11.4 Viewing Enrollment Details
Click the View Details button on any enrollment to see complete information.
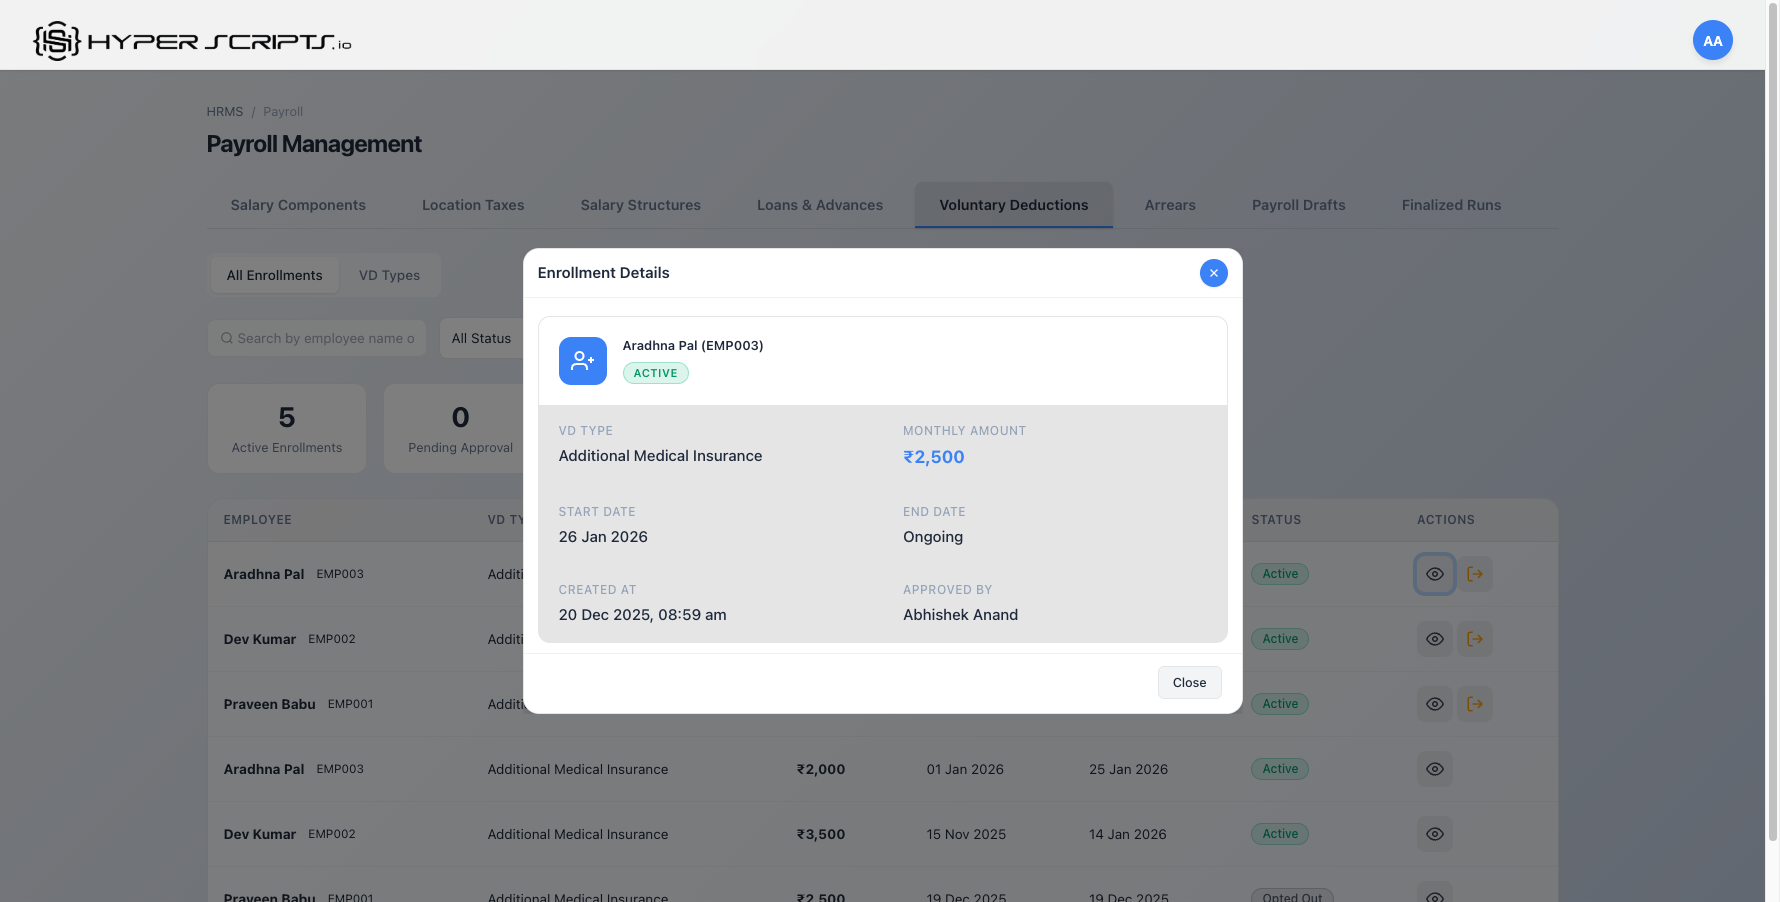
The details modal shows:
- Employee Name & Code - Who is enrolled
- VD Type - The deduction category
- Monthly Amount - Amount being deducted
- Start/End Dates - When deductions apply
- Status - Current enrollment status
- Approved By - Which HR admin approved (if applicable)
11.5 Opting Out of a VD
Active enrollments can be opted out by clicking the Opt-Out button. This ends the deduction from the specified date.
- Find the active enrollment in the list
- Click the "Opt-Out" button
- Set the Last Deduction Date (defaults to today)
- Click "Confirm Opt-Out"
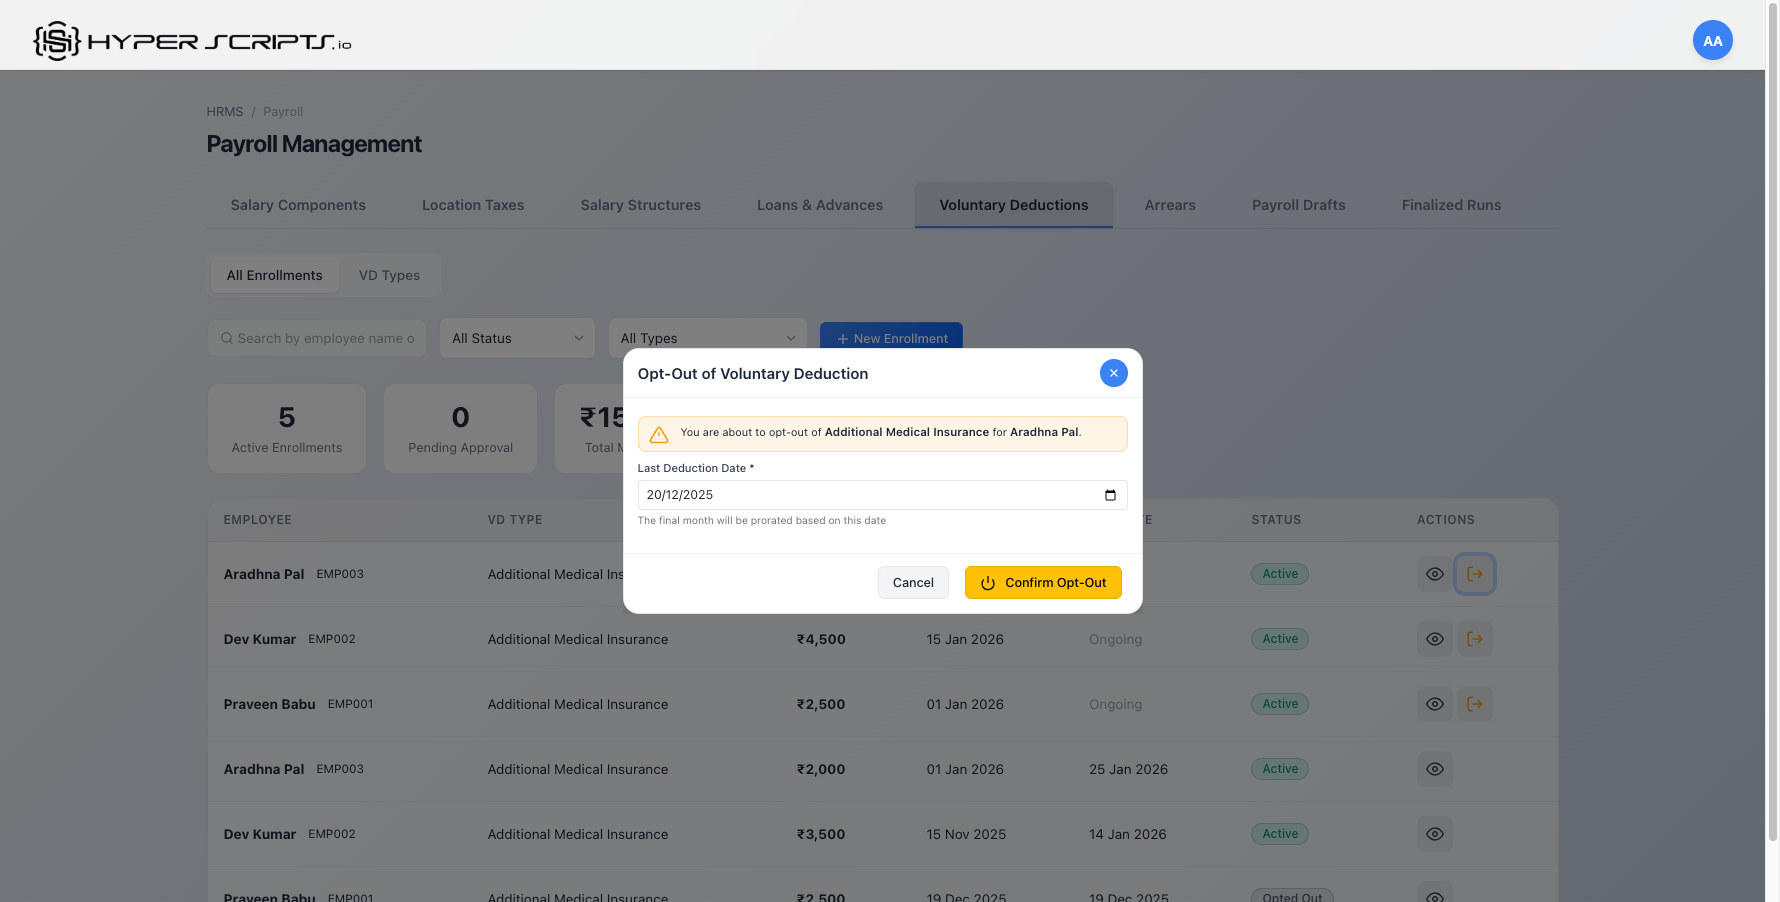
If the last deduction date is mid-month, the final month's deduction will be prorated based on the number of days enrolled.
11.6 Deleting an Enrollment
In some cases, you may need to completely delete an enrollment rather than opting out. The delete option is available for enrollments that have not yet been processed in any payroll.
When Can You Delete an Enrollment?
| Enrollment Status | End Date | Can Delete? | Alternative Action |
|---|---|---|---|
| Pending Approval | Any | Yes | — |
| Approved | Any | Yes | — |
| Rejected | Any | Yes | — |
| Active | Has end date | Yes (if not processed) | Use Opt-Out if already processed |
| Active | Ongoing (no end date) | No | Use Opt-Out button instead |
| Opted Out | Any | No | Already terminated |
How to Delete an Enrollment
- Find the enrollment in the list (must have a defined end date for active enrollments)
- Click the Delete button (trash icon)
- A confirmation dialog will appear asking you to confirm the deletion
- Click "Confirm" to permanently delete the enrollment
If the enrollment has already been processed in a payroll run (i.e., the deduction appeared on a payslip), you will see an error: "Cannot delete this enrollment because it has already been processed in payroll. Use 'Opt-Out' to stop future deductions instead."
- Delete - Completely removes the enrollment as if it never existed. Only for unprocessed enrollments.
- Opt-Out - Ends the enrollment from a specific date. The history is preserved and shows "Opted Out" status.
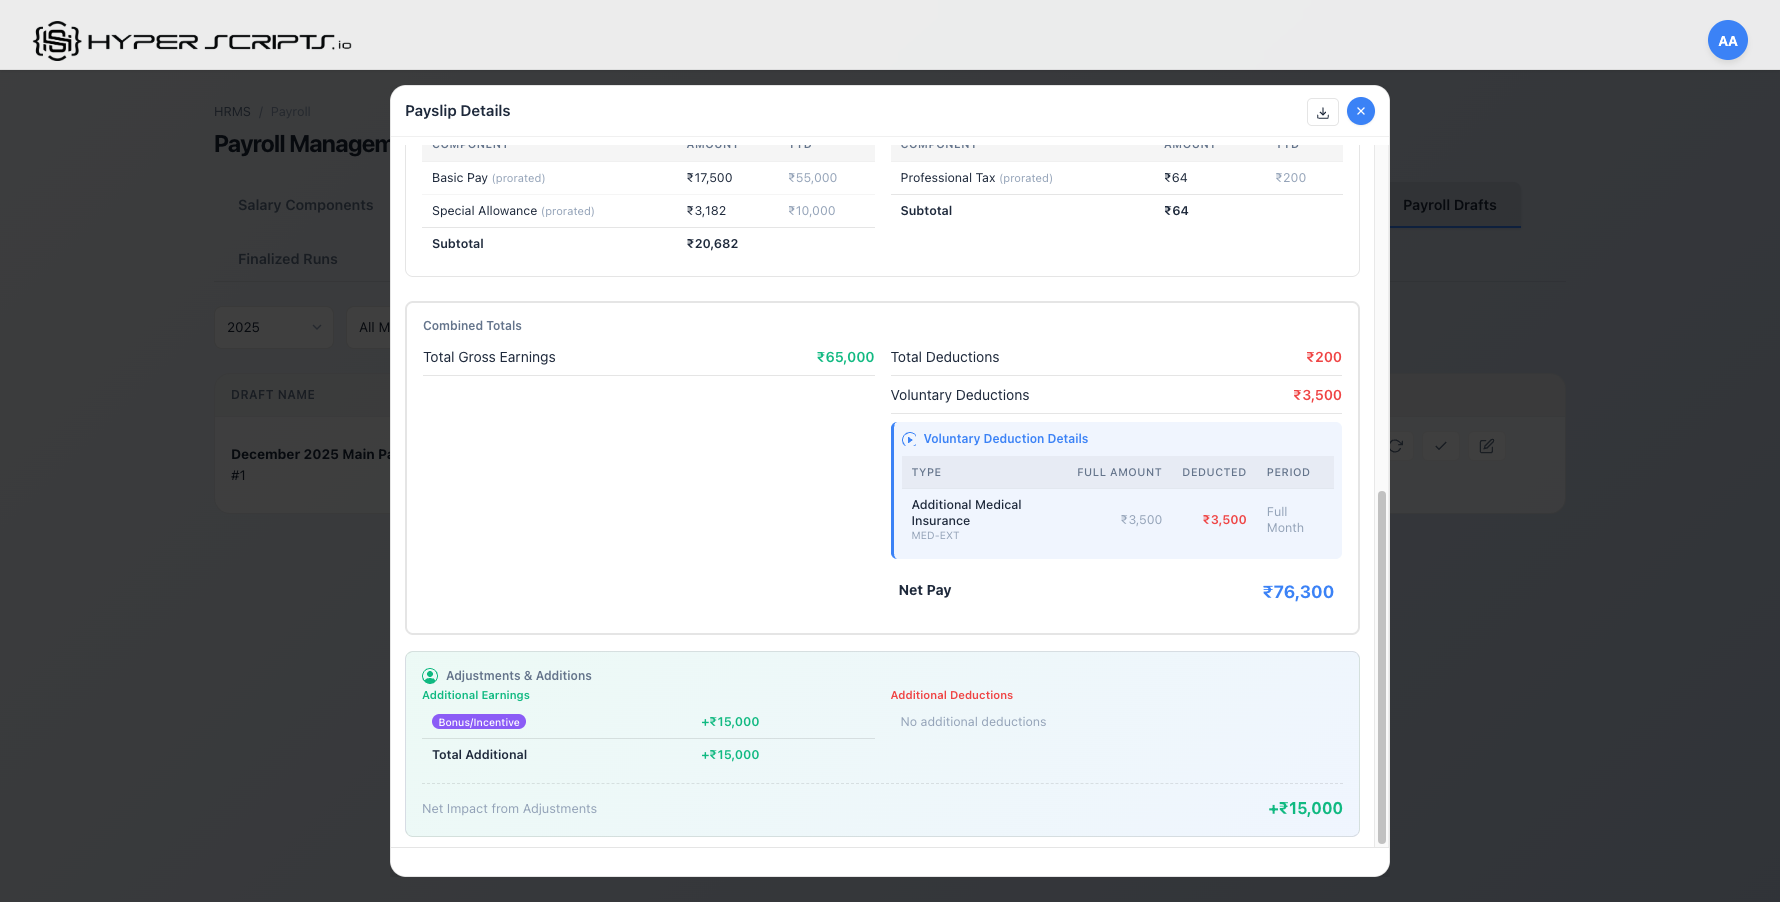
11.7 VD in Payslips
Voluntary deductions appear as line items in the Deductions section of employee payslips.

In the payslip above, you can see:
- Earnings: Basic Pay ₹55,000, Special Allowance ₹10,000
- Deductions:
- Professional Tax: ₹200
- Loan EMI: ₹5,208
- Additional Medical Insurance: ₹2,500 (VD)
- Net Pay: ₹57,092
11.8 Complete VD Workflow
The complete lifecycle of a voluntary deduction:
HR creates deduction categories
HR creates or employee applies
HR approves (if employee-initiated)
Deducted in monthly payroll
Employee/HR ends enrollment
- Create VD types before the payroll period you want them to apply
- Set clear start dates to ensure deductions begin in the correct payroll run
- Use the end date field for temporary deductions (e.g., 6-month insurance plans)
- Regularly review "Pending Approval" enrollments to ensure timely processing
12 Salary Reports Dashboard (HR Admin)
The Salary Reports Dashboard provides HR administrators with comprehensive analytics and summary views of the organization's salary data. These reports help with budgeting, compliance reporting, and salary audits.
Salary reports contain sensitive compensation data. Access is restricted to users with HRMS_HR_ADMIN, HRMS_ADMIN, or SUPERADMIN roles.
Salary Reports Dashboard Overview
Access the Salary Reports Dashboard by clicking "Salary Reports" button in the Payroll section:
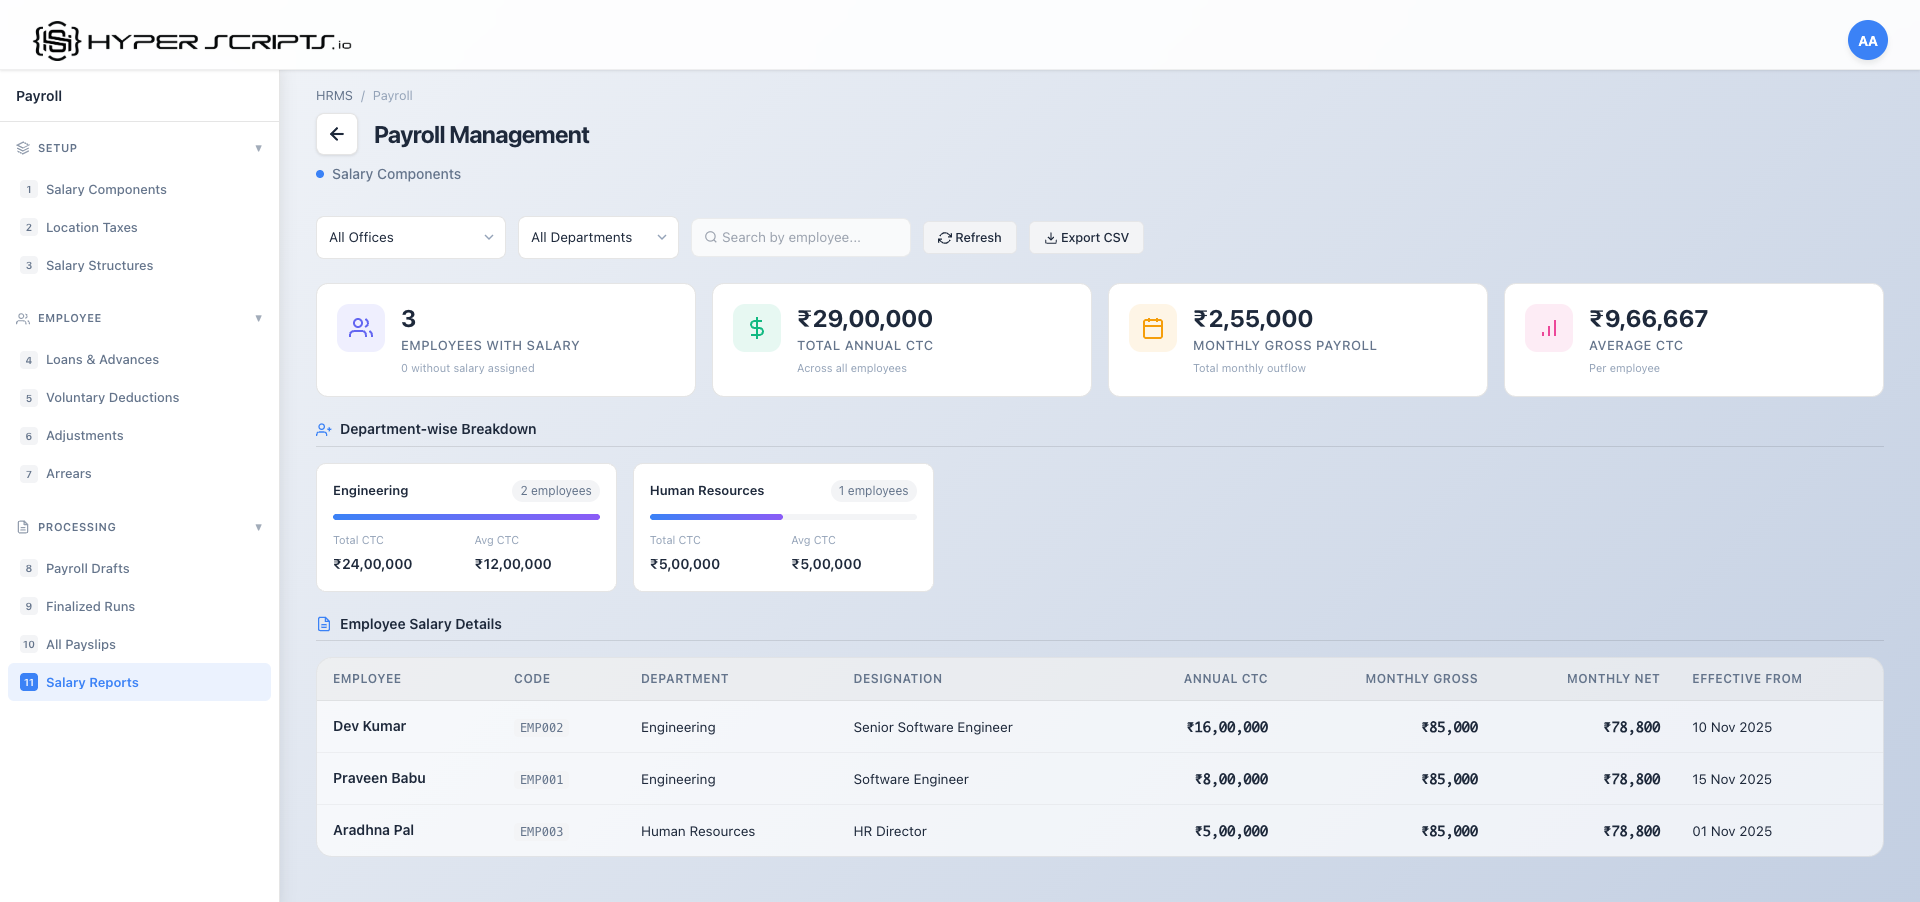
Dashboard Components
| Component | Description |
|---|---|
| Summary Cards | Quick metrics at a glance: Total Employees with Salary, Total Annual CTC, Total Monthly Gross, Average CTC |
| Department Breakdown | Visual breakdown of salary distribution by department with percentages |
| Employee Salary Table | Detailed list of all employees with their CTC, monthly gross, structure name, and effective date |
| Filter Options | Filter by department and/or office to narrow down the data |
| Export Buttons | Export data as CSV or PDF for external reporting |
- Budget Planning: View total salary expenses for fiscal year planning
- Department Comparison: Compare salary distribution across departments
- Audit Compliance: Export detailed salary data for compliance audits
- Identify Gaps: "Employees Without Salary" metric highlights incomplete records
12.1 Using Filter Options
The dashboard provides filter dropdowns to narrow down salary data by department or office.
How to Filter Data
- Click the Office dropdown to filter by a specific office location
- Click the Department dropdown to filter by a specific department
- The dashboard automatically updates to show filtered results
- Summary cards, department breakdown, and employee table all reflect the current filter
Understanding the Summary Cards
| Card | Description |
|---|---|
| Total Employees | Count of active employees with salary assigned (matching current filters) |
| Total Annual CTC | Sum of annual CTC for all employees in the filtered view |
| Monthly Gross | Sum of monthly gross salary for all employees |
| Average CTC | Average annual CTC per employee (Total CTC ÷ Employee count) |
12.2 Department Breakdown
The department breakdown section shows how salary costs are distributed across departments.
What You Can See
- Department Name: Each department in your organization
- Employee Count: Number of employees in that department
- Percentage: What portion of total salary goes to this department
Use the department breakdown at the start of each fiscal year to understand salary distribution. Identify departments with high costs for budget optimization discussions.
12.3 Employee Salary Table
The detailed employee table shows individual salary information for each employee.
Table Columns
| Column | Description |
|---|---|
| Employee | Employee name and code |
| Department | Employee's current department |
| Annual CTC | Total Cost to Company per year |
| Monthly Gross | Monthly gross salary before deductions |
| Structure | Name of the salary structure assigned |
| Effective From | Date when current salary became effective |
12.4 Exporting Reports
Export salary data for external analysis, compliance audits, or sharing with stakeholders.
How to Export
- Apply any filters you need (office, department)
- Click the Export CSV button to download data as a spreadsheet
- Click the Export PDF button to download a formatted report
Export Formats
| Format | Best For |
|---|---|
| CSV | Data analysis in Excel, importing to other systems, detailed manipulation |
| Formal reports, sharing with management, compliance documentation |
- Run reports monthly to track salary expense trends
- Use department filters for department-head salary reviews
- Export PDF reports for board presentations
- Export CSV for detailed analysis or audit purposes
13 Advanced Draft Features (HR Admin)
Beyond basic draft processing, the payroll system provides advanced features for partial processing, draft organization, and detailed payslip inspection.
13.1 Process Selected Employees Only
Instead of processing the entire draft at once, you can selectively process payslips for specific employees. This is useful for:
- Testing payroll calculations for a few employees before full processing
- Re-processing specific employees after corrections
- Handling employees who joined mid-month separately
- Processing department-by-department in large organizations
How to Process Selected Employees
- Navigate to Payroll → Payroll Drafts tab
- Find your draft (must be in "Not Processed" or "Processed" status)
- Click the Process Selected button
- In the modal, select the employees you want to process using checkboxes
- Use the search box to find specific employees by name or code
- Click Process Selected to generate payslips only for chosen employees
Process Selected Employees Modal
Process Selected Employees modal - Select specific employees to process, with search and selection counter
Modal Features
| Feature | Description |
|---|---|
| Search Box | Filter employees by name or employee code |
| Select All | Checkbox to select/deselect all visible employees |
| Selection Counter | Shows how many employees are currently selected (e.g., "3 selected") |
| Employee List | Checkboxes for each employee showing name, code, and department |
You can use Process Selected multiple times on the same draft. Each time, only employees who don't already have a payslip will be processed. Already-processed employees are automatically skipped.
13.2 Rename Draft
Change the name of a draft for better organization, especially when managing multiple drafts across different offices or purposes.
How to Rename a Draft
- Navigate to Payroll → Payroll Drafts tab
- Find the draft you want to rename in the drafts table
- Click the Rename button (pencil icon) in the Actions column
- Enter the new name in the rename dialog
- Click Rename to save the new name
Rename Draft Dialog
The rename dialog provides a simple input field to update the draft name:
Rename Draft dialog - Enter a new descriptive name for the draft
Consider using consistent naming patterns:
December 2024 - All Officesfor company-wide draftsDecember 2024 - Mumbai Officefor office-specific draftsDecember 2024 - Engineering Teamfor department-specific processing- Add "(Revised)", "(Corrected)", "(Final)" suffixes as needed
13.3 Viewing Draft Payslip Details
Before finalizing a draft, you can inspect individual payslips to verify calculations and review all earnings and deductions.
How to View Payslip Details
- Navigate to Payroll → Payroll Drafts tab
- Click on a processed draft to expand and see its payslips
- Click the View button (eye icon) on any payslip row
- The payslip details modal will show complete breakdown
Payslip Details Modal
The payslip modal displays comprehensive information:
| Section | Information Displayed |
|---|---|
| Header | Employee name, code, pay period (month/year) |
| Attendance Summary | Working days, days worked, LOP days |
| Earnings | List of all earning components (Basic, HRA, Allowances) with amounts |
| Deductions | List of all deduction components (PF, PT, ESI, Loans) with amounts |
| Summary | Gross Earnings, Total Deductions, Net Pay |
| YTD (Year-to-Date) | Cumulative amounts for each component for the financial year |
Draft vs Finalized Payslips
| Status | Can Modify? | Location |
|---|---|---|
| Draft | Yes - can recalculate or delete the entire draft | Payroll Drafts tab |
| Finalized | No - locked for audit purposes | Finalized Runs tab |
13.4 Draft Recalculation
Recalculate all payslips in a draft after making changes to salary structures, adjustments, or attendance data.
How to Recalculate a Draft
- Navigate to Payroll → Payroll Drafts tab
- Find your processed draft in the table
- Click the Recalculate button (refresh icon)
- Confirm the recalculation when prompted
- Wait for the system to regenerate all payslips
- Review the changes summary that appears
When to Recalculate
| Scenario | Why Recalculate |
|---|---|
| Salary Adjustments Approved | Newly approved adjustments need to be included in payslips |
| Attendance/LOP Corrected | Updated attendance affects salary proration |
| Structure Version Changed | Component percentages or amounts have changed |
| CTC Arrears Applied | Arrears need to be added to affected payslips |
| Loan Disbursed | New EMI deduction needs to be included |
Changes Summary
After recalculation, the system displays a summary showing:
- Total Recalculated: Number of payslips regenerated
- Changes Detected: Number of payslips with amount differences
- Updated Totals: New gross, deductions, and net pay totals
Recalculation regenerates all payslip amounts from scratch based on current data. Any manual overrides or corrections made to individual payslips will be lost. Make manual corrections after the final recalculation.
13.5 Delete Draft
Remove a draft and all its associated payslips. Only drafts in "Not Processed" or "Processed" status can be deleted.
How to Delete a Draft
- Navigate to Payroll → Payroll Drafts tab
- Find the draft you want to delete in the table
- Click the Delete button (trash icon) in the Actions column
- A confirmation dialog will appear asking you to confirm the deletion
- Click Delete to permanently remove the draft
Delete Restrictions
| Draft Status | Can Delete? | Alternative Action |
|---|---|---|
| Not Processed | Yes | - |
| Processed | Yes | - |
| Finalized | No | View in Finalized Runs |
Deleted drafts cannot be recovered. All payslips generated within the draft will also be permanently deleted. Always ensure you want to discard the draft before confirming deletion.
- Draft was created with incorrect month/year settings
- Major data errors require starting fresh
- Test draft that's no longer needed
- Duplicate draft created by mistake
14 Loan Monitoring (HR Admin)
Track and manage employee loans throughout their lifecycle, from application to full repayment.
14.1 Active Loans Dashboard
View and monitor all currently active loans across the organization.
Accessing Active Loans
- Navigate to Payroll → Loans tab
- Click on Active Loans filter button or select "Active" from the status dropdown
- The table displays all loans currently in repayment
Active Loans Table Columns
| Column | Description |
|---|---|
| Employee | Employee name, code, and department |
| Loan Type | Type of loan (Salary Advance, Personal Loan, Emergency Loan) |
| Principal | Original loan amount borrowed |
| EMI Amount | Monthly deduction amount from salary |
| Outstanding | Remaining balance to be repaid |
| Progress | Visual progress bar showing EMIs paid vs remaining |
| Next EMI | Date of next EMI deduction |
Loan Status Indicators
| Status | Badge Color | Description |
|---|---|---|
| Pending | Yellow | Loan request submitted, awaiting HR approval |
| Approved | Blue | Approved by HR, awaiting disbursement |
| Rejected | Red | Loan request was declined |
| Disbursed | Purple | Amount transferred, EMI starts next month |
| Active | Green | EMI deductions in progress |
| Closed | Gray | All EMIs paid, loan fully repaid |
14.2 Pending Loan Approvals
Review and process loan requests submitted by employees.
Viewing Pending Approvals
- Navigate to Payroll → Loans tab
- Click on Pending filter button or select "Pending" from the status dropdown
- A badge on the filter shows the number of pending requests
Pending Request Details
Each pending loan request displays:
- Employee Information: Name, employee code, and department
- Loan Type: Type of loan requested
- Amount: Principal amount requested
- Tenure: Requested repayment period in months
- Reason: Employee's stated reason for the loan
- Requested On: Date the request was submitted
Approving or Rejecting a Loan
- Click the View button on a pending loan request
- Review the loan details and employee information
- To approve: Click Approve button
- To reject: Click Reject button and provide a rejection reason
- Check if employee has any existing active loans
- Verify the requested amount is within policy limits
- Ensure EMI amount won't exceed 50% of employee's net salary
- Review employee's tenure and standing
14.3 Loan Repayment History
View the complete repayment schedule and track EMI deductions for any loan.
Viewing Repayment History
- Navigate to Payroll → Loans tab
- Find the loan in the table (use filters if needed)
- Click the View Details button
- The loan details modal shows the complete repayment schedule
Loan Details Modal
The loan details view displays:
| Section | Information Displayed |
|---|---|
| Loan Summary | Principal, Interest Rate, Tenure, EMI Amount, Total Payable |
| Current Status | Outstanding Balance, EMIs Paid, EMIs Remaining |
| Disbursement | Date, Mode (Bank Transfer/Cheque), Reference Number |
| Repayment Schedule | Month-by-month breakdown of all EMIs |
Repayment Schedule Table
Each row in the repayment schedule shows:
| Column | Description |
|---|---|
| EMI # | Installment number (1, 2, 3, etc.) |
| Due Date | Date when EMI is due |
| Principal | Principal component of the EMI |
| Interest | Interest component of the EMI |
| Total | Total EMI amount (Principal + Interest) |
| Balance After | Outstanding balance after this EMI |
| Status | Deducted, Pending, Paid, Waived, or Defaulted |
Repayment Status Indicators
| Status | Badge | Description |
|---|---|---|
| Pending | Yellow | EMI scheduled but not yet deducted |
| Deducted | Green | EMI successfully deducted from payslip |
| Paid | Blue | EMI paid outside payroll (cash/direct payment) |
| Waived | Purple | EMI waived by HR (exception cases) |
| Defaulted | Red | EMI not paid and marked as default |
14.4 Loan Types
The system supports three types of employee loans, each designed for different needs:
| Type | Description | Typical Tenure | Interest |
|---|---|---|---|
| Salary Advance | Advance against upcoming salary for immediate cash needs | 1-3 months | Usually 0% (interest-free) |
| Personal Loan | Standard personal loan for planned expenses | 6-24 months | Standard rate (e.g., 8-12%) |
| Emergency Loan | Quick disbursement for medical or family emergencies | 3-12 months | Reduced rate (e.g., 4-8%) |
Disbursing Approved Loans
After a loan is approved, HR Admin must disburse the amount:
- Navigate to Payroll → Loans tab
- Filter by "Approved" status to see loans ready for disbursement
- Click Disburse on the approved loan
- Select the disbursement mode:
- Bank Transfer: Direct deposit to employee's bank account
- Cheque: Physical cheque issued
- Cash: Cash payment (not recommended)
- Enter the reference number (NEFT/RTGS/Cheque number)
- Click Confirm Disbursement
Once a loan is disbursed, EMI deductions begin from the next payroll cycle. The loan status changes from "Approved" to "Disbursed" and then to "Active" when the first EMI is deducted.
- Set maximum loan limits based on employee's salary (e.g., 3x monthly gross)
- Review pending loans weekly to ensure timely processing
- Track employees with multiple active loans for risk assessment
- Document all disbursement references for audit trail
- Monitor default rates and adjust policies accordingly
⚠️ What Can Go Wrong
Even experienced HR professionals encounter issues during payroll. Here are the most common problems, why they happen, and how to fix them.
Common Mistakes & Recovery
Finalized Payroll with Wrong Data
What happened: You finalized a draft but realized an employee's salary was incorrect, leave wasn't counted, or an adjustment was missing.
Recovery Path
- If the run is not yet "Approved" → Go back to Drafts, delete the finalized run, fix the data, and re-process
- If already "Approved" but not "Paid" → Contact system admin to roll back status
- If already "Paid" → Create a correction adjustment for next month (Adjustment Type: "Correction")
✓ Safe Checkpoint: Always use "Processed" status as your review stage before finalizing
Created Duplicate Payroll Run for Same Month
What happened: Two drafts were created for the same month/year, causing confusion about which one is correct.
Recovery Path
- Identify which draft has the correct data (check employee count, total amounts)
- Delete the incorrect draft(s) before finalizing
- The system prevents finalizing if another finalized run exists for the same period
✓ Safe Checkpoint: Check "Payroll Runs" list before creating a new draft
Employee Missing from Payroll
What happened: After processing, you notice an employee doesn't have a payslip generated.
Recovery Path
- Check if employee has an active salary assigned (Payroll → Employee Salaries)
- Verify employee's "Employment Status" is "Active"
- Check if employee joined after the pay period end date
- Assign salary, then use "Recalculate" on the draft to regenerate payslips
✓ Safe Checkpoint: Compare processed employee count vs. total active employees
Loss of Pay (LOP) Days Incorrect
What happened: Employee's payslip shows wrong LOP days, affecting their net pay.
Recovery Path
- Check employee's attendance records for the month (Attendance page)
- Verify leave requests are approved and correctly marked
- Regularize any missing attendance before recalculating
- Use "Recalculate" on the draft to regenerate with correct LOP
✓ Safe Checkpoint: Complete attendance regularization before processing payroll
Arrears Not Included in Payslip
What happened: You expected arrears from a salary revision, but they don't appear in the payslip.
Recovery Path
- Go to Payroll → Arrears tab
- Check if arrears are in "Pending" status (they need to be "Applied" first)
- Click "Apply" on the pending arrears
- Recalculate the payroll draft
✓ Safe Checkpoint: Check Arrears tab before processing each month's payroll
Loan EMI Not Deducted
What happened: An employee's loan EMI wasn't deducted from their payslip.
Recovery Path
- Check loan status in Payroll → Loans (must be "Disbursed" or "Active")
- Verify loan start date is on or before the pay period
- Check if loan is fully repaid (Closed status)
- If loan was just disbursed, EMI starts from next month
✓ Safe Checkpoint: Review "Active Loans" list before processing payroll
Prevention Tips
| Before You... | Always Check... |
|---|---|
| Create a payroll draft | All attendance is regularized, all leaves are approved |
| Process a draft | All employees have active salaries assigned |
| Finalize a draft | Review payslip totals, spot-check 2-3 individual payslips |
| Approve a run | All adjustments, arrears, and loans are correctly applied |
| Mark as paid | Bank file is generated, transfer is complete |
Once payroll is marked "Paid", changes are extremely difficult. Always use the intermediate statuses (Processed → Finalized → Approved) as review checkpoints before proceeding.
✓ Setup Checklist
Follow this checklist to ensure your payroll system is fully configured:
-
Create Salary Components
Define all earnings (Basic, HRA, Allowances) and deductions (PF, PT) your organization needs. -
Create Salary Structures
Combine components into structures. Create at least one default structure. -
Configure Location Taxes
Set up Professional Tax and other location-specific taxes for each office. -
Assign Salaries to Employees
Assign salary structures with CTC to all employees via the Employees page. -
Process Monthly Payroll
Create drafts, process, review, finalize, approve, and mark as paid each month.
Monthly Payroll Checklist
- Complete Attendance: Ensure all attendance is regularized and approved
- Approve Leaves: Process all pending leave requests
- Review Adjustments: Check for any pending salary adjustments
- Create Payroll Draft: Create draft for the month
- Process Draft: Calculate all payslips
- Review Payslips: Check individual payslips for accuracy
- Finalize Draft: Lock and create finalized run
- Get Approval: Obtain management approval
- Disburse Salaries: Process bank transfers
- Mark as Paid: Record payment in system